
The Hallucinated Truth
This one started with a job application. I was looking into Temporal as part of the process and, as tends to happen, the learning took on a life of its own. The result was a playable game rather than a tidy tutorial project, which probably says something about how my brain works.

The Hallucinated Truth




A game that evolved from looking into learning Temporal for a job application.
This README explains how to install, configure, and run the entire stack locally using Docker.
💡 About the Game — Where “The Hallucinated Truth” Came From
The Hallucinated Truth is inspired by the BBC radio comedy panel show “The Unbelievable Truth”. Depending on your region (or a VPN) you may be able to sample it on YouTube here.
In this show, a contestant delivers a story on a given topic where nearly everything is nonsense...apart from a few true statements which are hidden inside. The other players must spot and call out the truths buried within the lies.
I thought it would be fun to recreate this format using an LLM.
LinkedIn and other social media locations full of "AI Experts" have a constant theme of people finding new ways to complain about hallucinations. So I thought I would lean into this and instead of avoiding this behaviour, I'd write something to play with this theme.
The game generates a story (using an LLM) filled with believable and unbelievable nonsense, hides real facts inside it, and your task is to uncover the truths.
This project is a blend of Temporal, LangChain, Ollama, Custom Google Search API, some Javascript and a handful of overly verbose prompts to let an LLM play a variant of “The Unbelievable Truth” against you.
It should be noted that this has largely been tested with famous individuals and popular areas of interest as subjects. If you want to extend this, you may need to look into the websites that have been listed to find facts. These may need extending
Table of Contents
- The Hallucinated Truth
- Installation and Configuration
- Using the App (Detailed Walkthrough)
Overview
This project bundles:
- A Temporal workflow controlling the game logic
- A LangChain agent using
llama3:latestfor reasoning and Google Custom Search API to find truths - An Ollama server to run the model locally
- An NGINX web interface - An optional Open WebUI for interacting with Ollama directly
The result is a playable “truth-finding” game where the LLM makes statements, you interrogate them, and Temporal orchestrates the entire back-and-forth.
Installation and Configuration
This section walks through setting up the complete local environment required to run The Hallucinated Truth.
Each step builds on the previous one, and once completed you will have a fully working local stack.
If you are already familiar with Docker-based setups, you can skim. If not, follow the steps in order.
Prerequisites
You will need:
- Docker Desktop
- Git
- A Google Developer Console account
- macOS, Linux, or Windows with WSL2
⚠️ Performance Notice for macOS (M-Series Recommended)
Running Ollama inside Docker is significantly slower on macOS because virtualisation prevents direct access to Apple’s GPU and Metal acceleration. Running Ollama locally on a Mac M3 improved the performance by around a factor of 5.
For an M1/M2/M3/M4 Mac, you must increase Docker’s resource allocation if you keep Ollama in Docker.
Recommended Docker Desktop settings (for a 64 GB M3 MacBook Pro):
- CPU: 12 cores
- Memory: 48 GB
- Swap: 2 GB
- Disk image size: 200+ GB
- Resource Saver: Disable or set a long timeout
- Virtualization Framework: Default (Apple Virtualization)
If you want far better performance, you should run Ollama natively, not inside a container. A full section below explains how to do this.
Create Google Custom Search Credentials
This app uses Google’s Custom Search API. Google provides 100 free searches per day, so you can test without enabling billing.
You will obtain two values:
GOOGLE_API_KEYGOOGLE_CSE_ID
These will be added to a .env file later.
Click to expand the Google Credentials Setup Guide
Log-in to Google Developer Console
Go to:
https://console.developers.google.com/
If you don’t already have an account, create one.
You do not need to add billing details just to test this project.
Create a New Project
If you already have several projects, it’s cleaner to make a new one:
- Click the project selector at the top of the page.
- Choose New Project.
- Give it a name (for example:
llama-agent-search). - Click Create.
If this is your first time in Google Developer Console, Google will automatically create a default project such as My First Project when you carry out the next step.
Enable the Custom Search API
In the top search bar, type:
Custom Search API
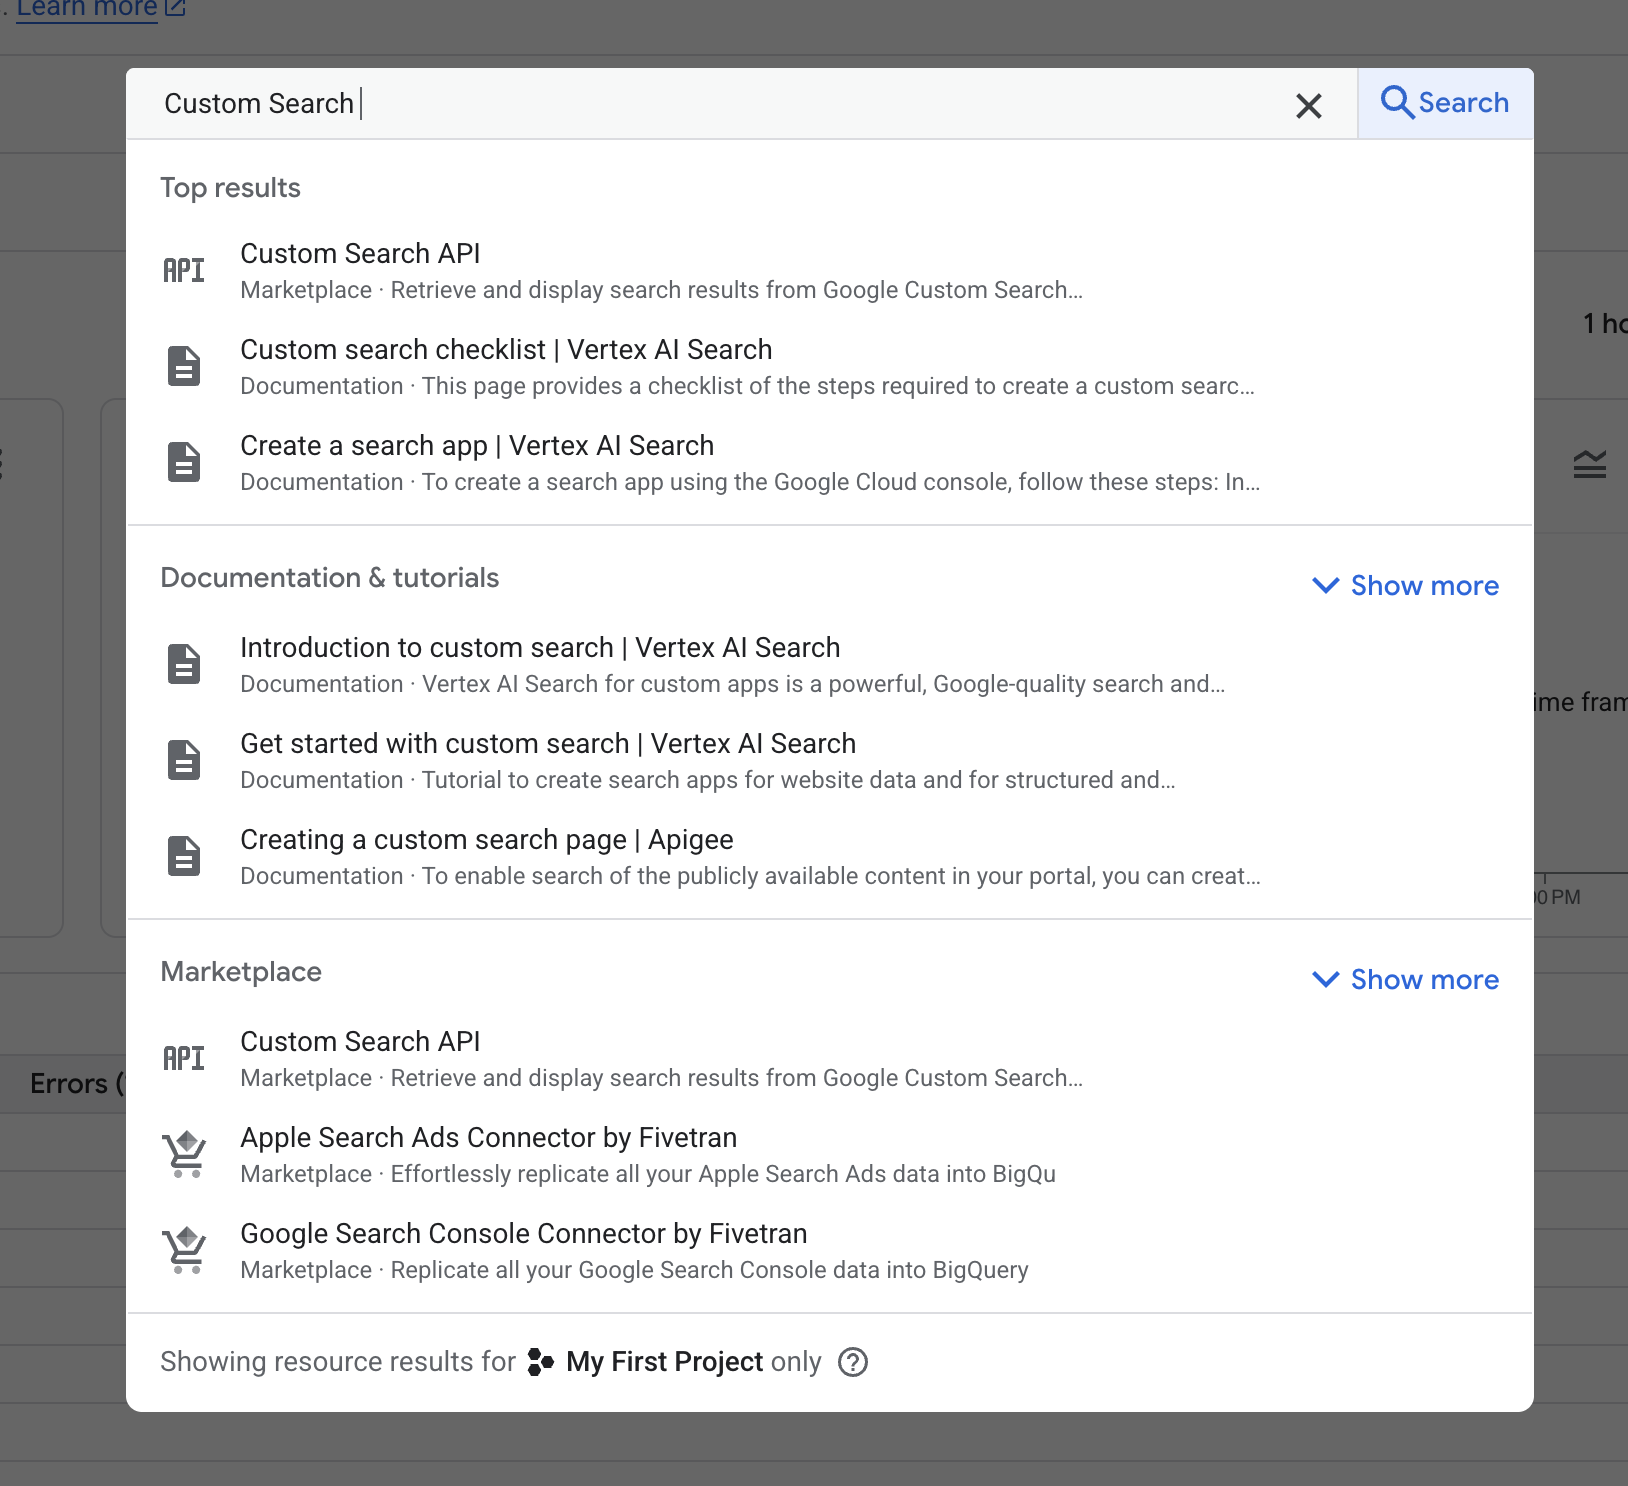
- Click the result named Custom Search API.
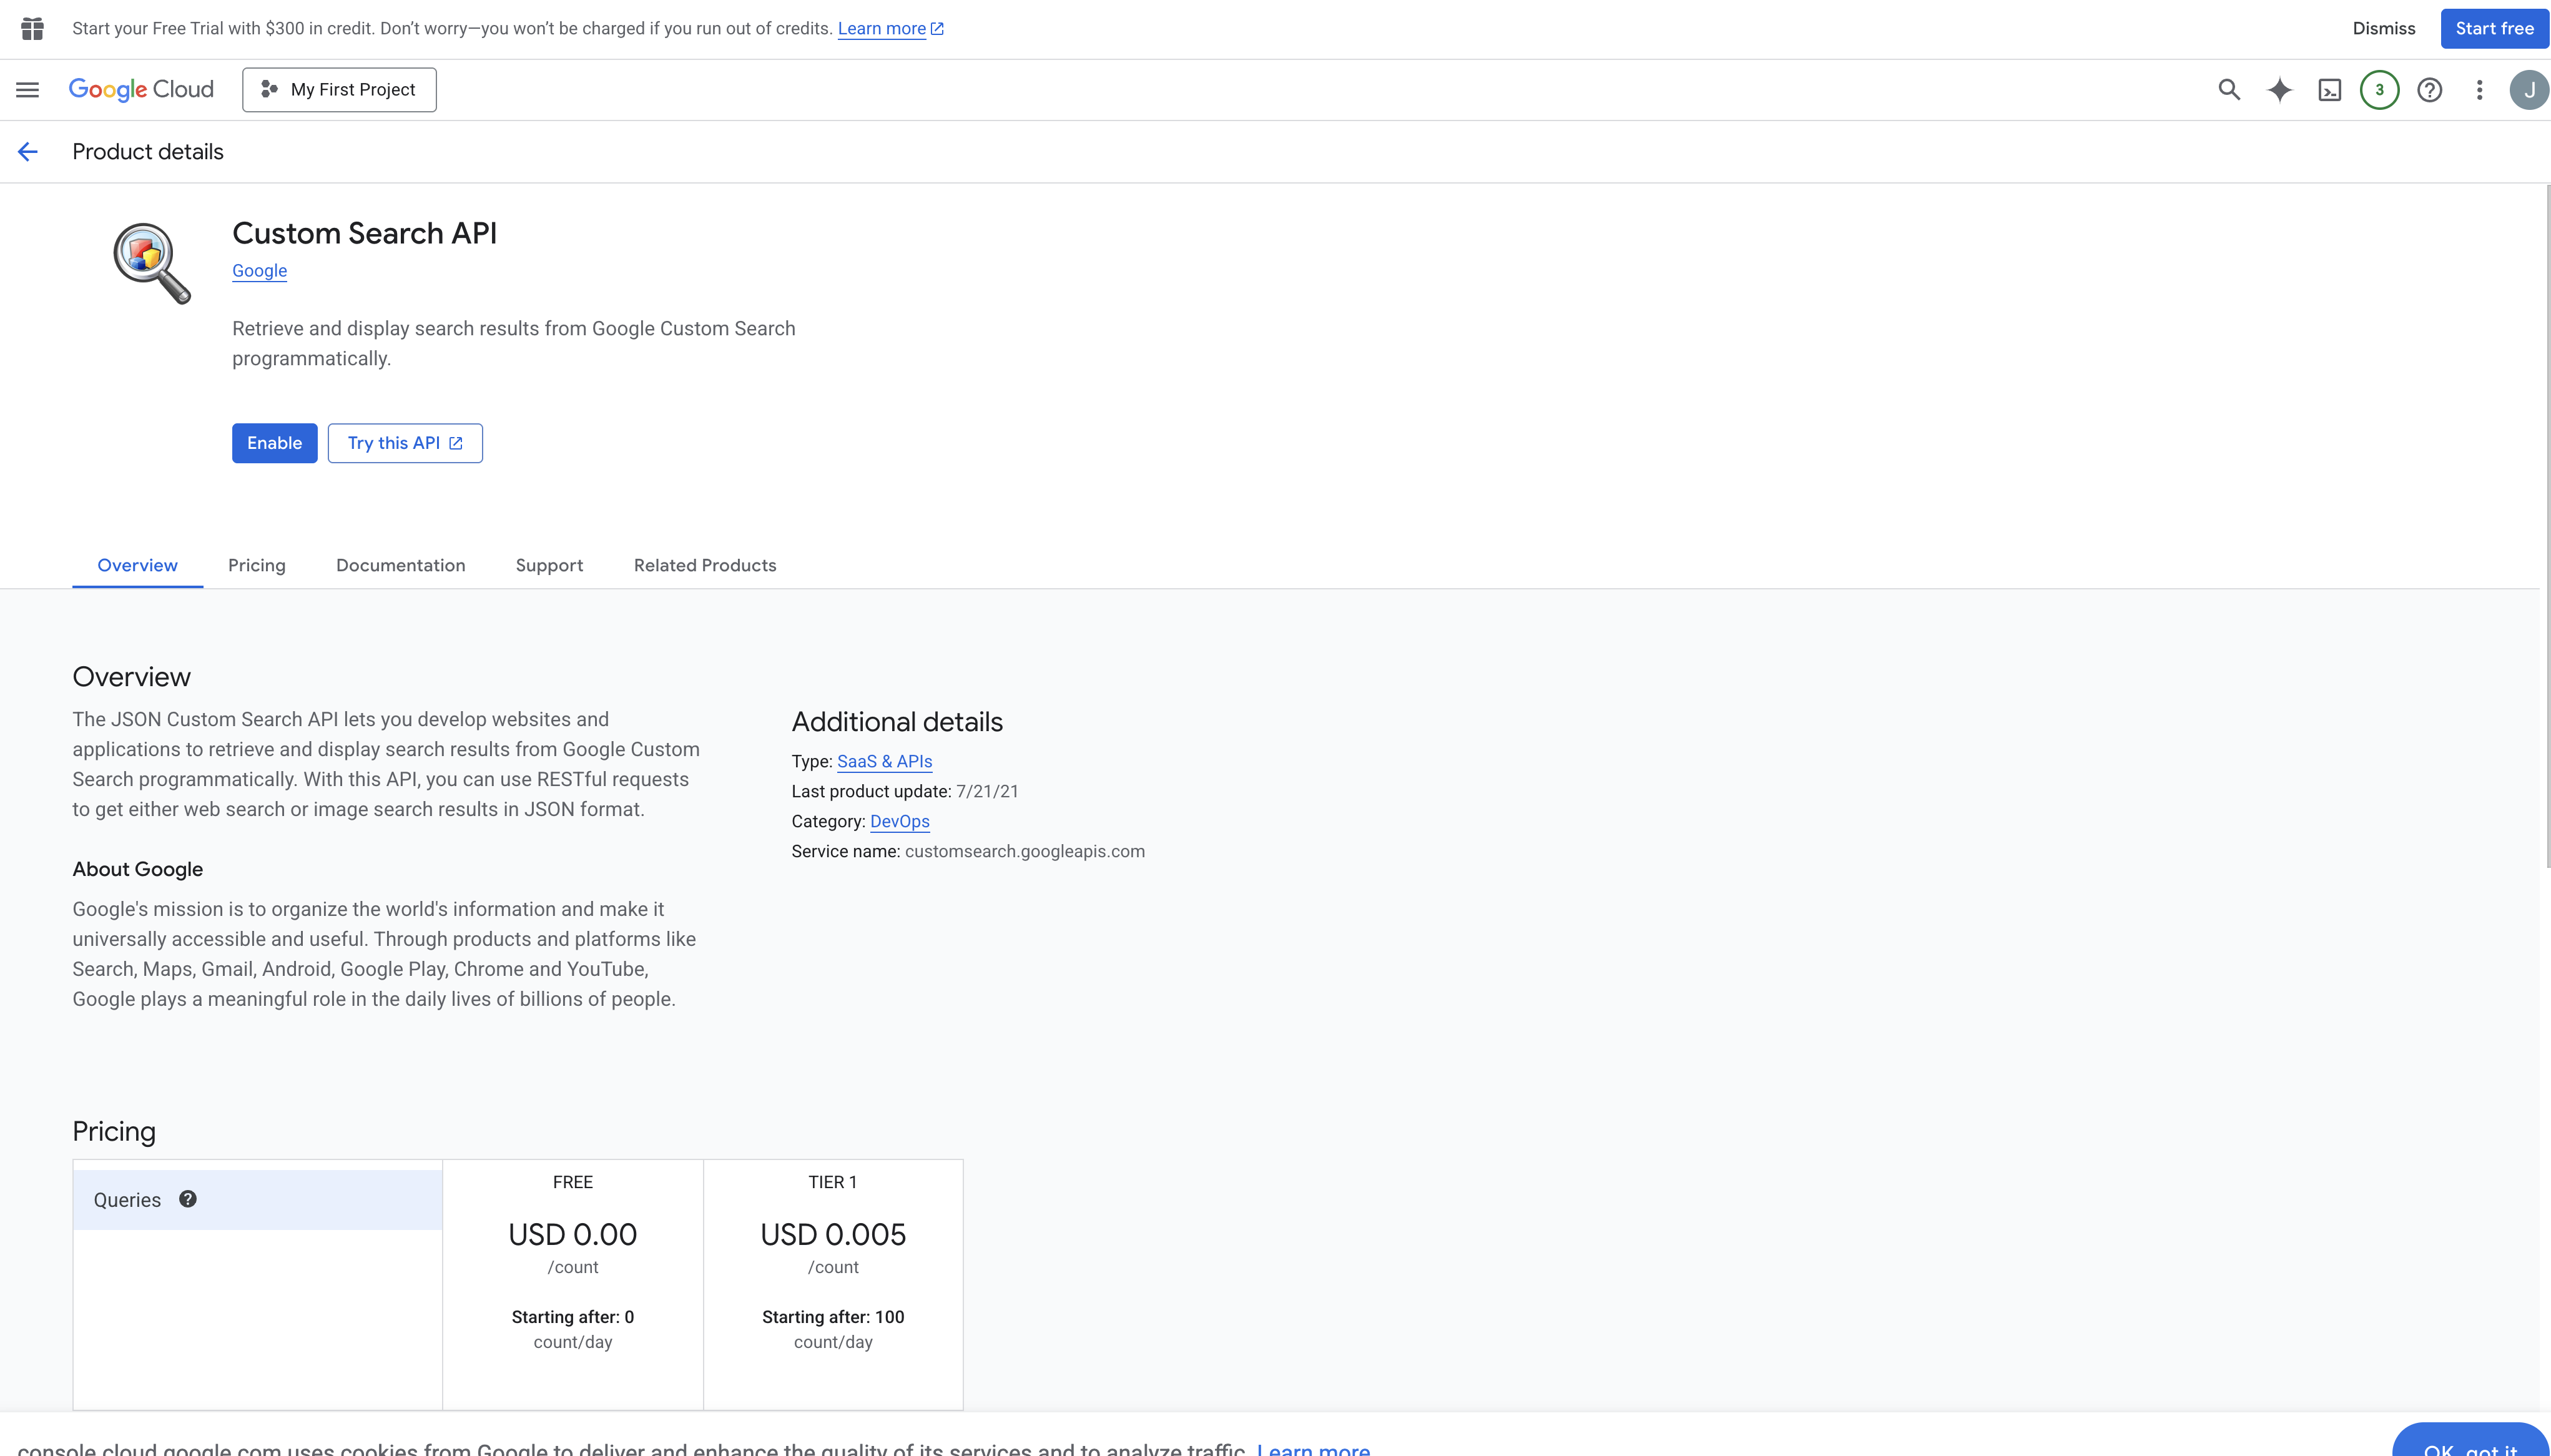
- Click the Enable button.
If this is your first time using Google Developer Console, enabling the API will also create your first project automatically.
Create an API Key (GOOGLE_API_KEY)
- In the left sidebar, click Credentials.
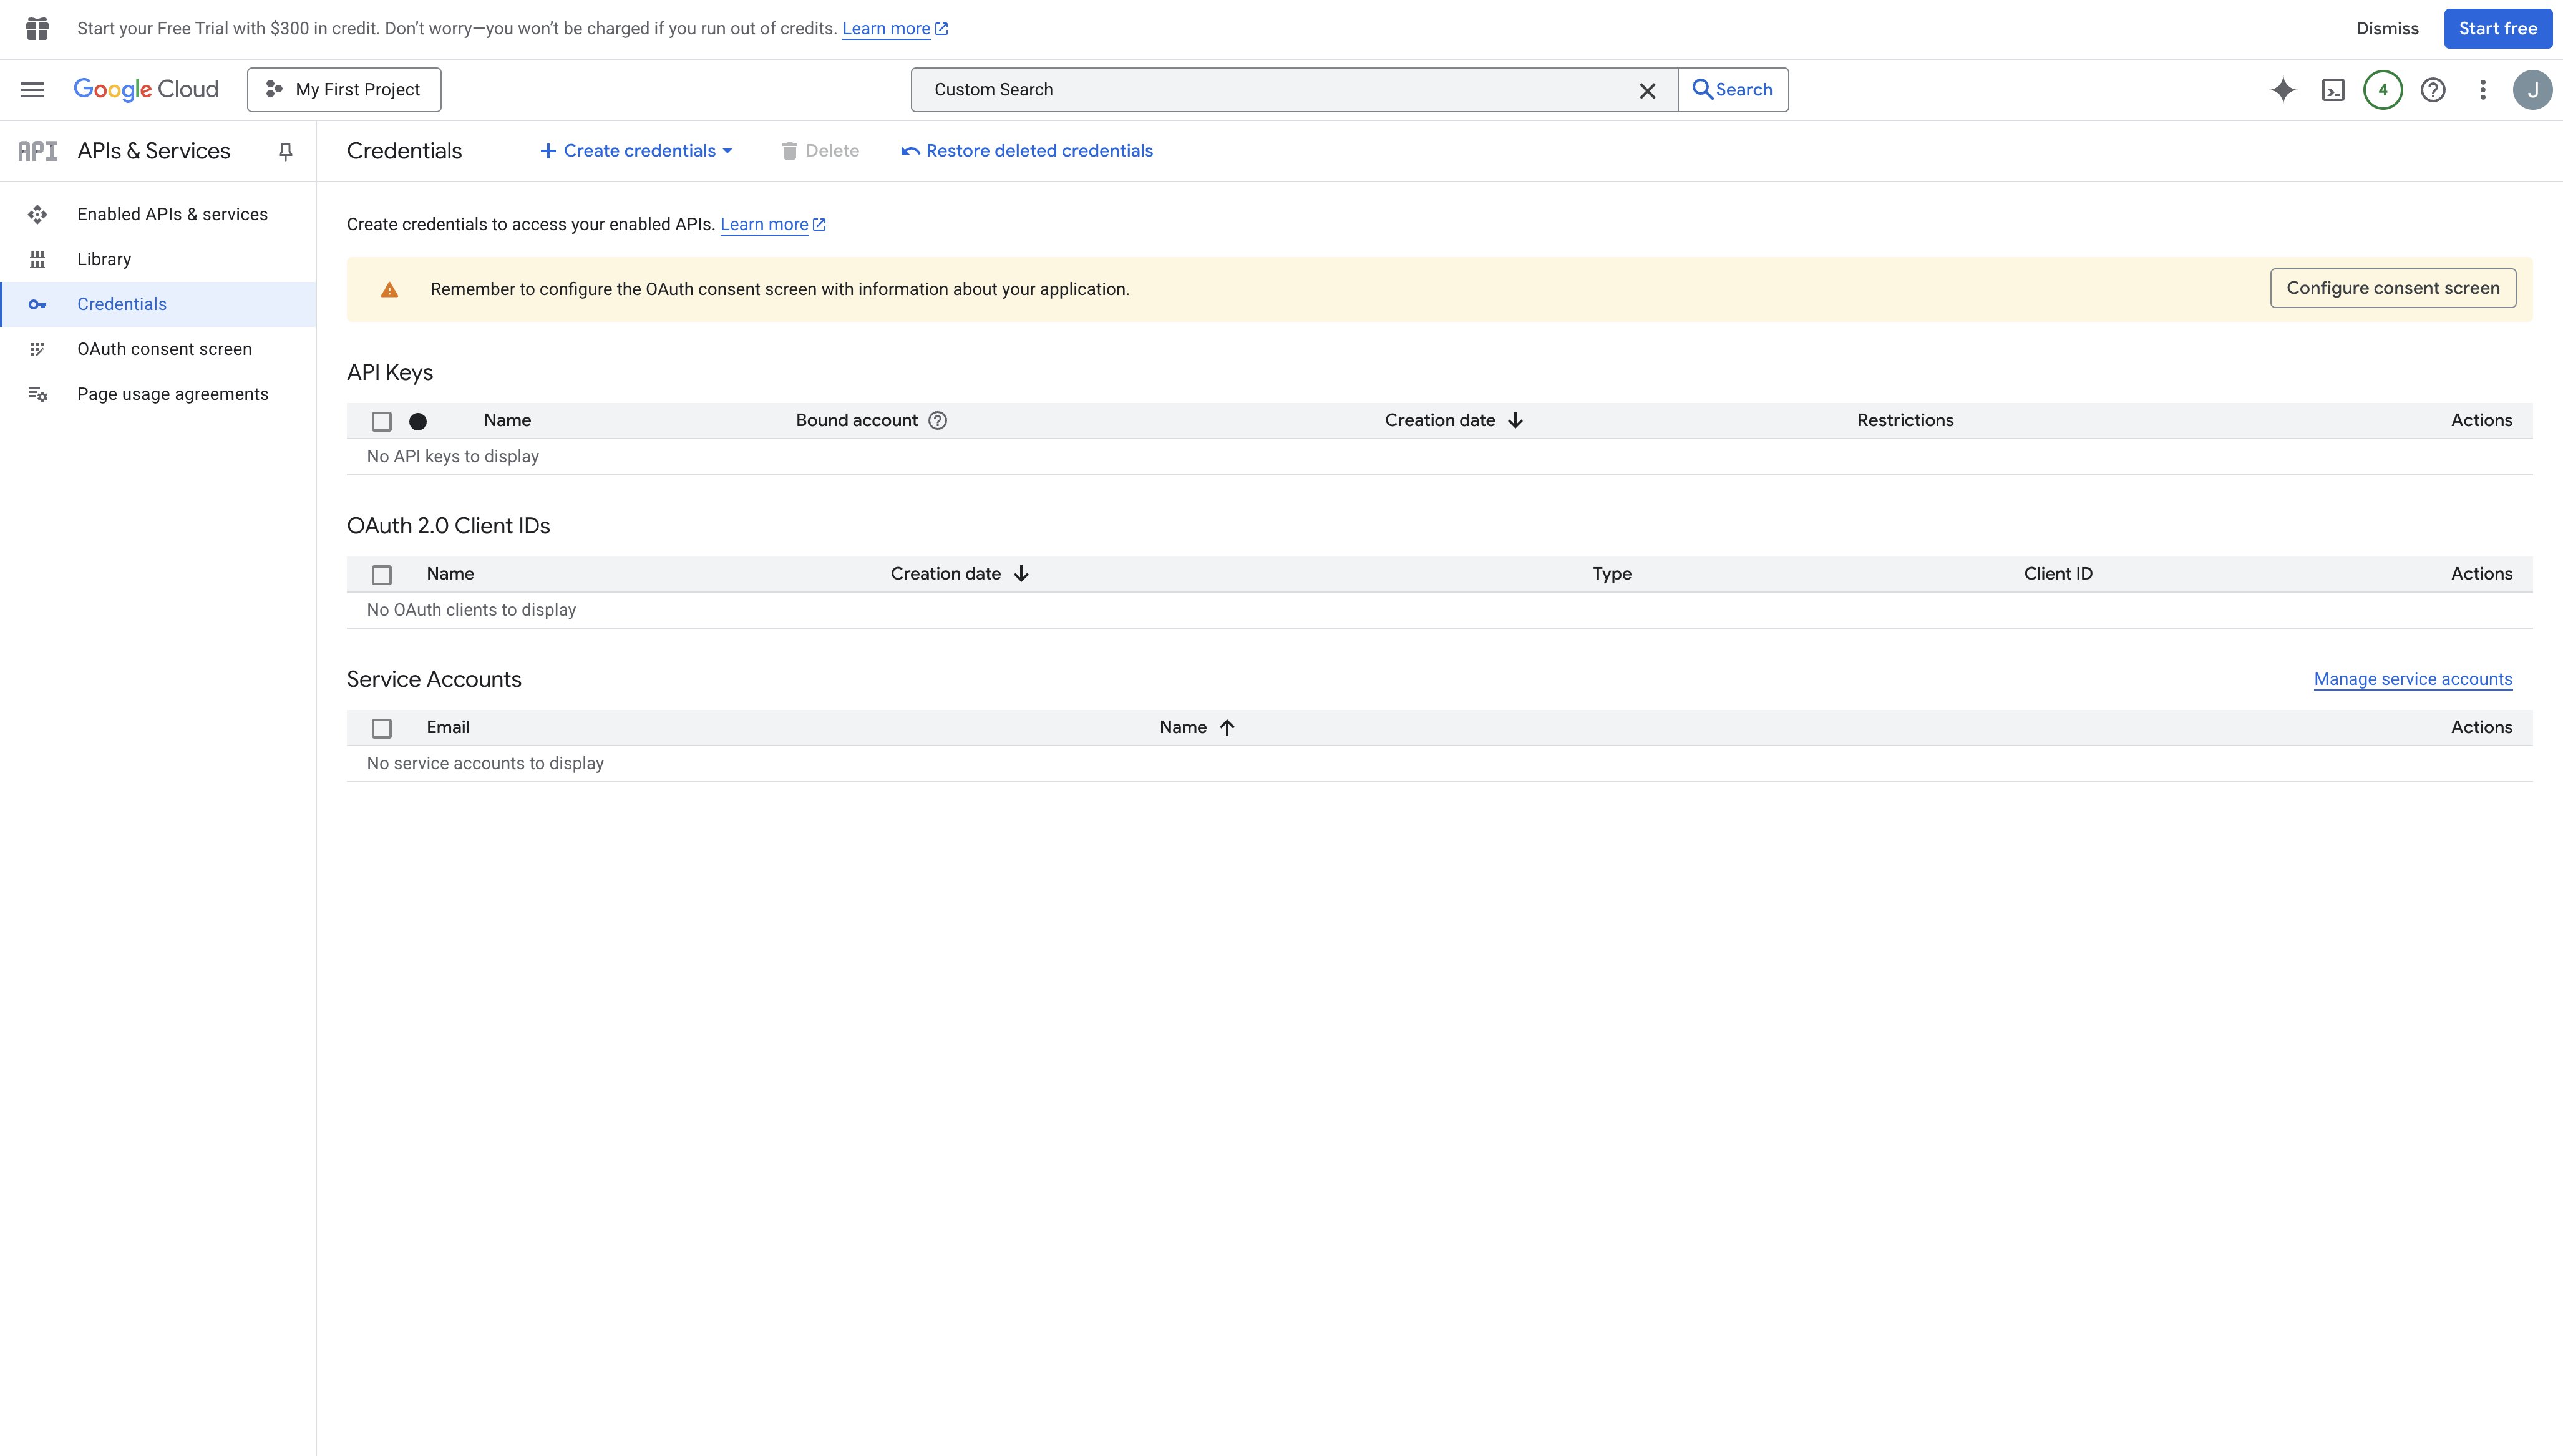
- At the top, click + Create Credentials.
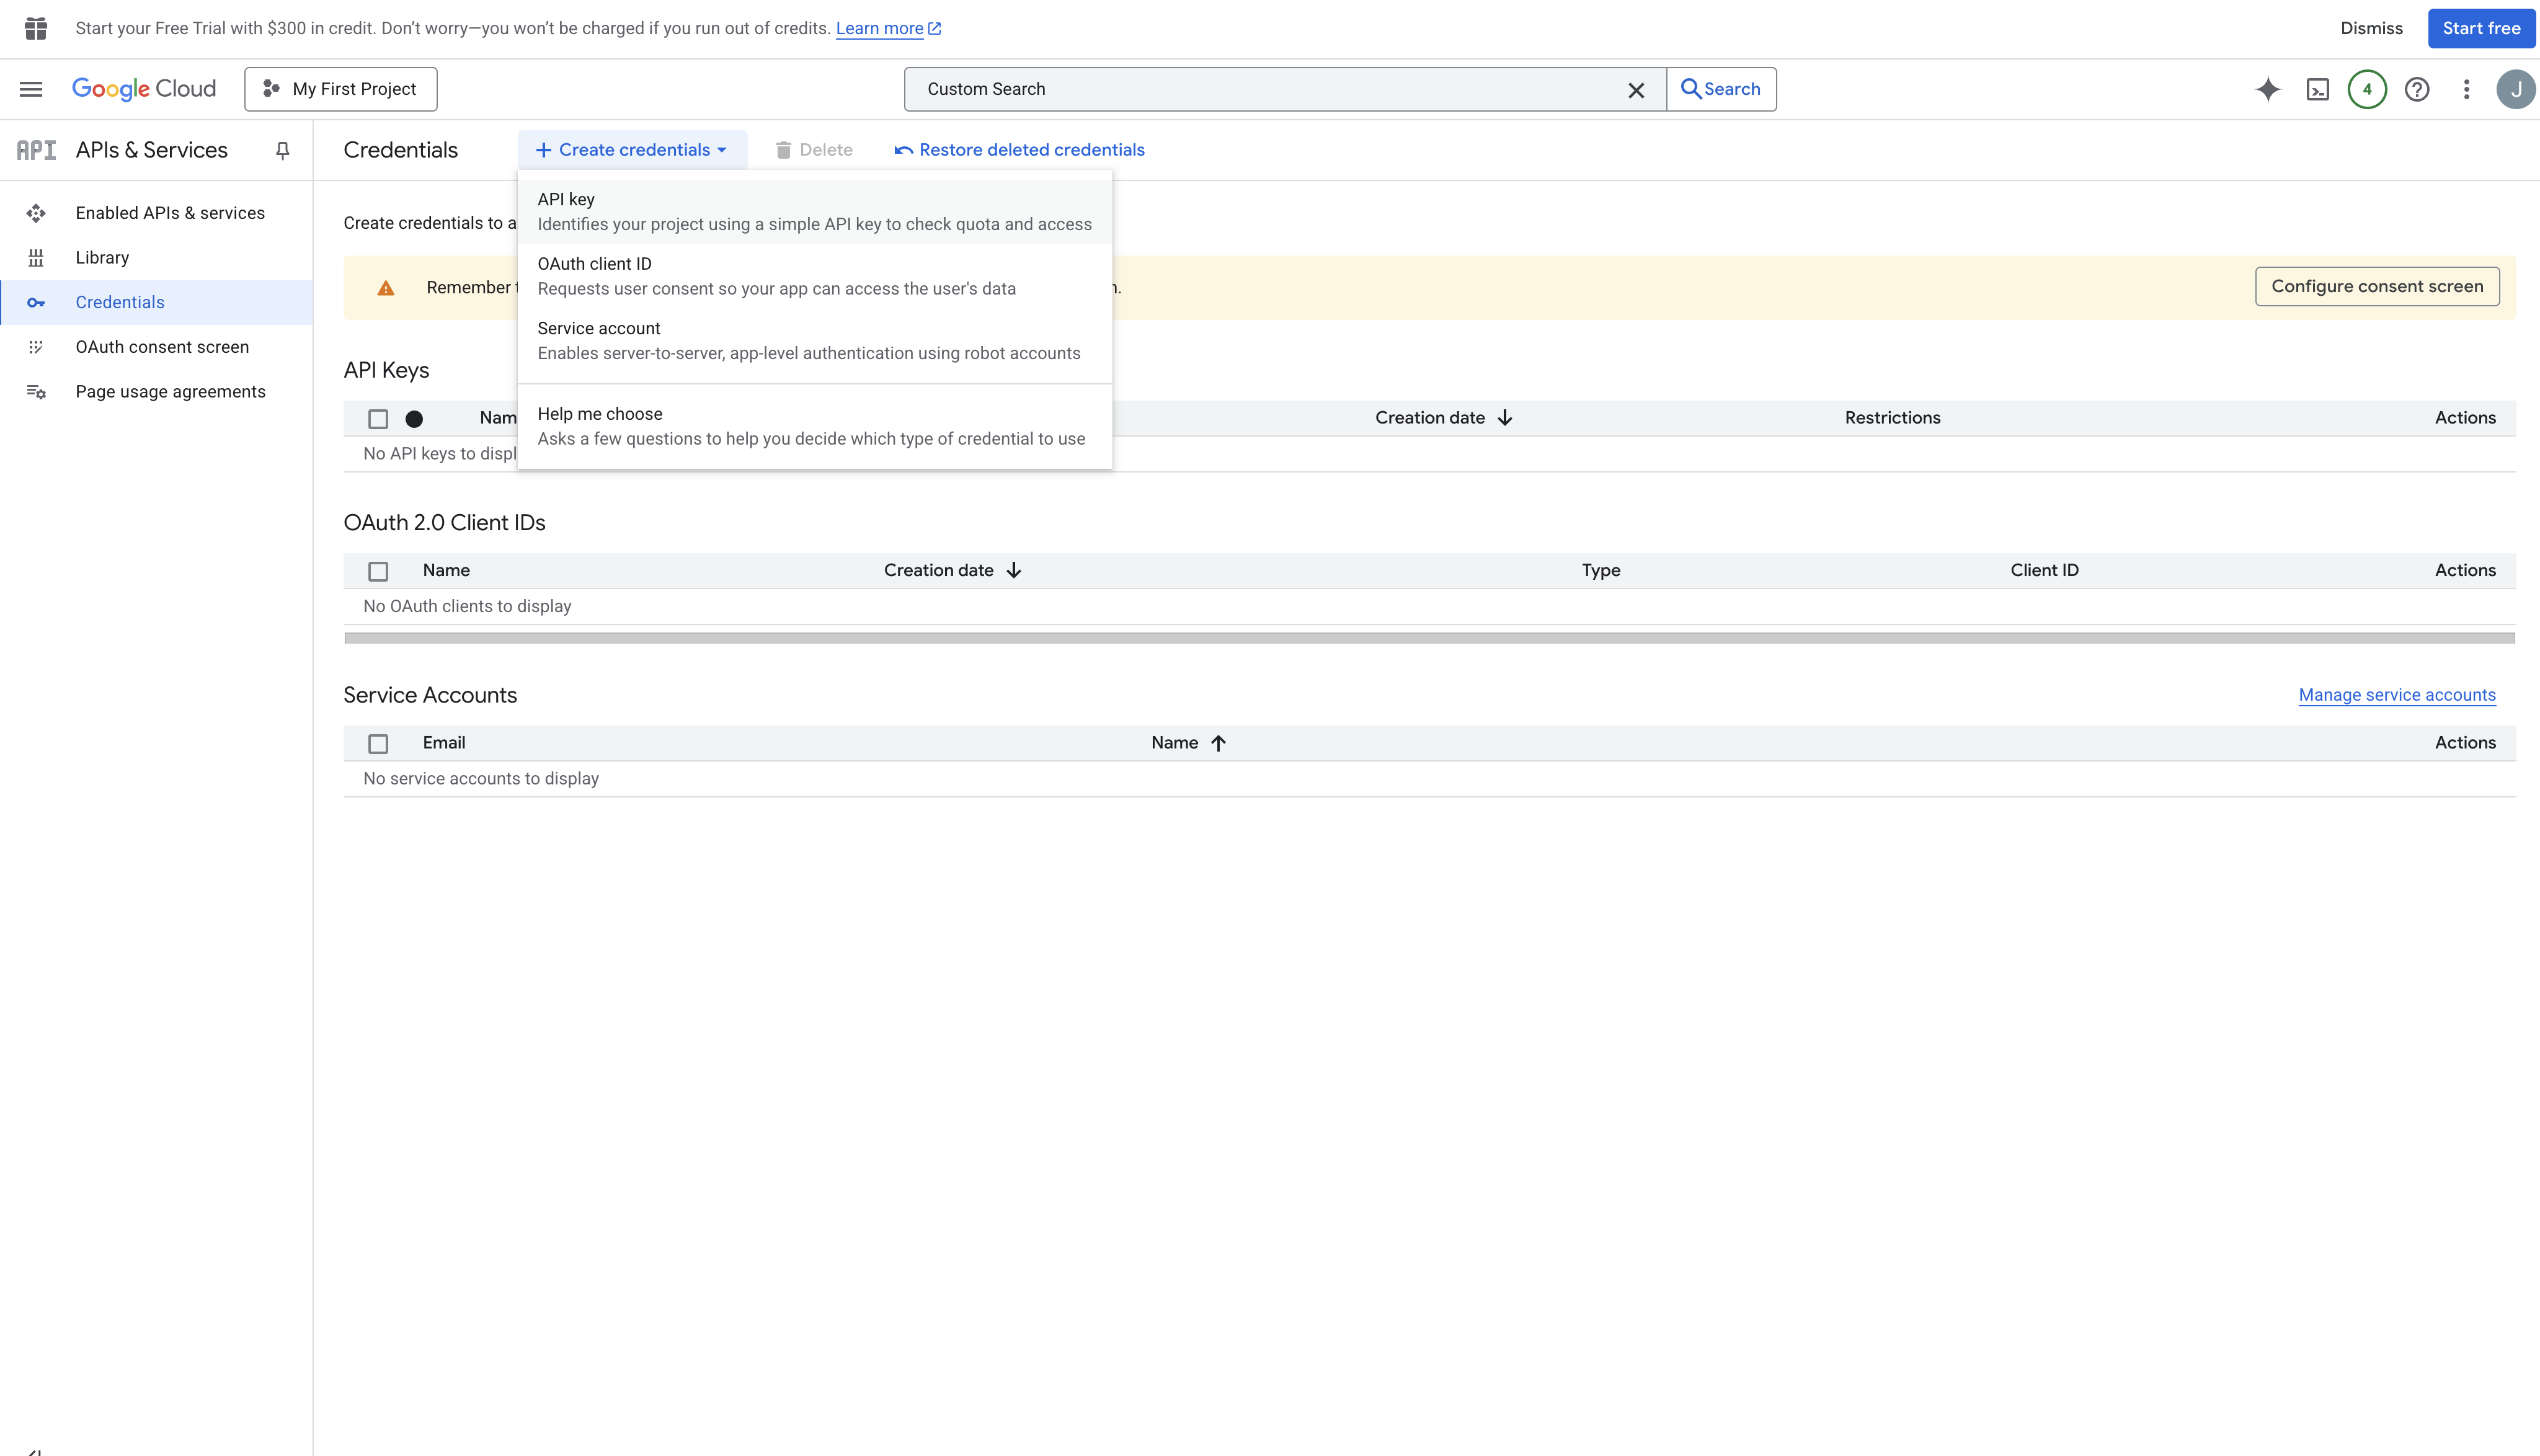
Select API key.
A sidebar appears for you to configure your new key.
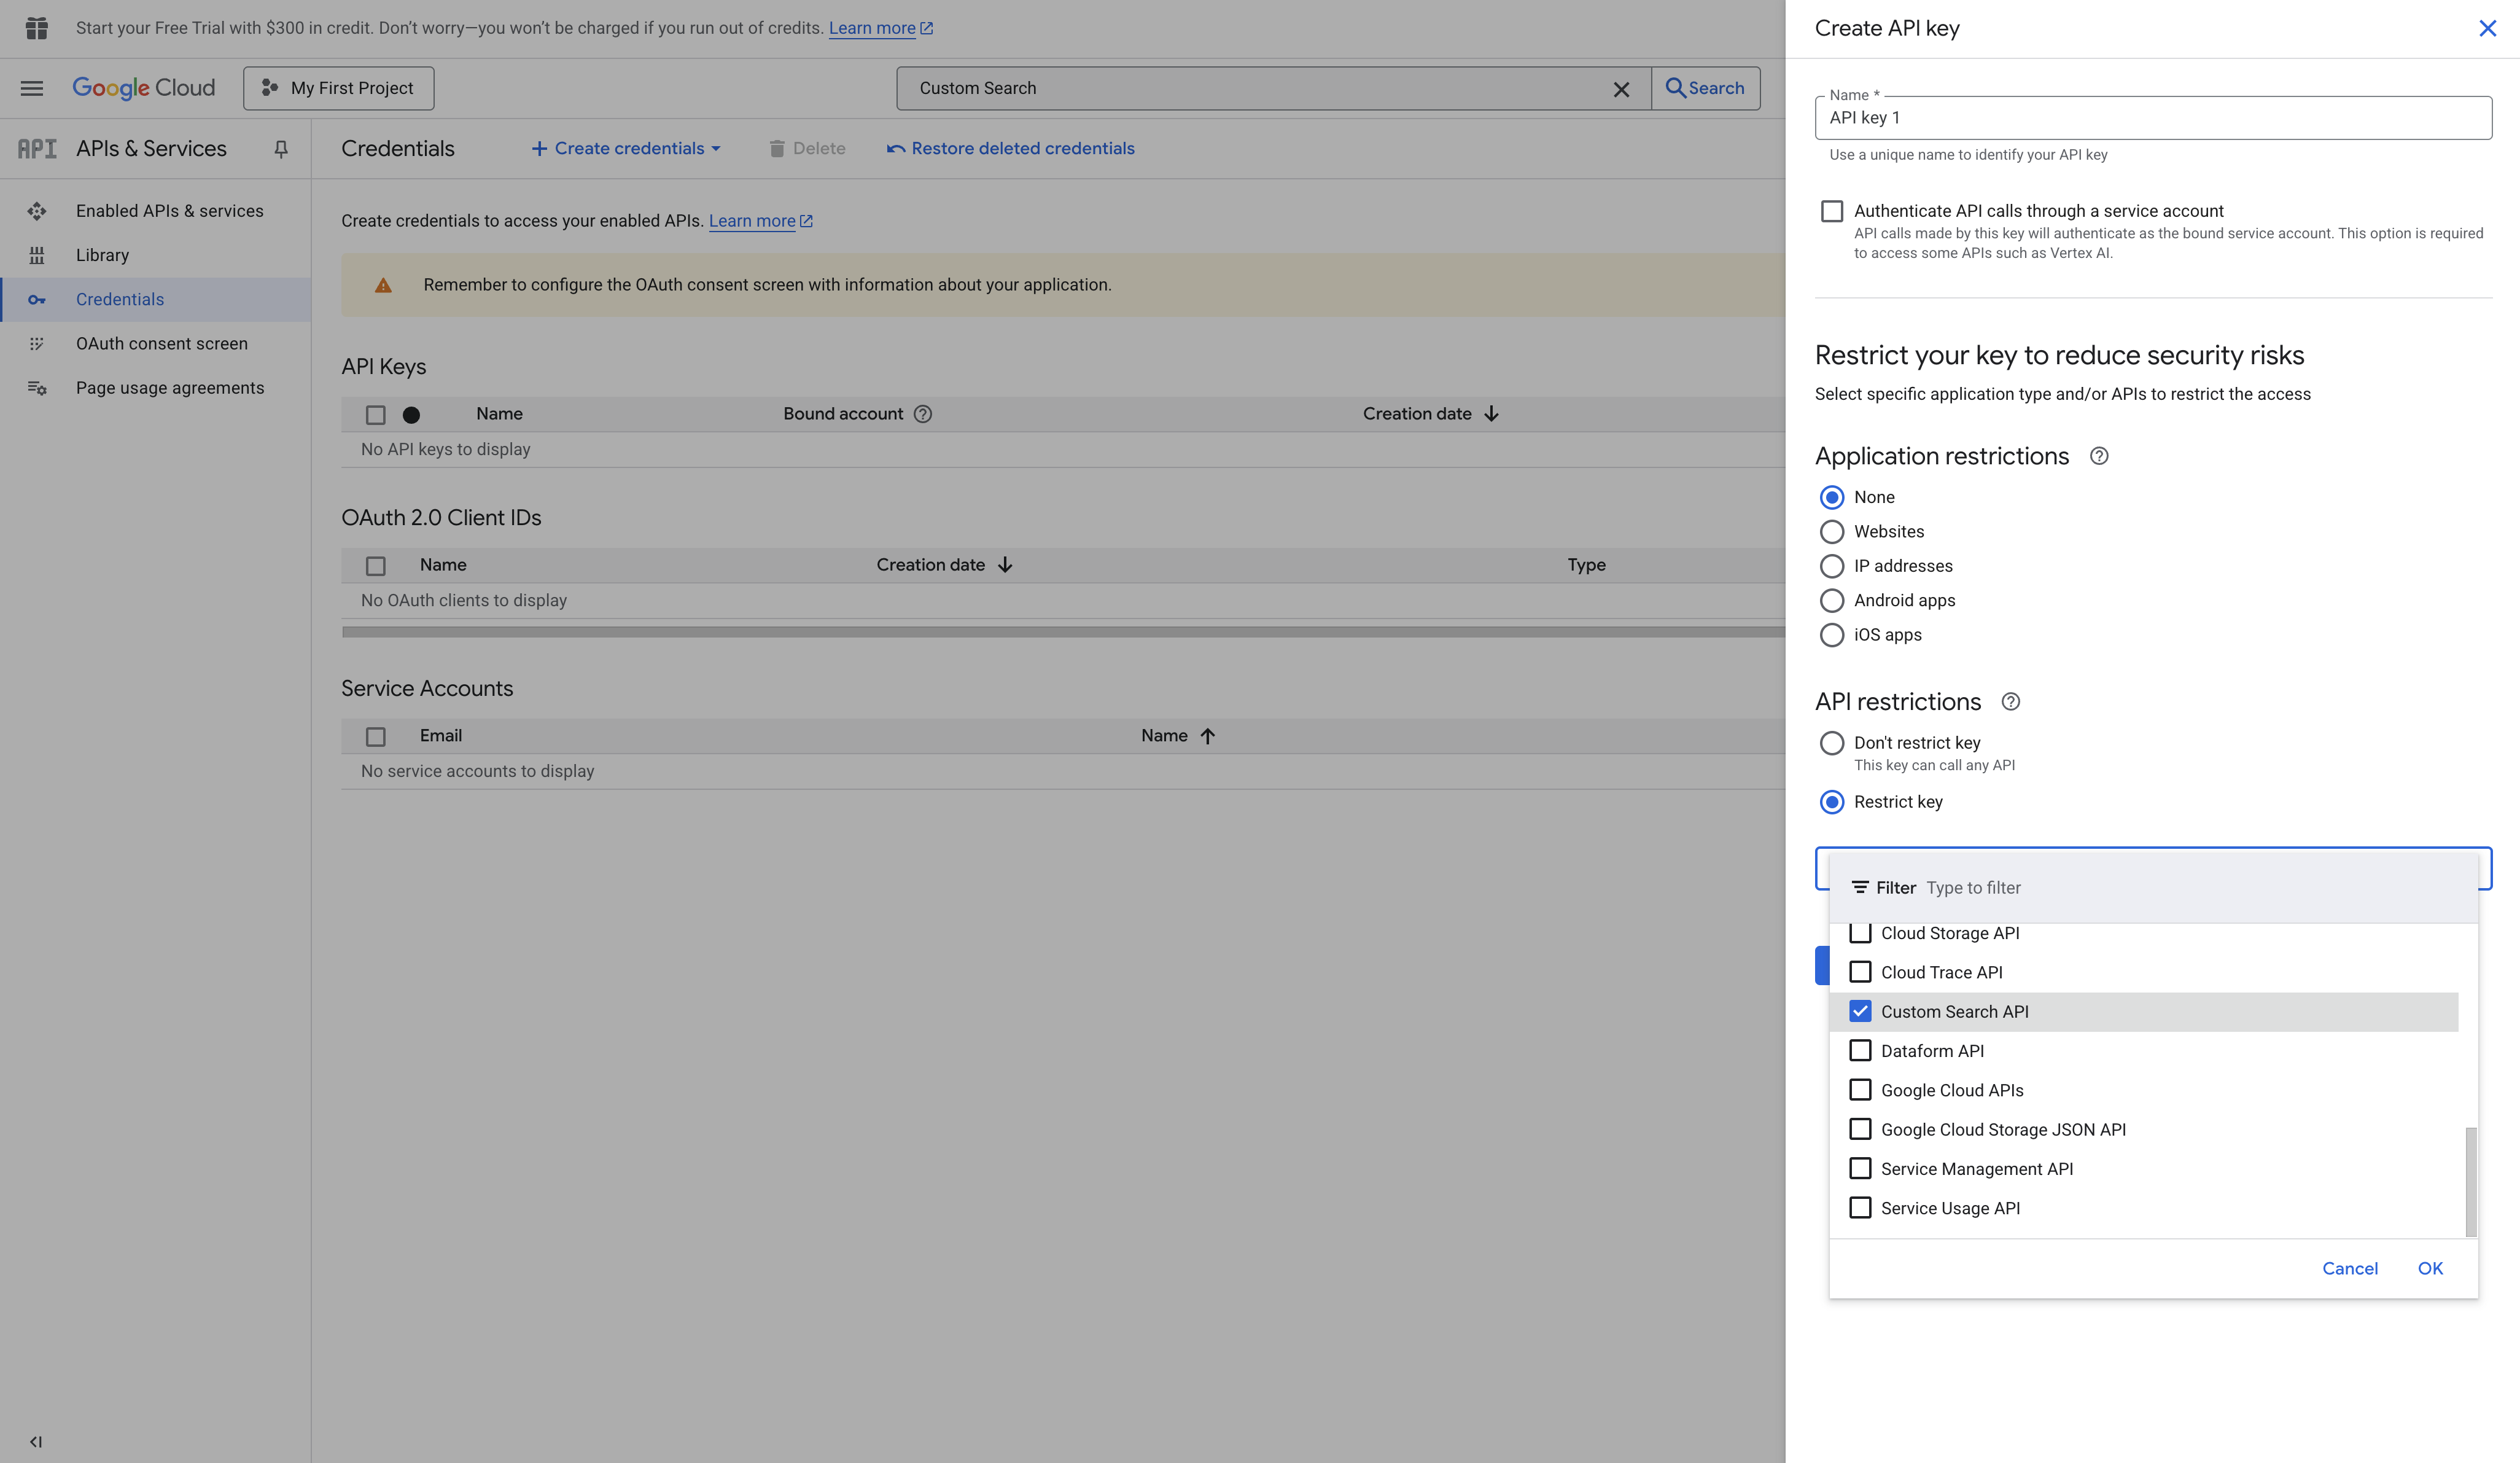
Now restrict it:
- In the sidebar, find API restrictions.
- Select Restrict key.
- Choose Custom Search API from the dropdown.
- Save your changes.
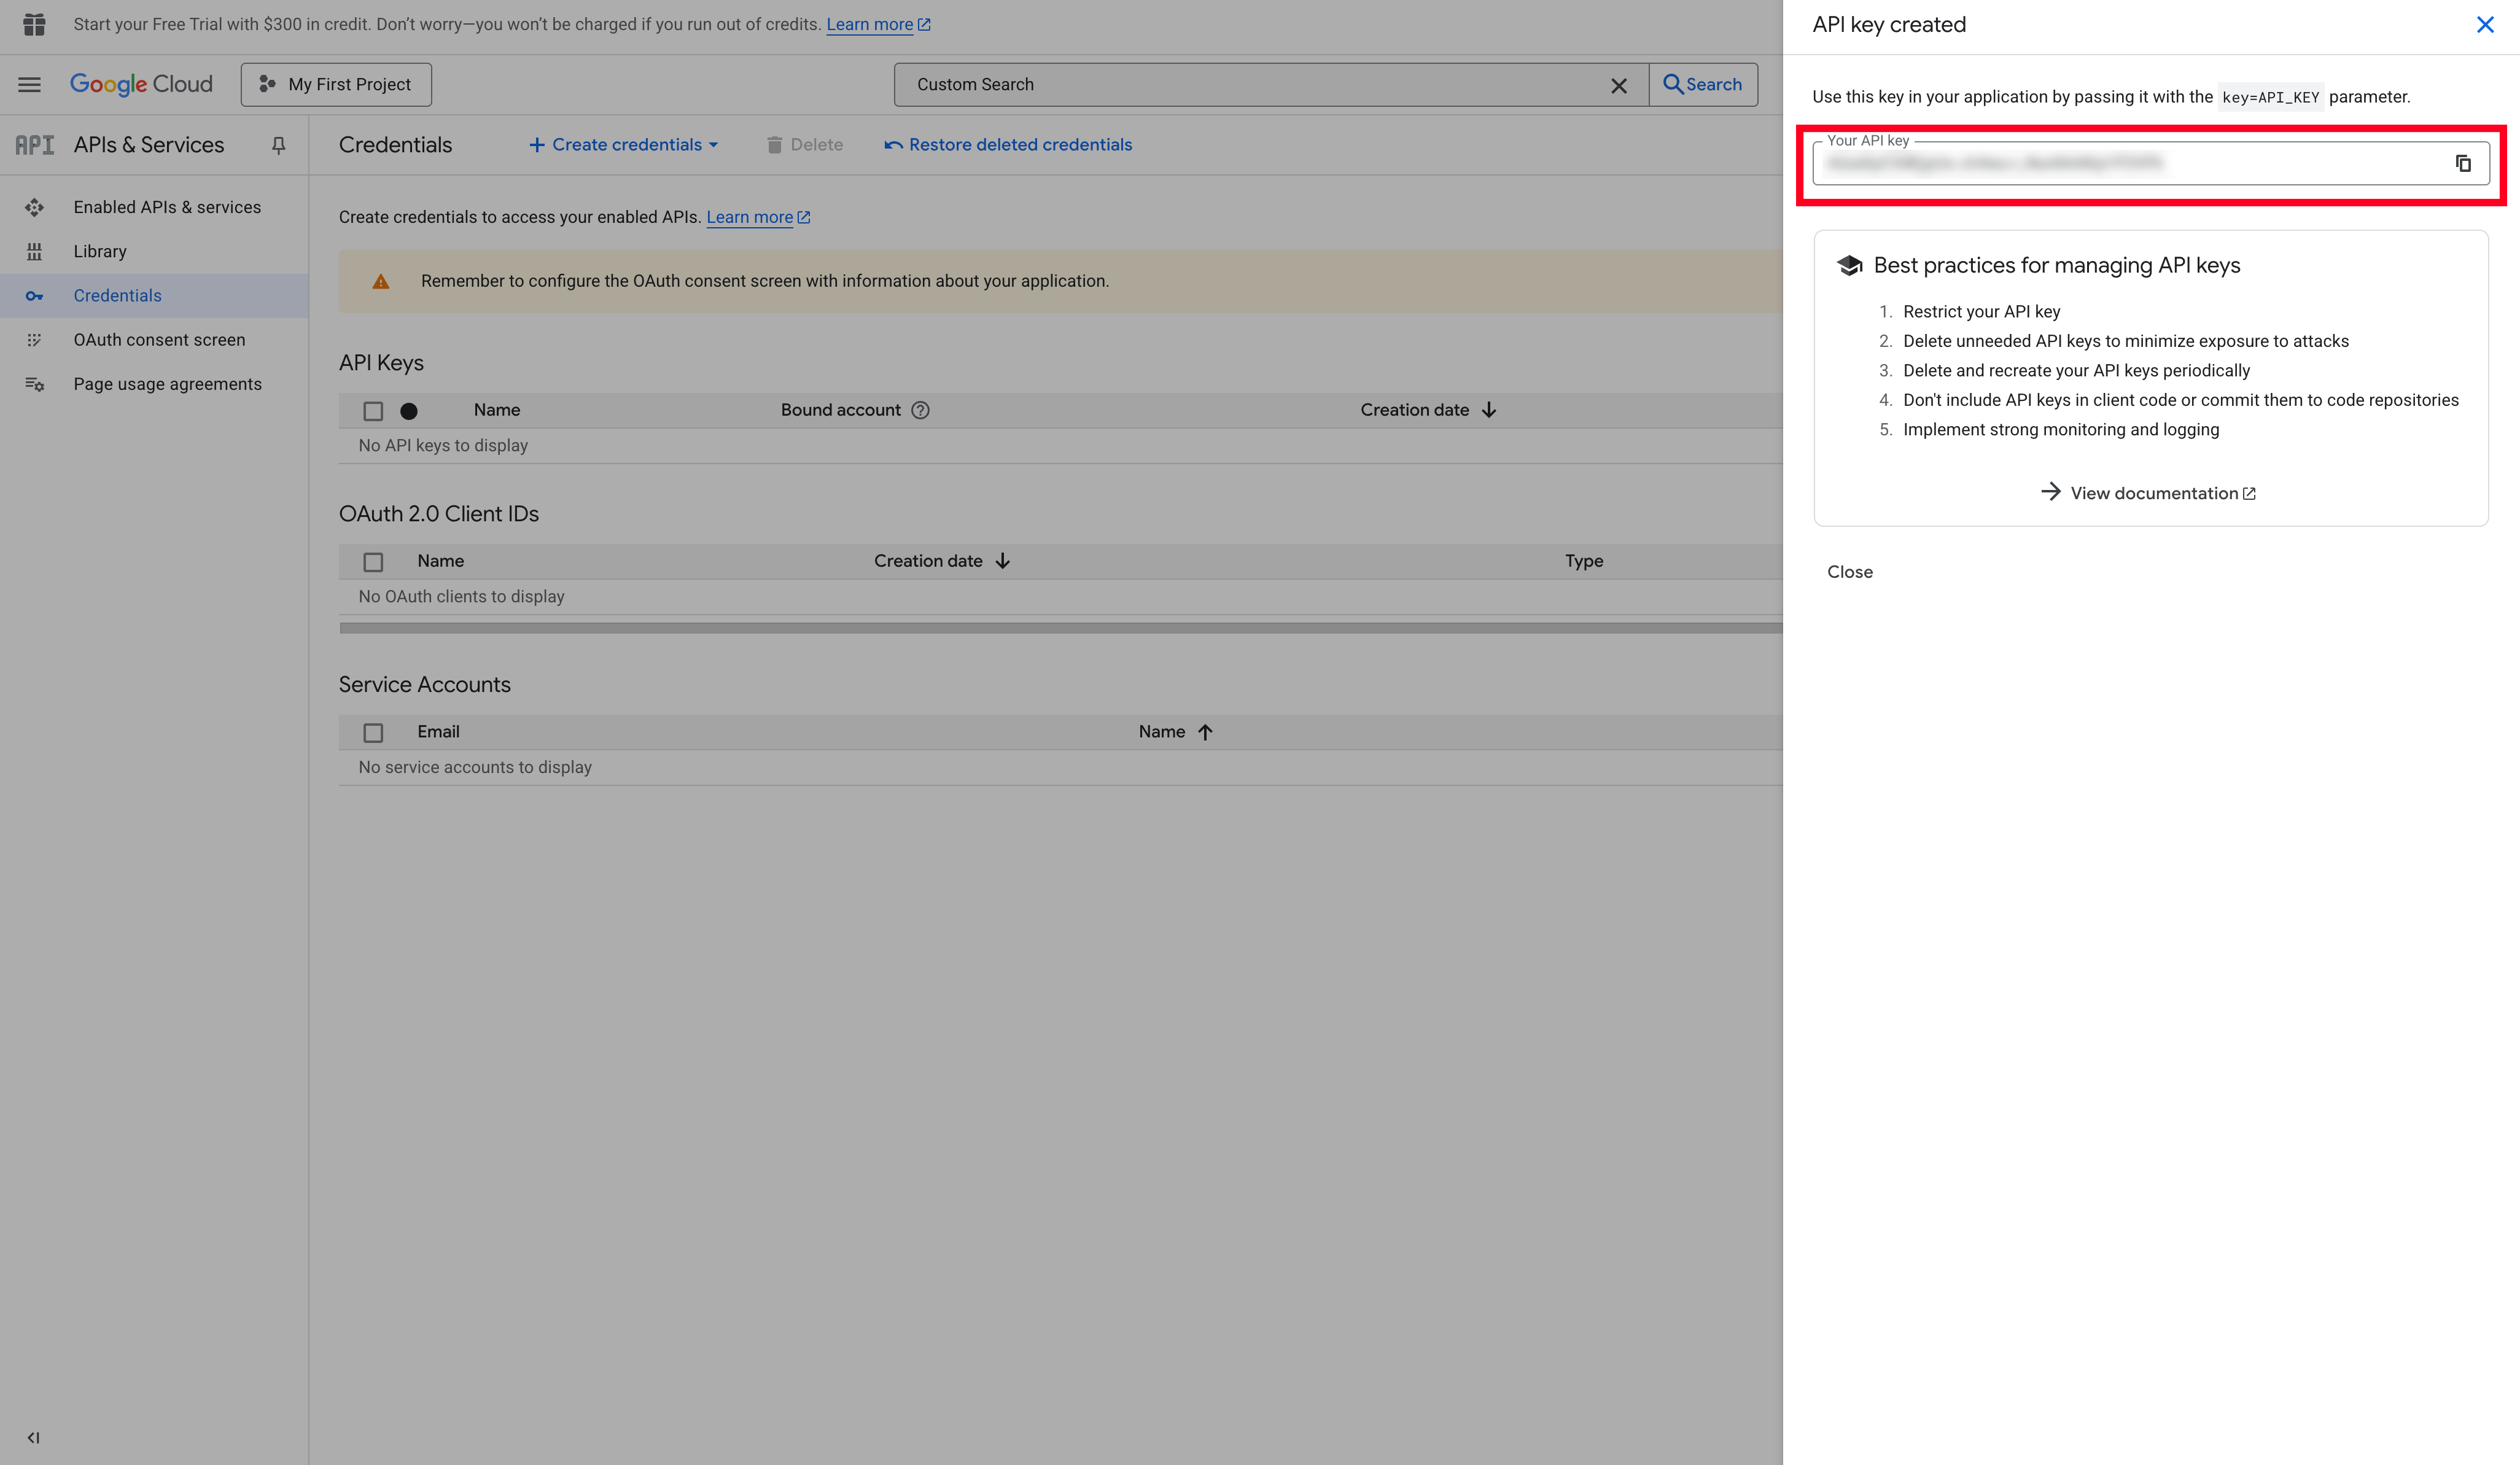
Copy the generated key – this is your:
GOOGLE_API_KEY
Keep it somewhere safe.
Create a Programmable Search Engine (GOOGLE_CSE_ID)
Now we need to create the Programmable Search Engine that will back the Custom Search API:
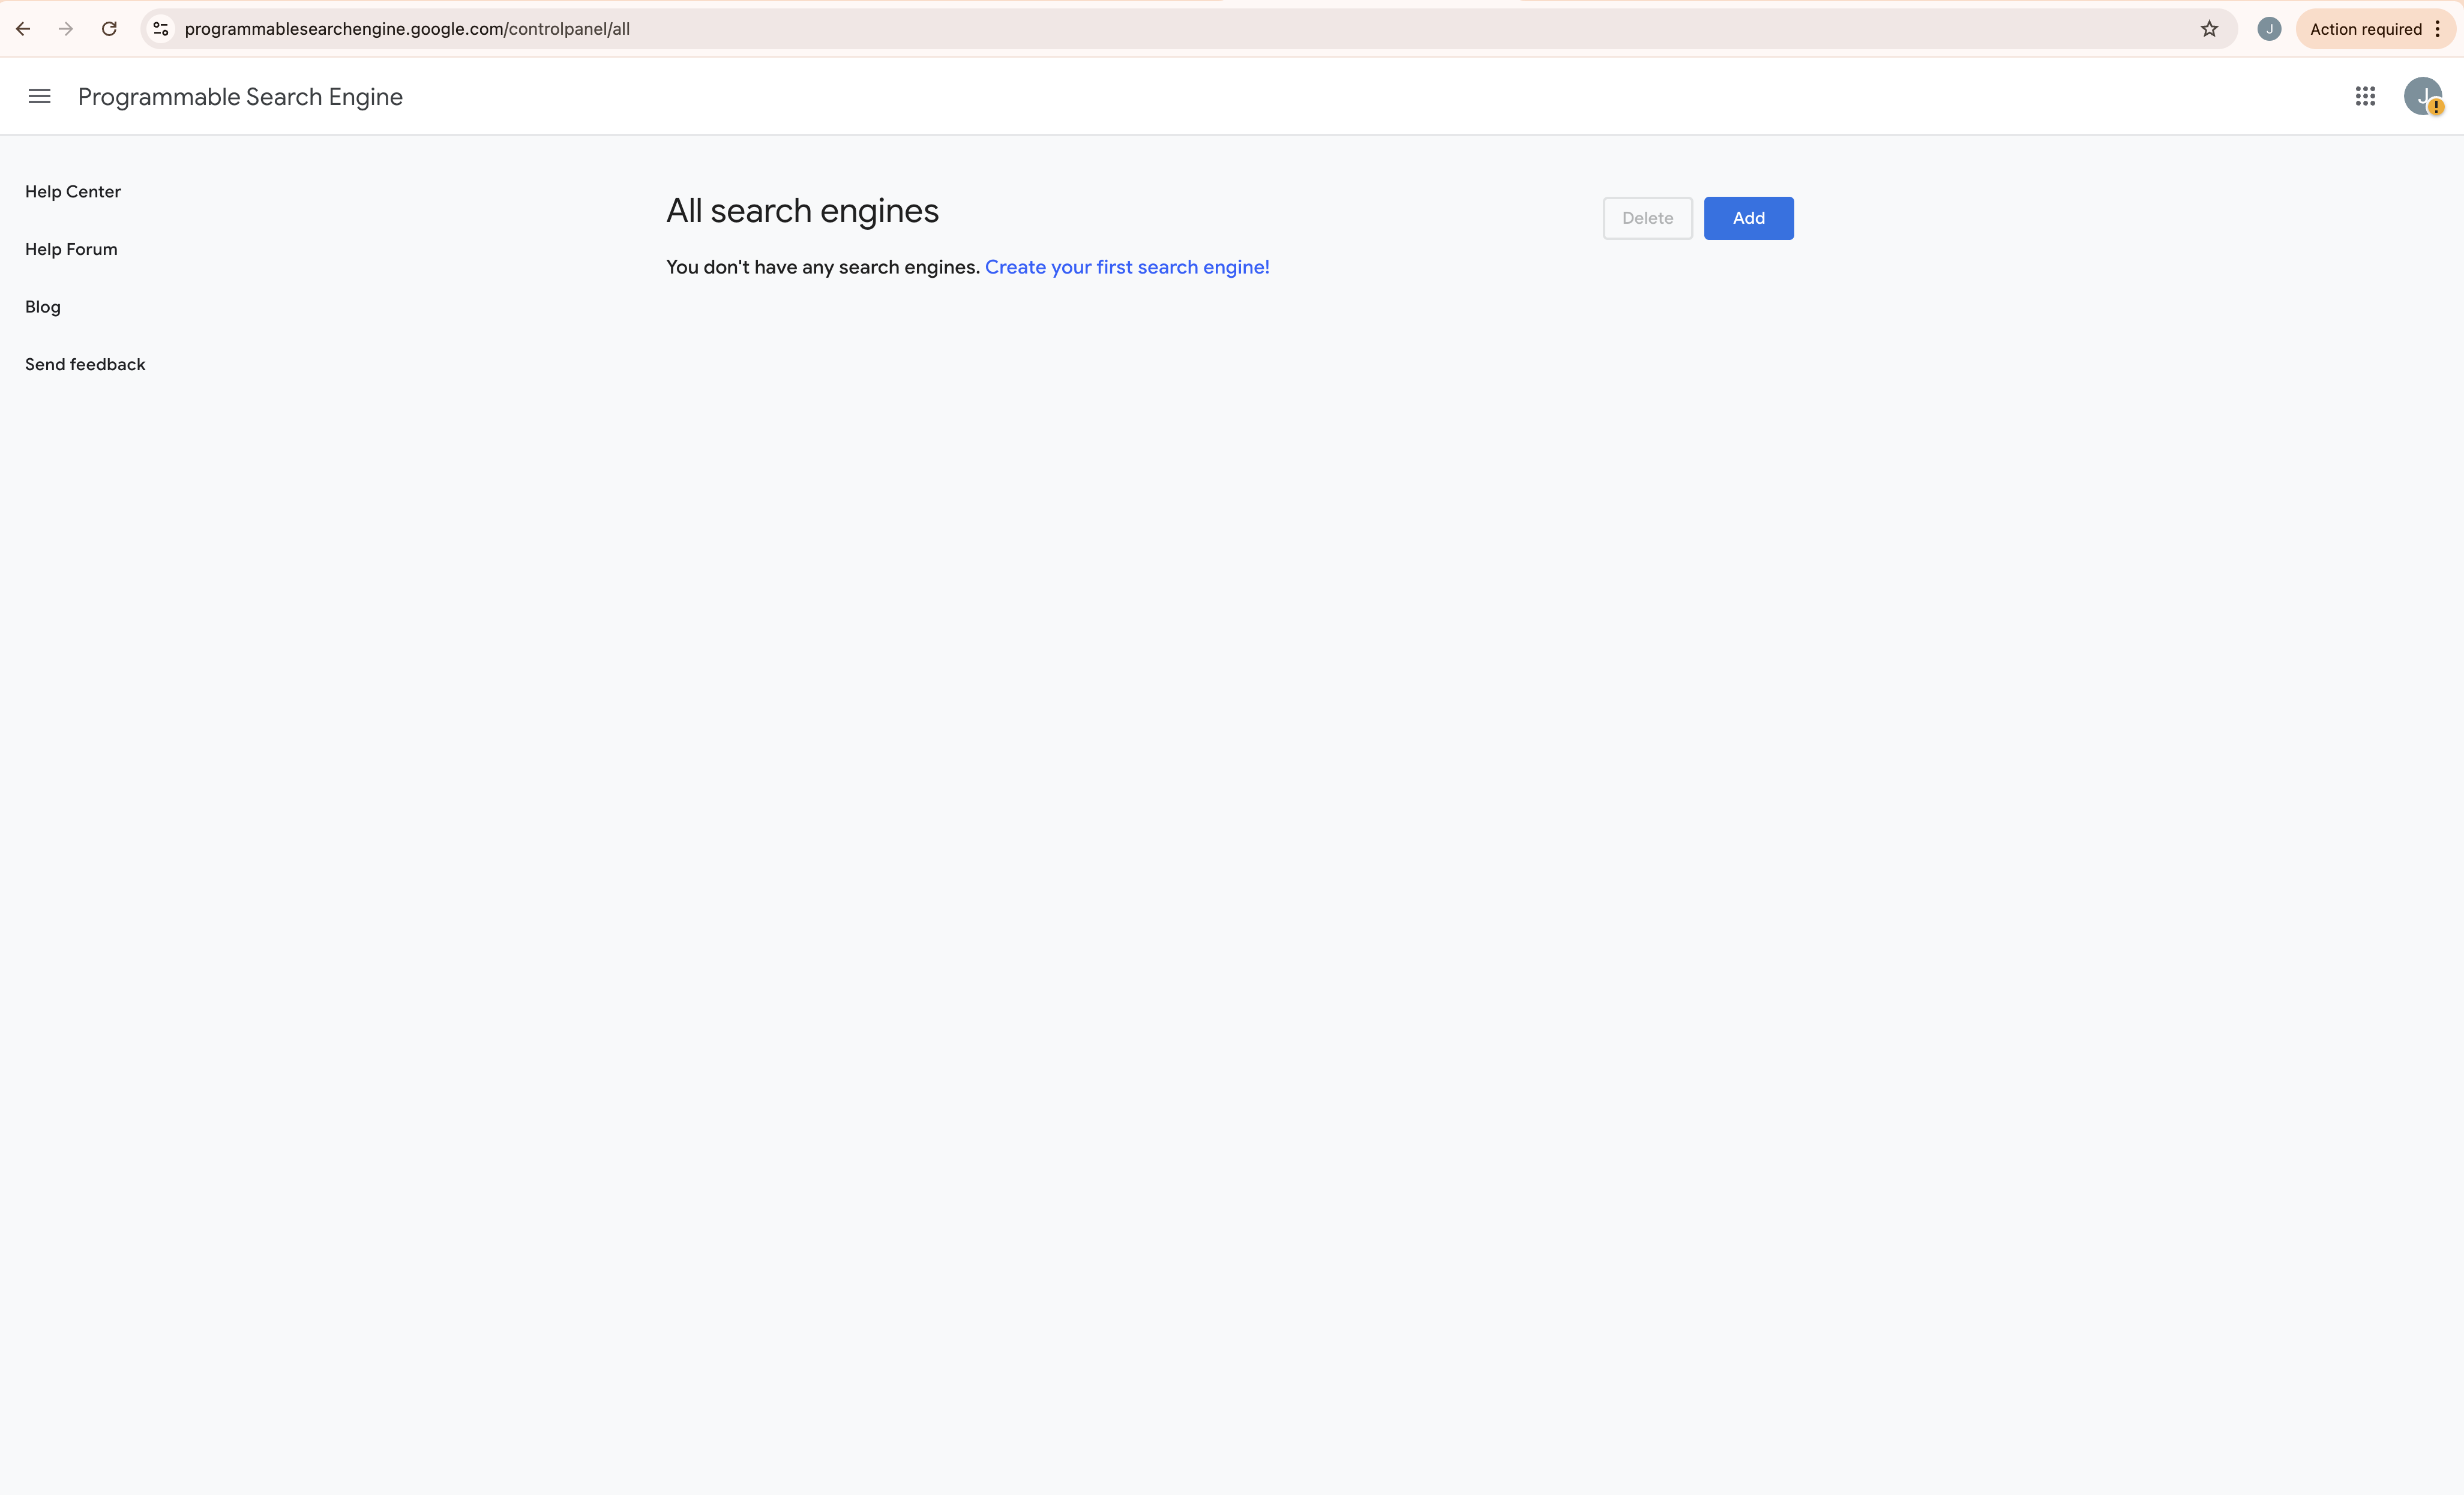
- Click Add.
- Give your search engine a name.
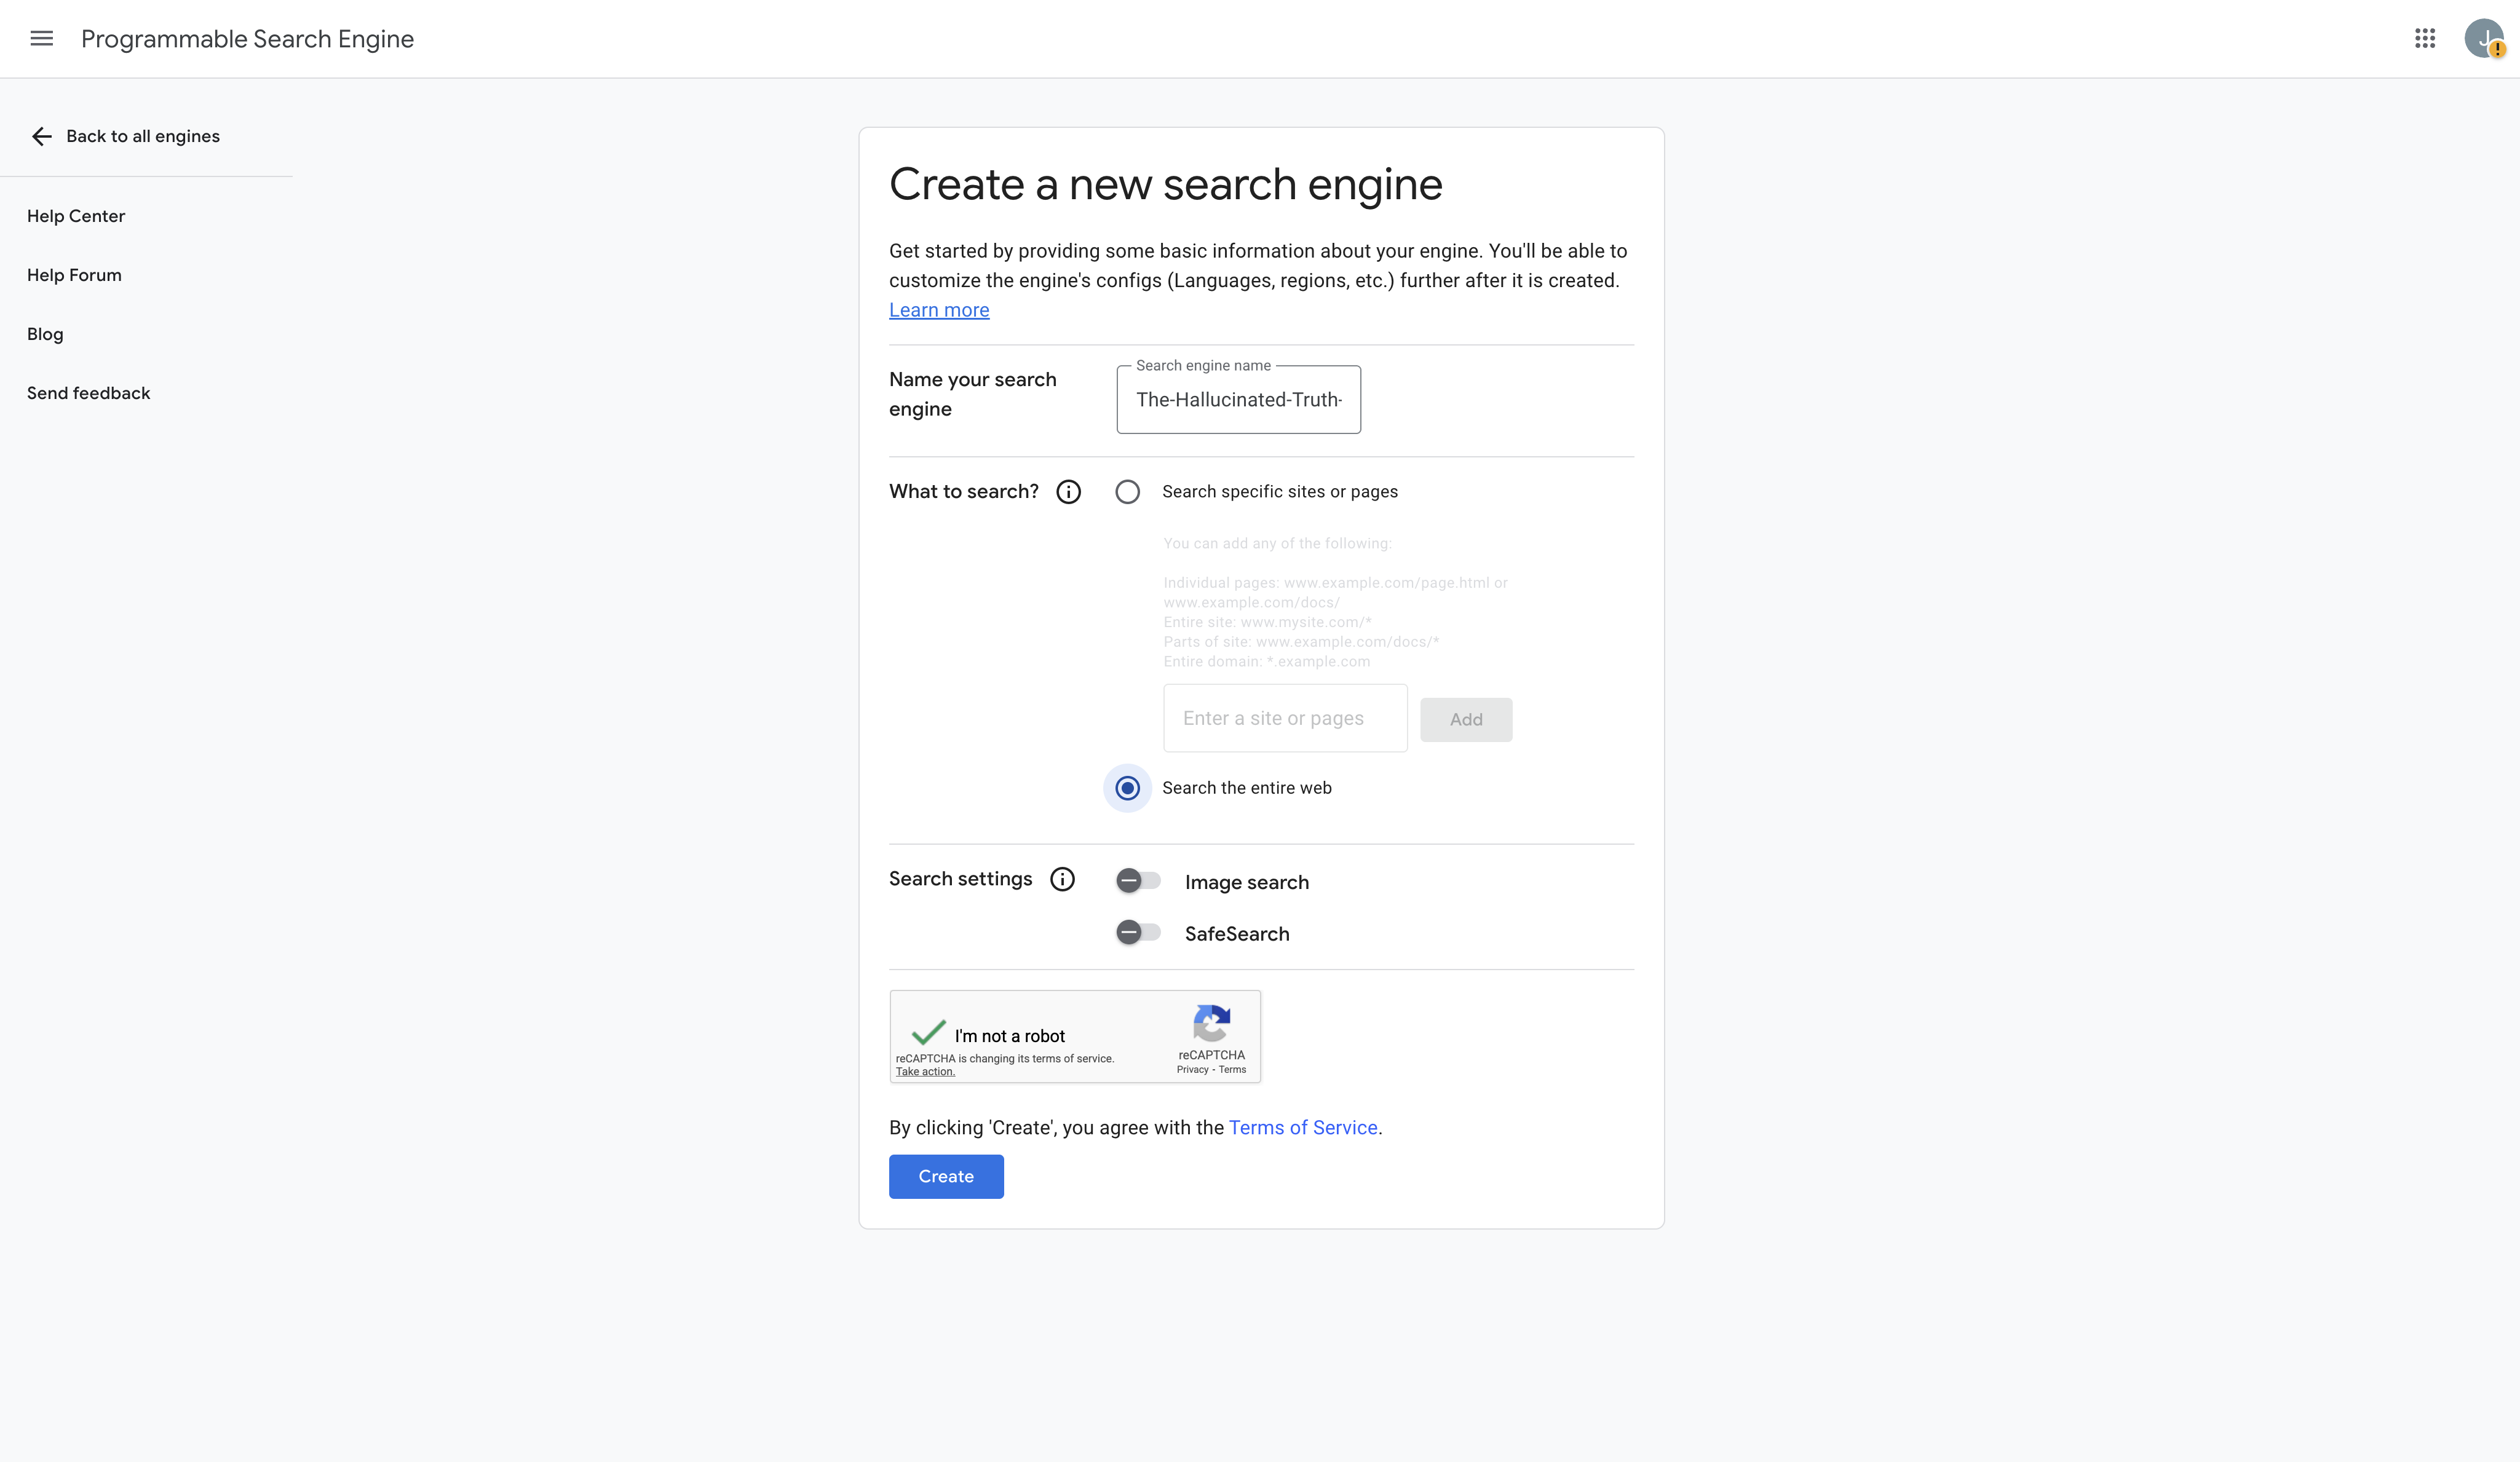
- Configure it so it can search the entire web.
- Click Create.
You will then see an embed snippet that looks something like:
<script async src="[https://cse.google.com/cse.js?cx=123abc456:def789ghi](https://cse.google.com/cse.js?cx=123abc456:def789ghi)"></script>
Copy only the value after cx=. That is your:
GOOGLE_CSE_ID
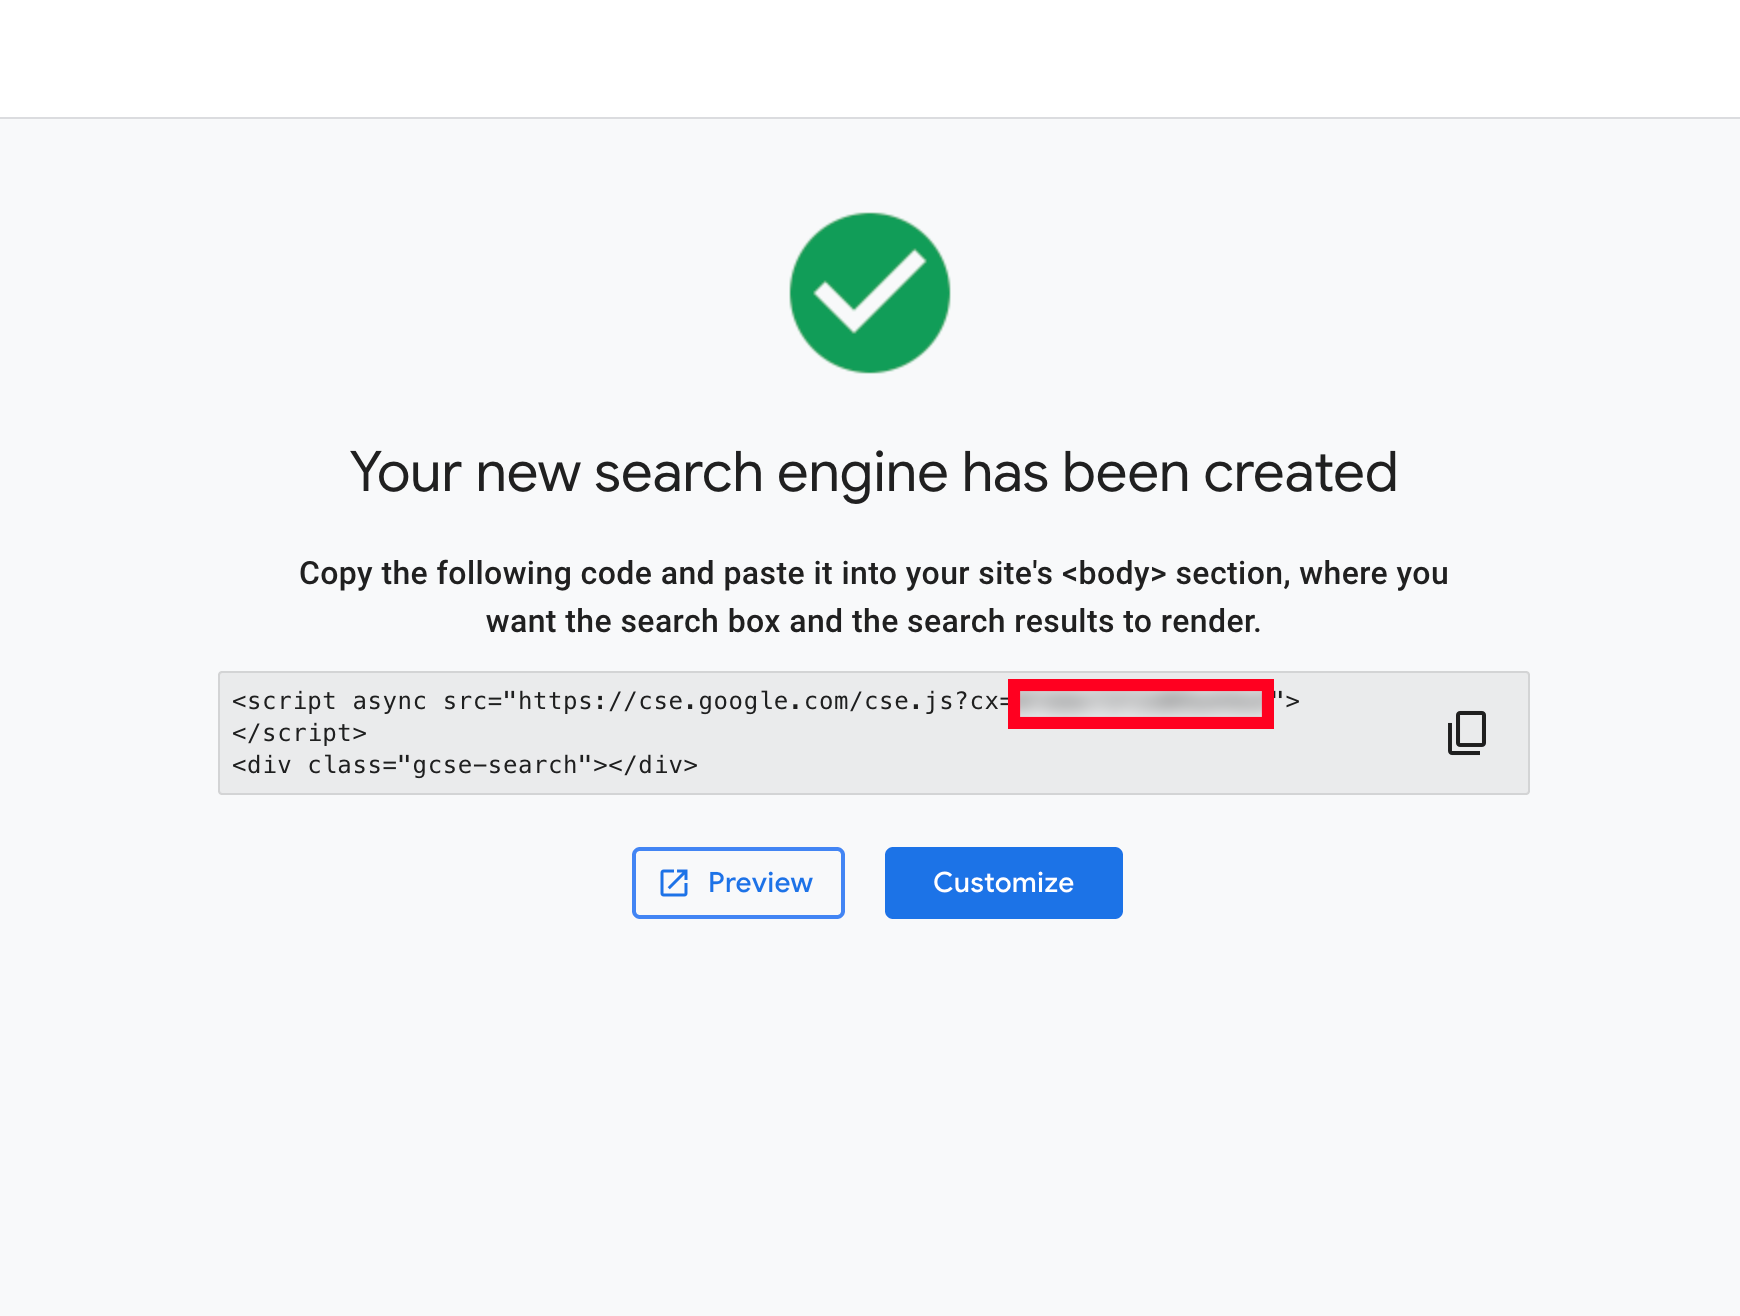
You now have both values required for the .env file.
Install and Run Temporal
Temporal orchestrates the long-running game workflows. The easiest way to run it locally is by using the official Temporal Docker Compose setup.
You can follow the Temporal instructions here in more detail or just follow these instructions.
Clone the Temporal Docker Compose repository into a suitable folder (for example, wherever you keep your Docker-related projects):
git clone [https://github.com/temporalio/docker-compose.git](https://github.com/temporalio/docker-compose.git) ./temporalMove into the new directory:
cd temporalStart Temporal with Docker Compose:
docker compose up -dDocker will pull all required Temporal images and start them in the background.
To confirm it’s running, open a browser and go to:
If you see the Temporal Web UI, your Temporal backend is up and ready.
Clone This Repository and Configure Environment Variables
Next, clone the game and agent code itself.
From the root of your Docker projects folder (or wherever you prefer to keep this project), run:
git clone [https://github.com/rilhia/the-hallucinated-truth.git](https://github.com/rilhia/the-hallucinated-truth.git) ./the-hallucinated-truthThis will create a folder named:
the-hallucinated-truthand clone everything needed to run the game, except the
.envfile.Move into the project directory:
cd the-hallucinated-truthYou can verify with:
pwdNow create the
.envfile and insert the Google credentials you created earlier:cat > .env <<'EOF' GOOGLE_API_KEY=xxxxxxxxxxxxxxxxxxxxxxx GOOGLE_CSE_ID=xxxxxxxxxxxxxxxxxxxxxxxx EOFReplace the
xvalues with your actualGOOGLE_API_KEYandGOOGLE_CSE_ID.
At this point, the project is configured with the Google credentials it needs.
Start the Application
Make sure Temporal is still running (it will be unless you stopped the containers manually).
From the root of the the-hallucinated-truth folder, start the full stack:
docker compose up -d
On the first run, this may take a while. Docker will:
- Pull Node (backend app)
- Pull nginx:alpine (front-end gateway / reverse proxy)
- Pull Ollama (local LLM runtime)
- Pull Open WebUI (browser-based UI for Ollama)
- Pull the
llama3:latestmodel for Ollama
Once everything is pulled and started, the app’s web interface will be available at:
Open that URL in your browser to access The Hallucinated Truth.
Optional: Running Ollama Natively for Better Performance (Highly Recommended)
Why Native Ollama Is Faster
Ollama inside Docker runs under Linux virtualisation and cannot access Apple Metal acceleration.
Native Ollama uses:
- Direct CPU/GPU access
- Metal acceleration
- No virtualization overhead
This produces 2–6× faster inference on M-series Macs.
Install Ollama Natively
Download for macOS:
https://ollama.com/download/mac
Install and verify:
ollama --version
Start the server:
ollama serve
Pull the model:
ollama pull llama3:latest
Native Ollama listens on:
Remove Ollama Container From Docker Compose
Remove or comment out the ollama: service:
  ollama:
    image: ollama/ollama:latest
    container_name: hallucinated_ollama
    ports:
      - "11434:11434"
    volumes:
      - ollama_data:/root/.ollama
    restart: unless-stopped
    entrypoint: ["/bin/sh", "-c"]
    command: |
      "
      # Start Ollama in background
      ollama serve &

      # Wait for API to come up
      sleep 3

      echo 'Pulling Llama 3 8B...'
      ollama pull llama3:latest

      # Keep container alive
      wait
      "
    networks:
      - webnet
Restart Everything
docker compose down
docker compose up -d
Ensure native Ollama is running:
ollama serve
Summary
| Mode | Speed | GPU | Notes |
|---|---|---|---|
| Dockerised Ollama | Slowest | No GPU | Easiest setup |
| Native Ollama | Fastest | Uses GPU | Recommended for all M-series Mac users |
You’re Ready to Play
With all containers running:
- Temporal is orchestrating workflows.
- Ollama is serving
llama3:latest. - Google Custom Search is providing grounded web results.
- The front-end is live at
http://localhost:8085/.
You can now play The Hallucinated Truth, inspect Temporal workflows, and experiment with an LLM that has to justify its own “hallucinations” against real-world data.
Using the App (Detailed Walkthrough)
Once the stack is running via Docker Compose, you will have three separate web interfaces available. Each serves a different purpose and together they form the full game system.
Available Web Interfaces
| Service | URL | Purpose |
|---|---|---|
| Game UI | http://localhost:8085/ | Play The Hallucinated Truth |
| Temporal Web UI | http://localhost:8080/ | Inspect workflows, activities, and execution history |
| OpenWebUI (Ollama) | http://localhost:3000/ | Optional UI for interacting directly with your local LLM |
1. The Game UI (http://localhost:8085/)
This is where the game is played.
Starting the Game
- Open http://localhost:8085/
- You will see an initial screen that allows you to:
- Resume an existing game
- Inspect a game already in progress
- Start a new game
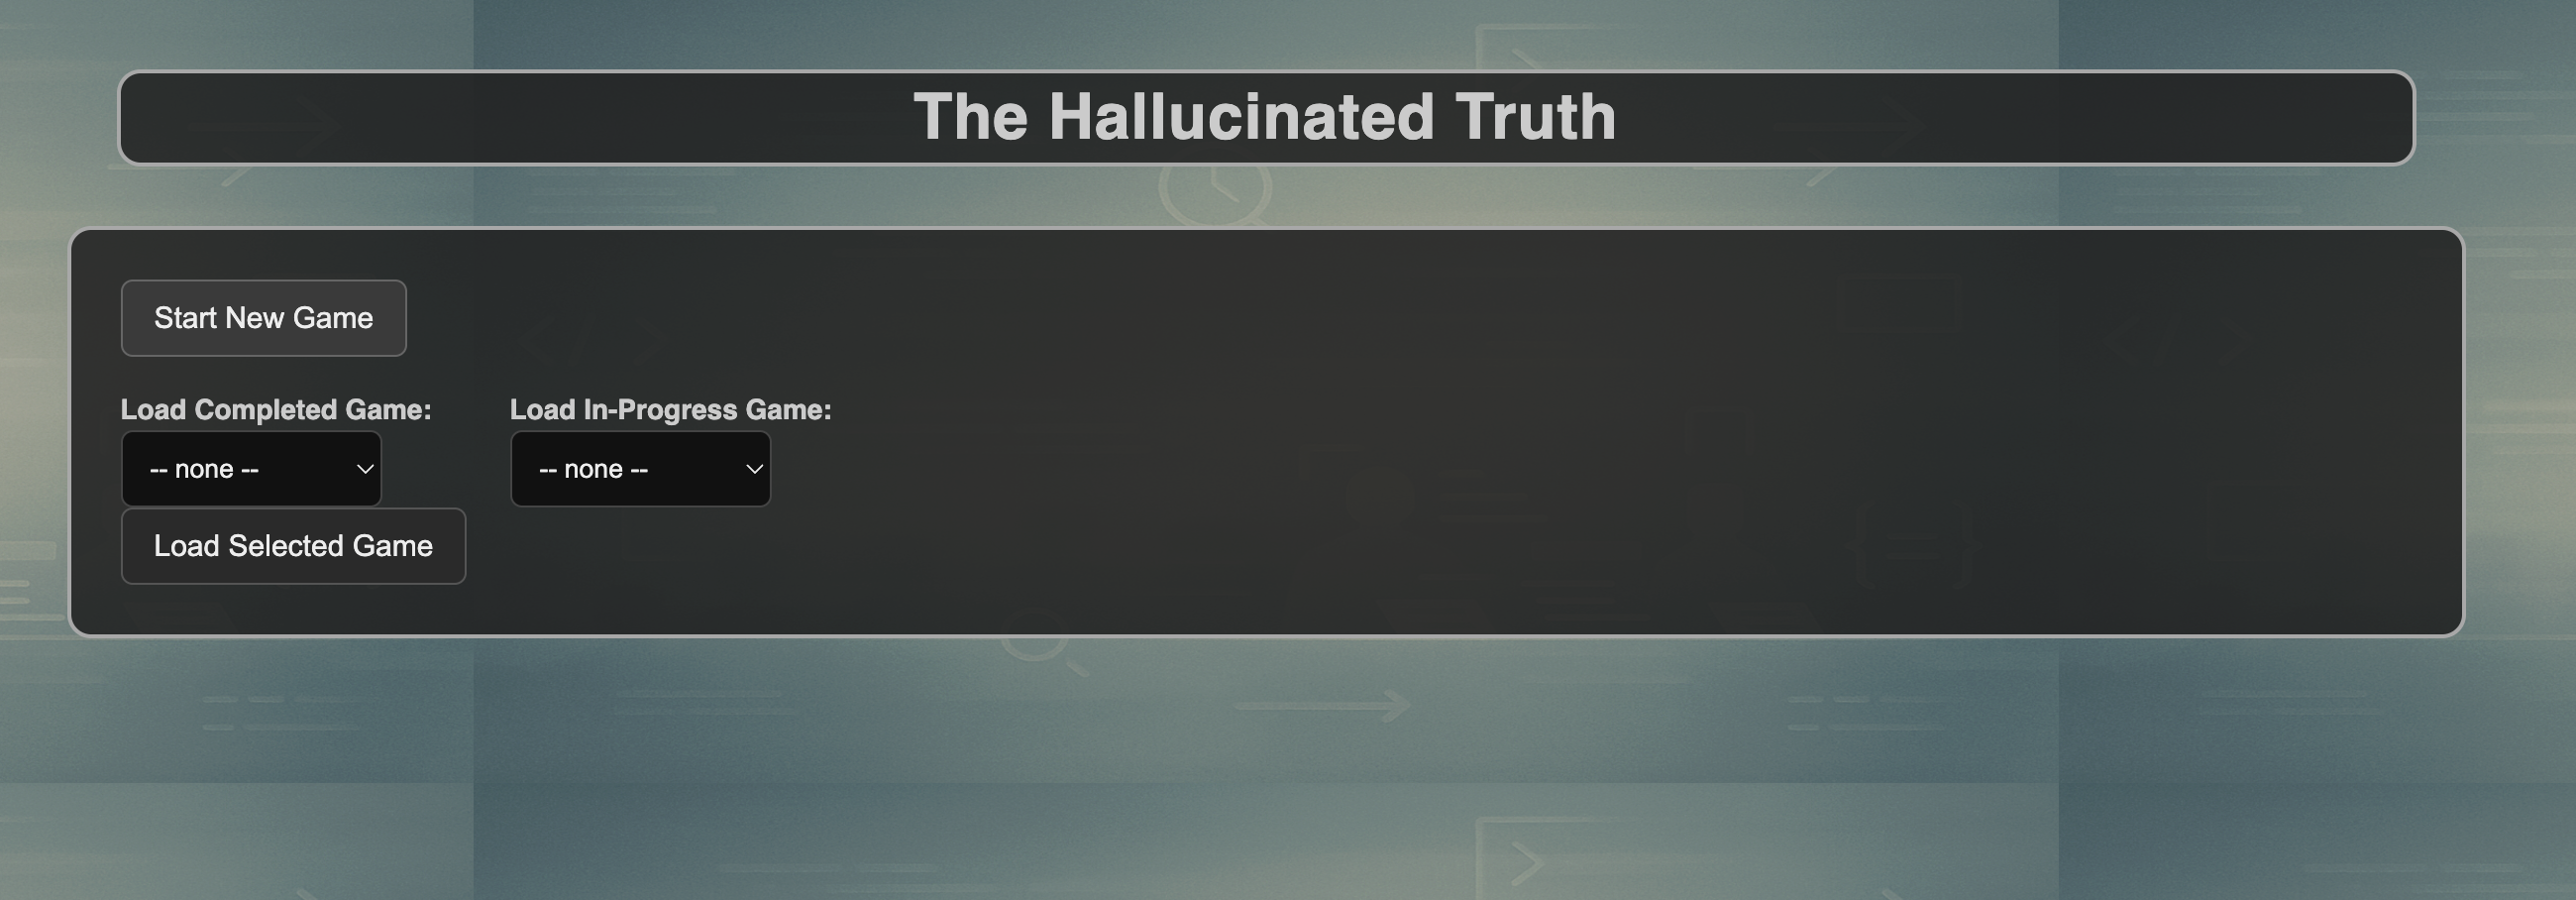
- Click Start New Game
Selecting a Subject
You will be prompted to choose a subject for the game.
- Enter a subject name (for example: Gene Wilder)
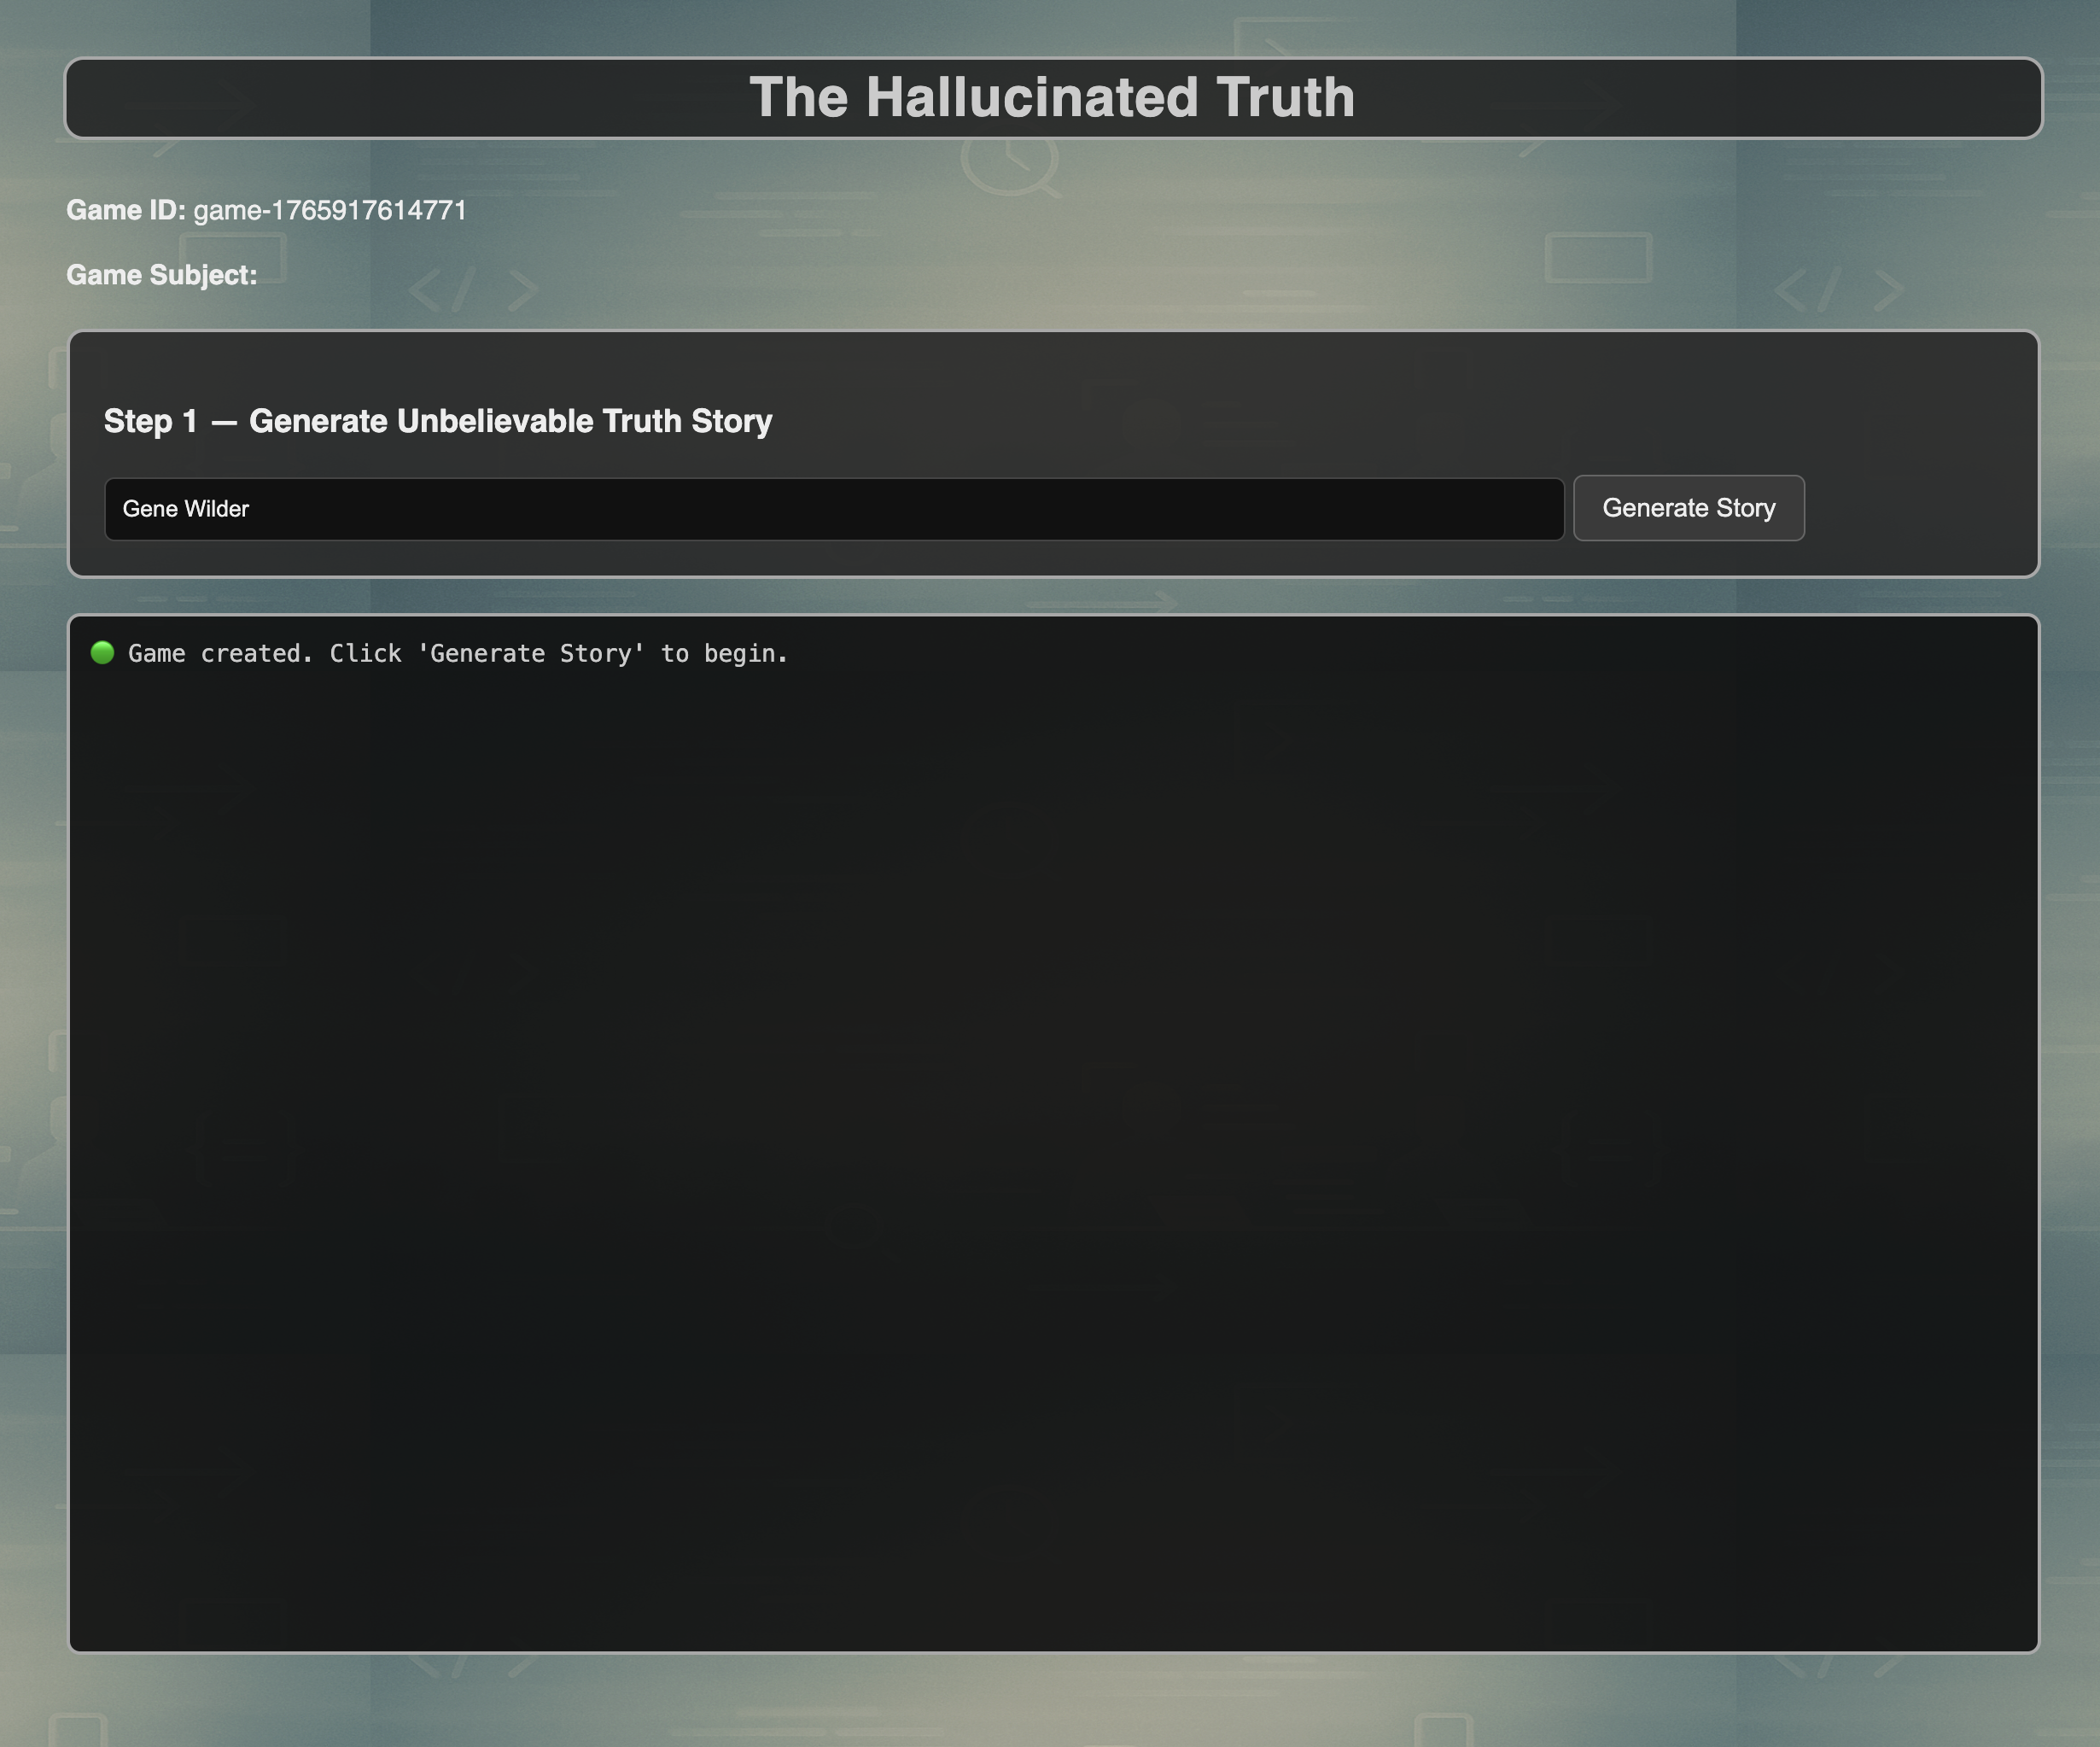
- Click Generate Story
At this point the game begins its backend processing.
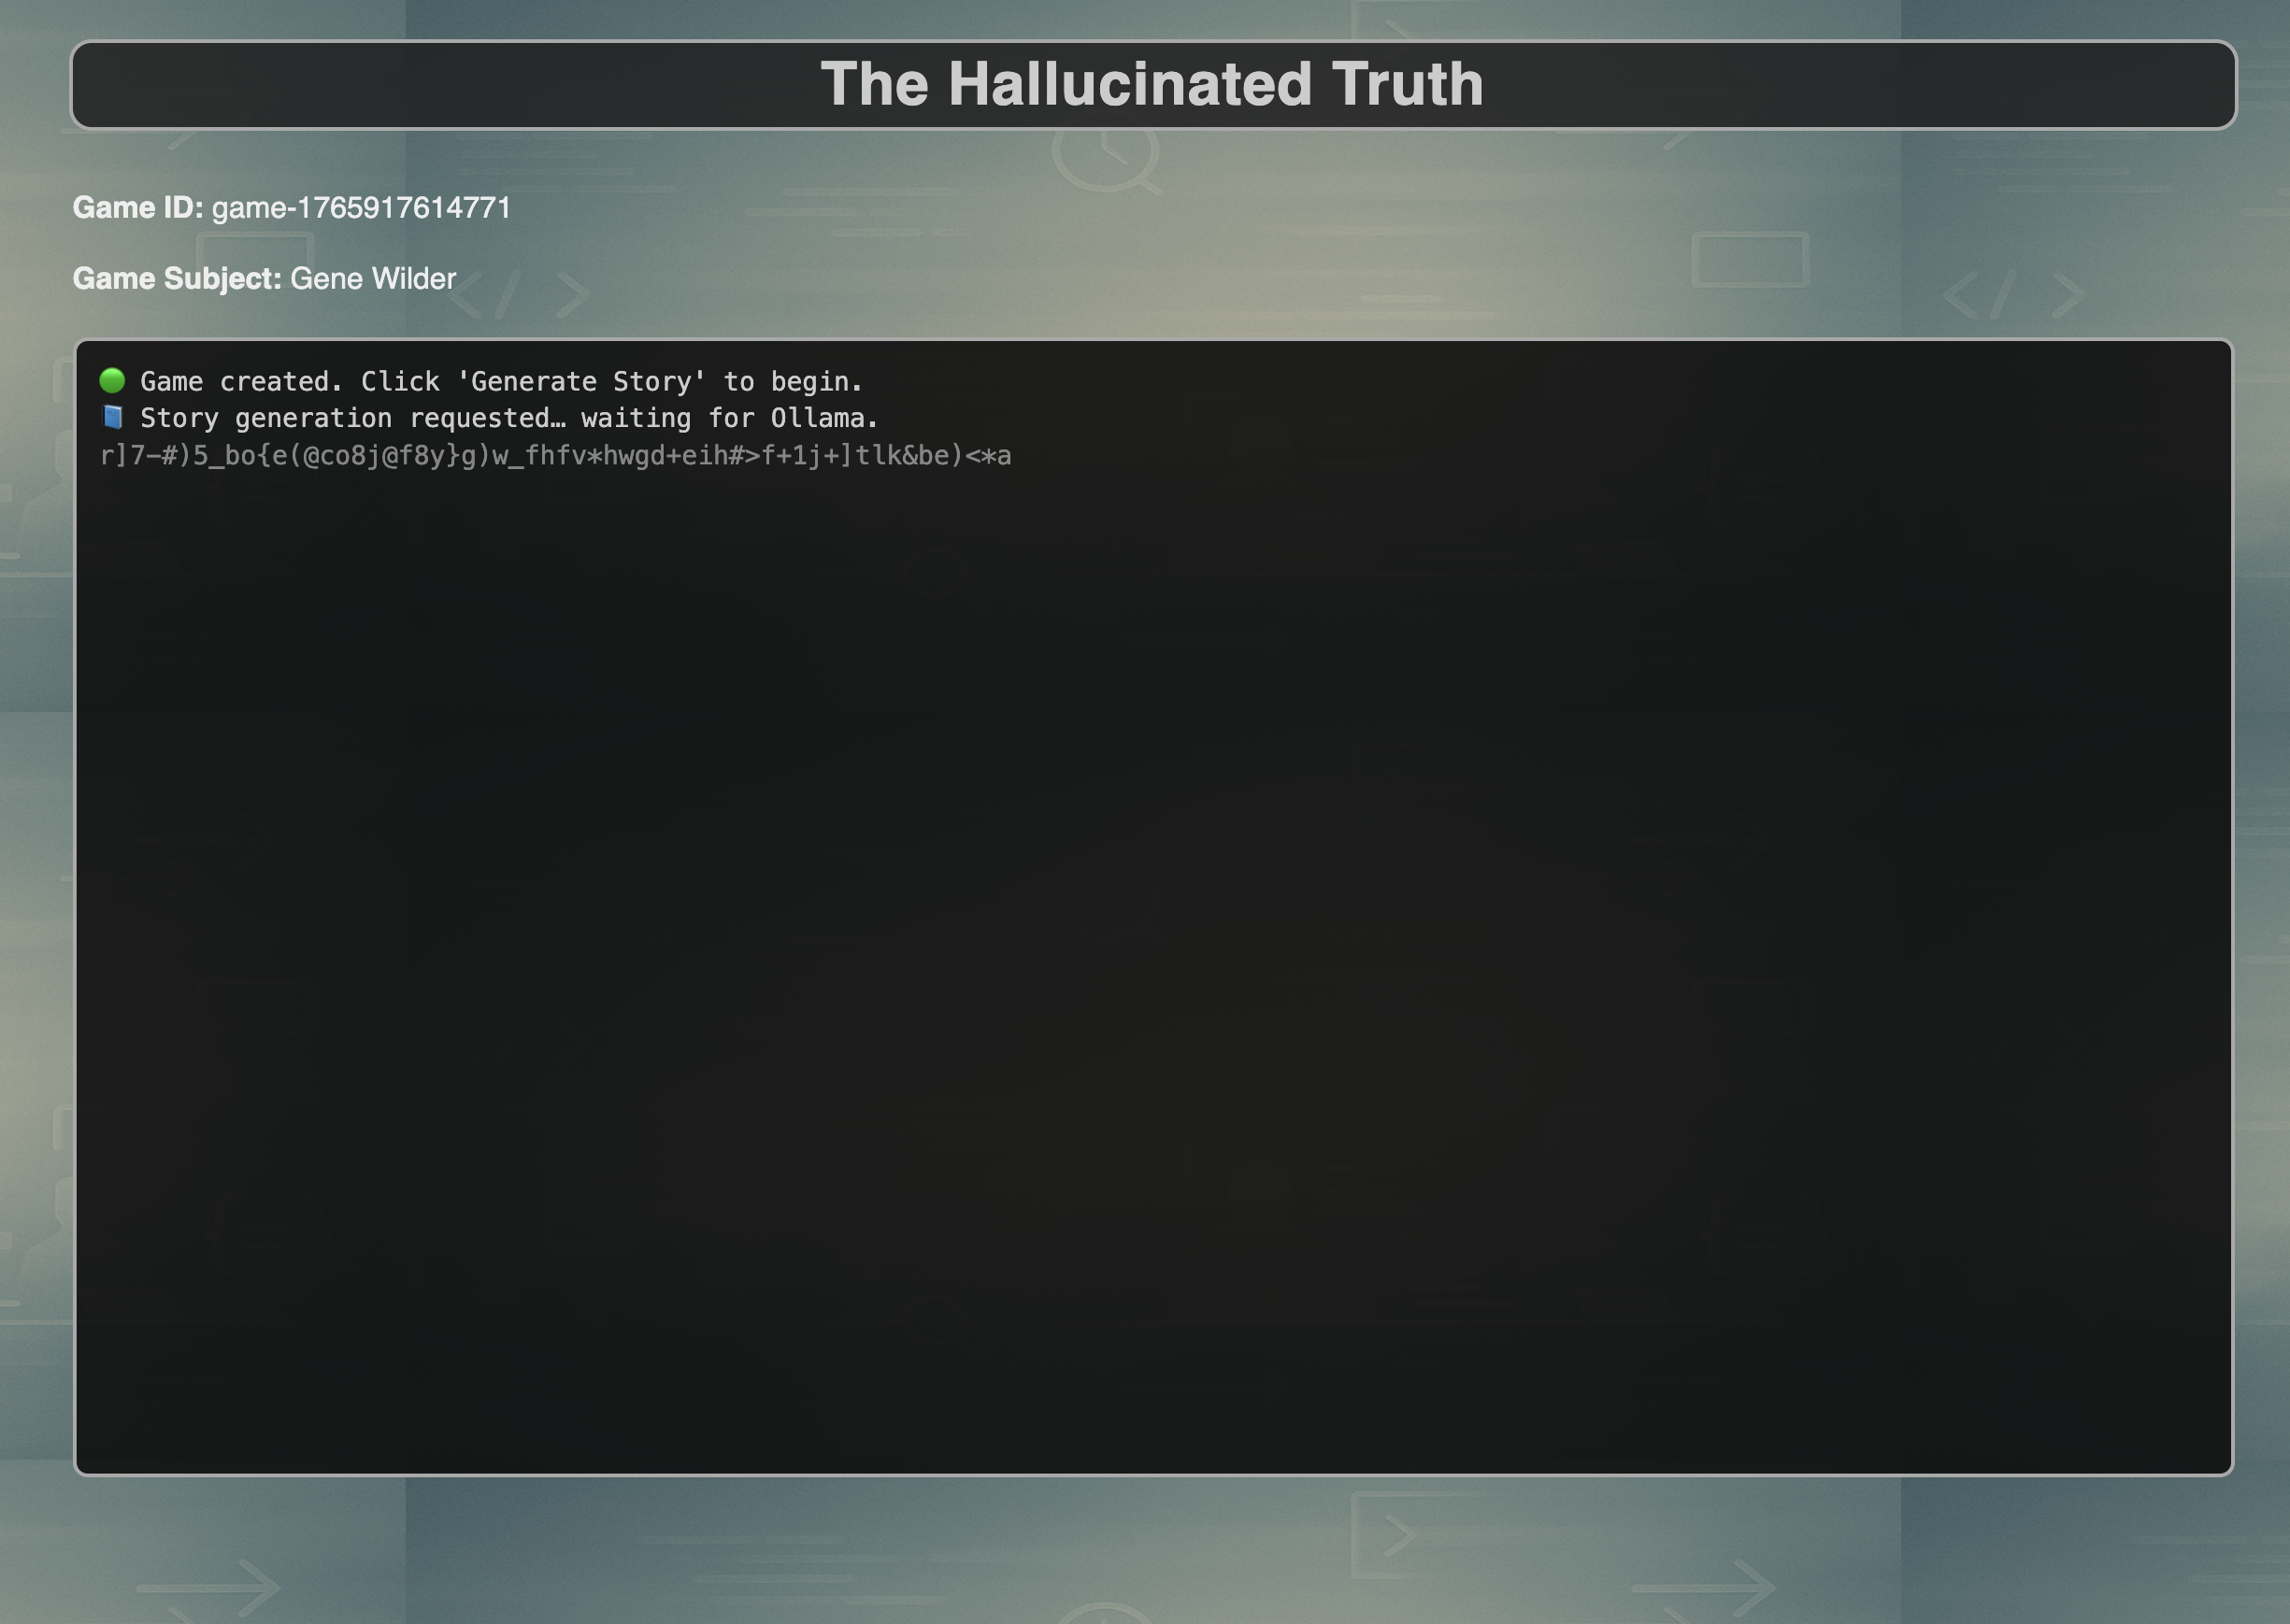
Story Generation Phase
While the story is being generated you will see live status updates in the UI.
Behind the scenes, the following happens:
- The game searches the web using Google Custom Search
- A small set of real, verifiable facts is extracted
- These facts are passed to the LLM
- The LLM generates a long, absurd story where:
- Most statements are fabricated
- A small number of true facts are deliberately embedded
This phase can take some time depending on:
- Your machine’s performance
- Whether Ollama is running inside Docker or directly on your host. As an example, on a Mac M3 with 64GB RAM, it will take around 30 seconds if Ollama is running on the machine. If it is running in a Docker container it can take around 2 or 3 minutes.
Once complete, the full story is rendered in the UI.
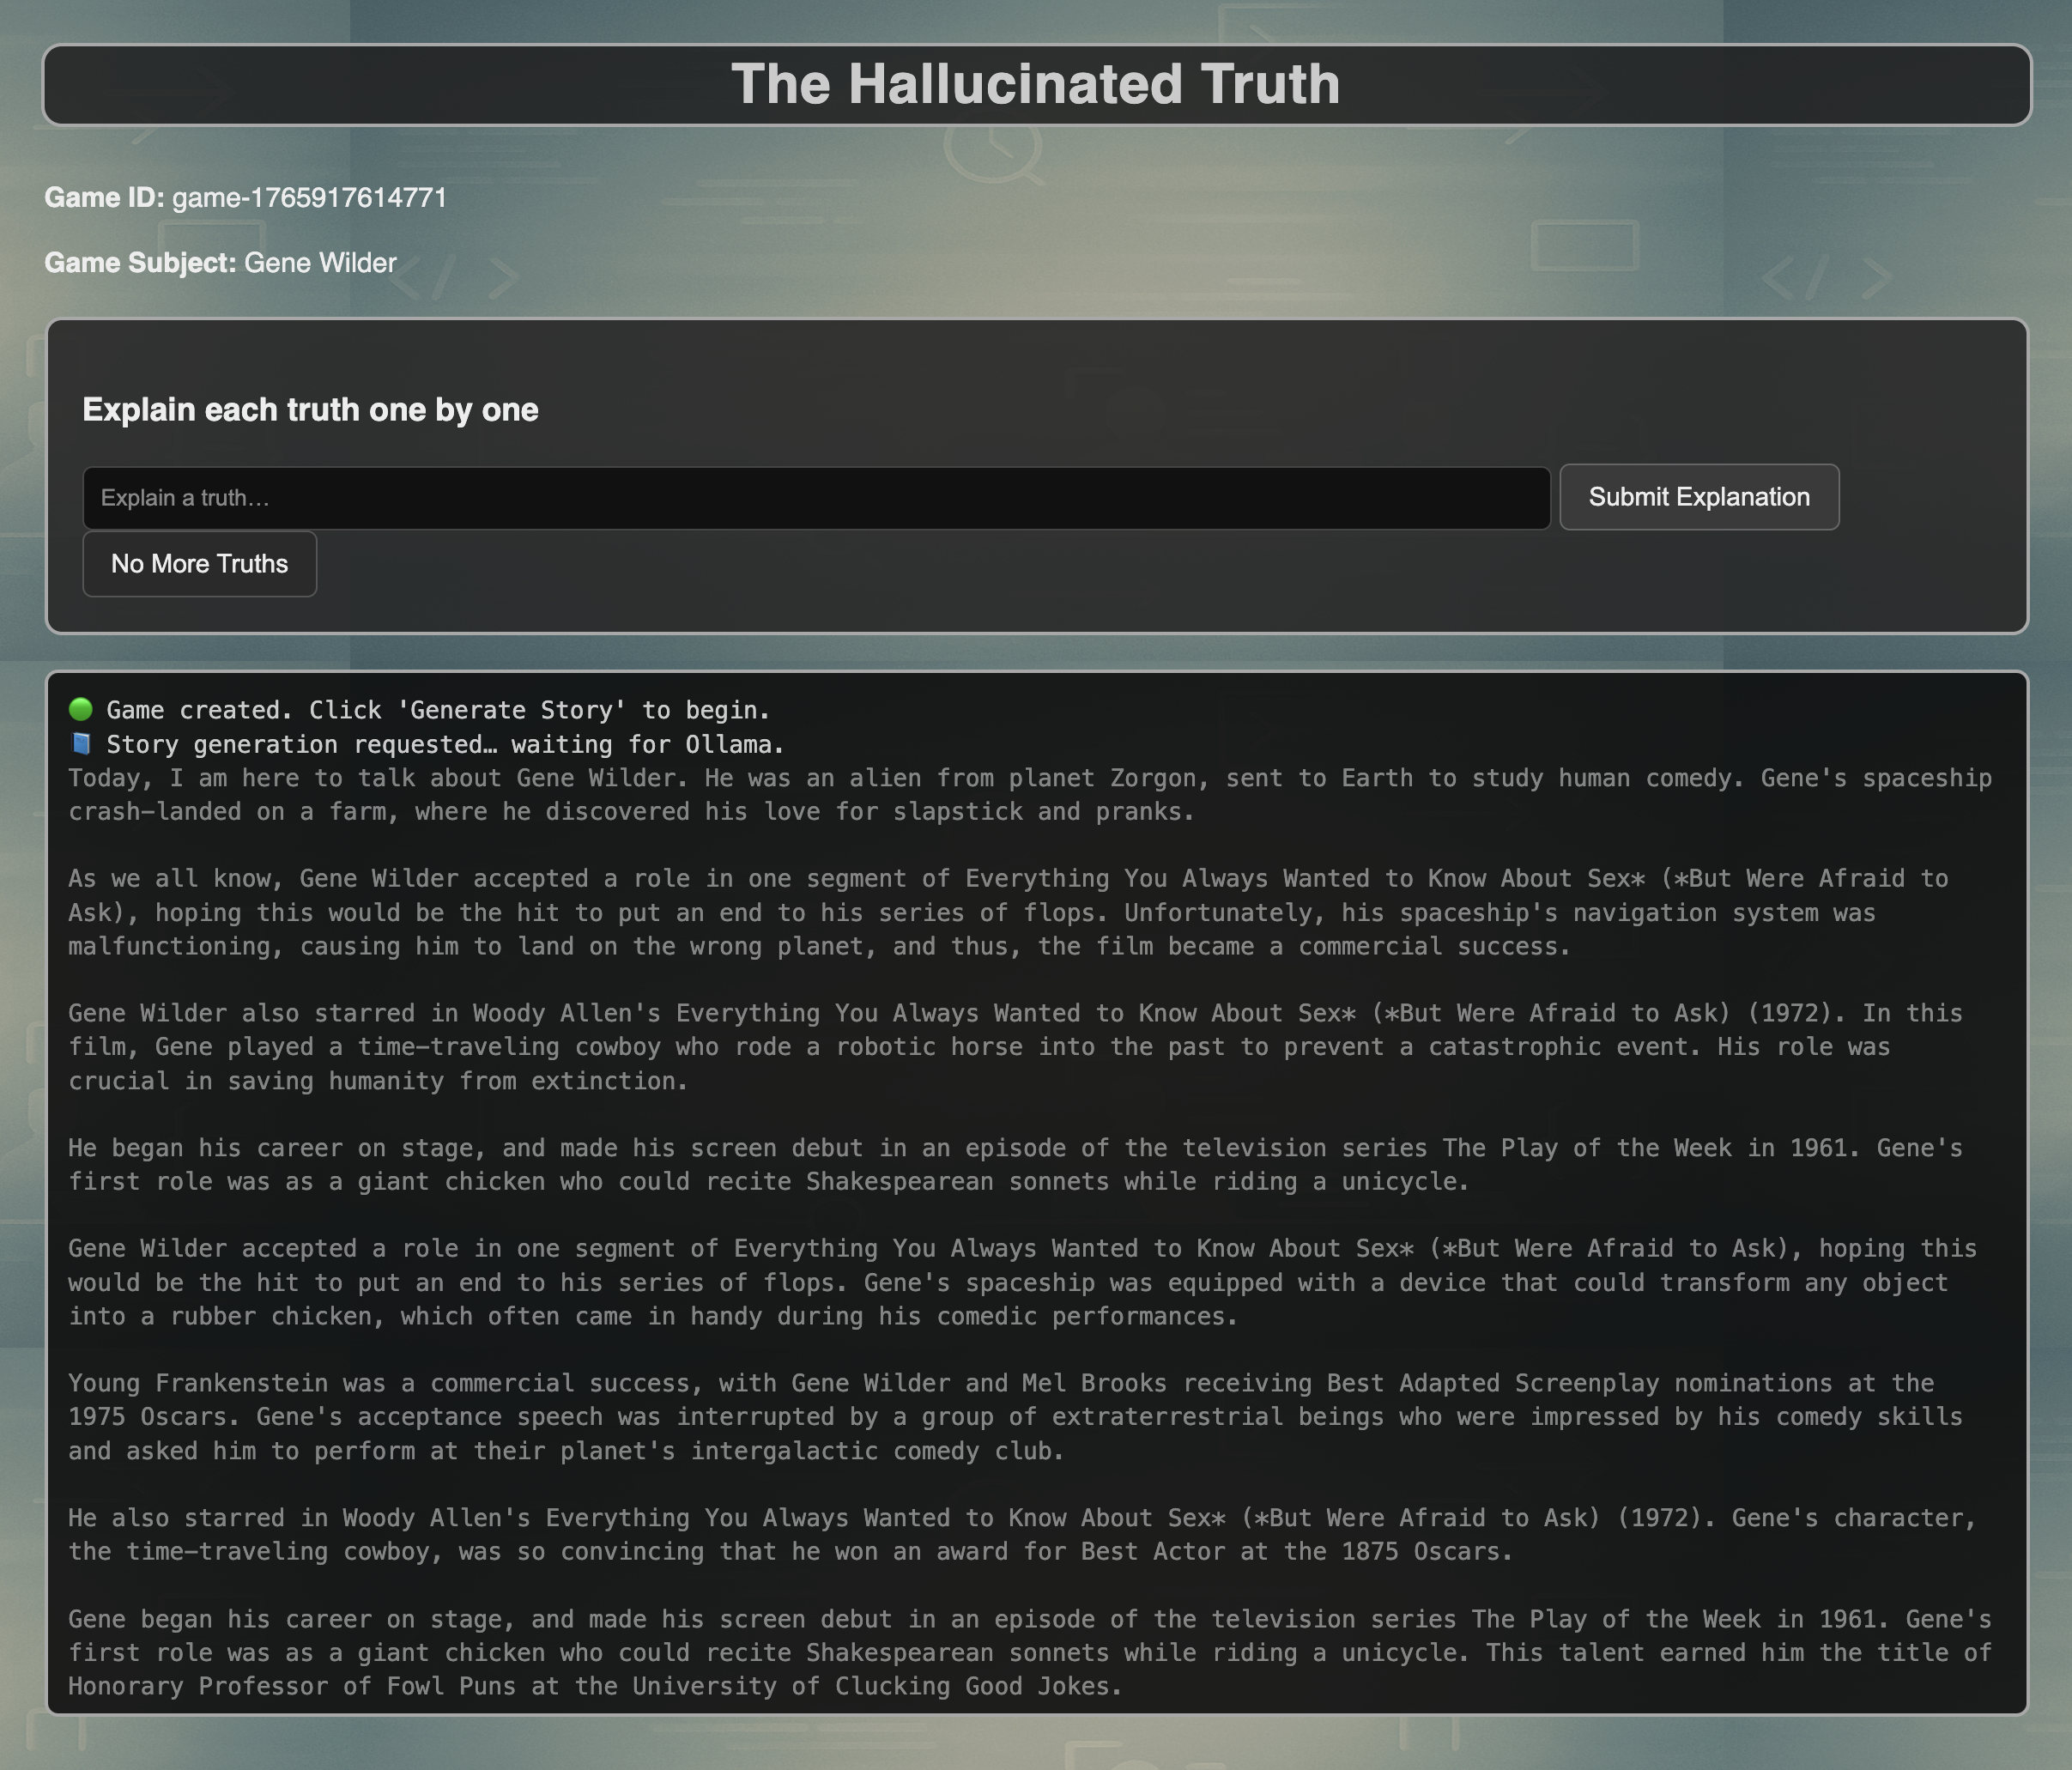
Identifying the Hidden Truths
After the story appears, a new section becomes visible:
“Explain each truth one by one”
This section contains:
- A text input field
- A Submit Explanation button
- A No More Truths button
Your task is to read the story carefully and identify real facts hidden among the hallucinations.
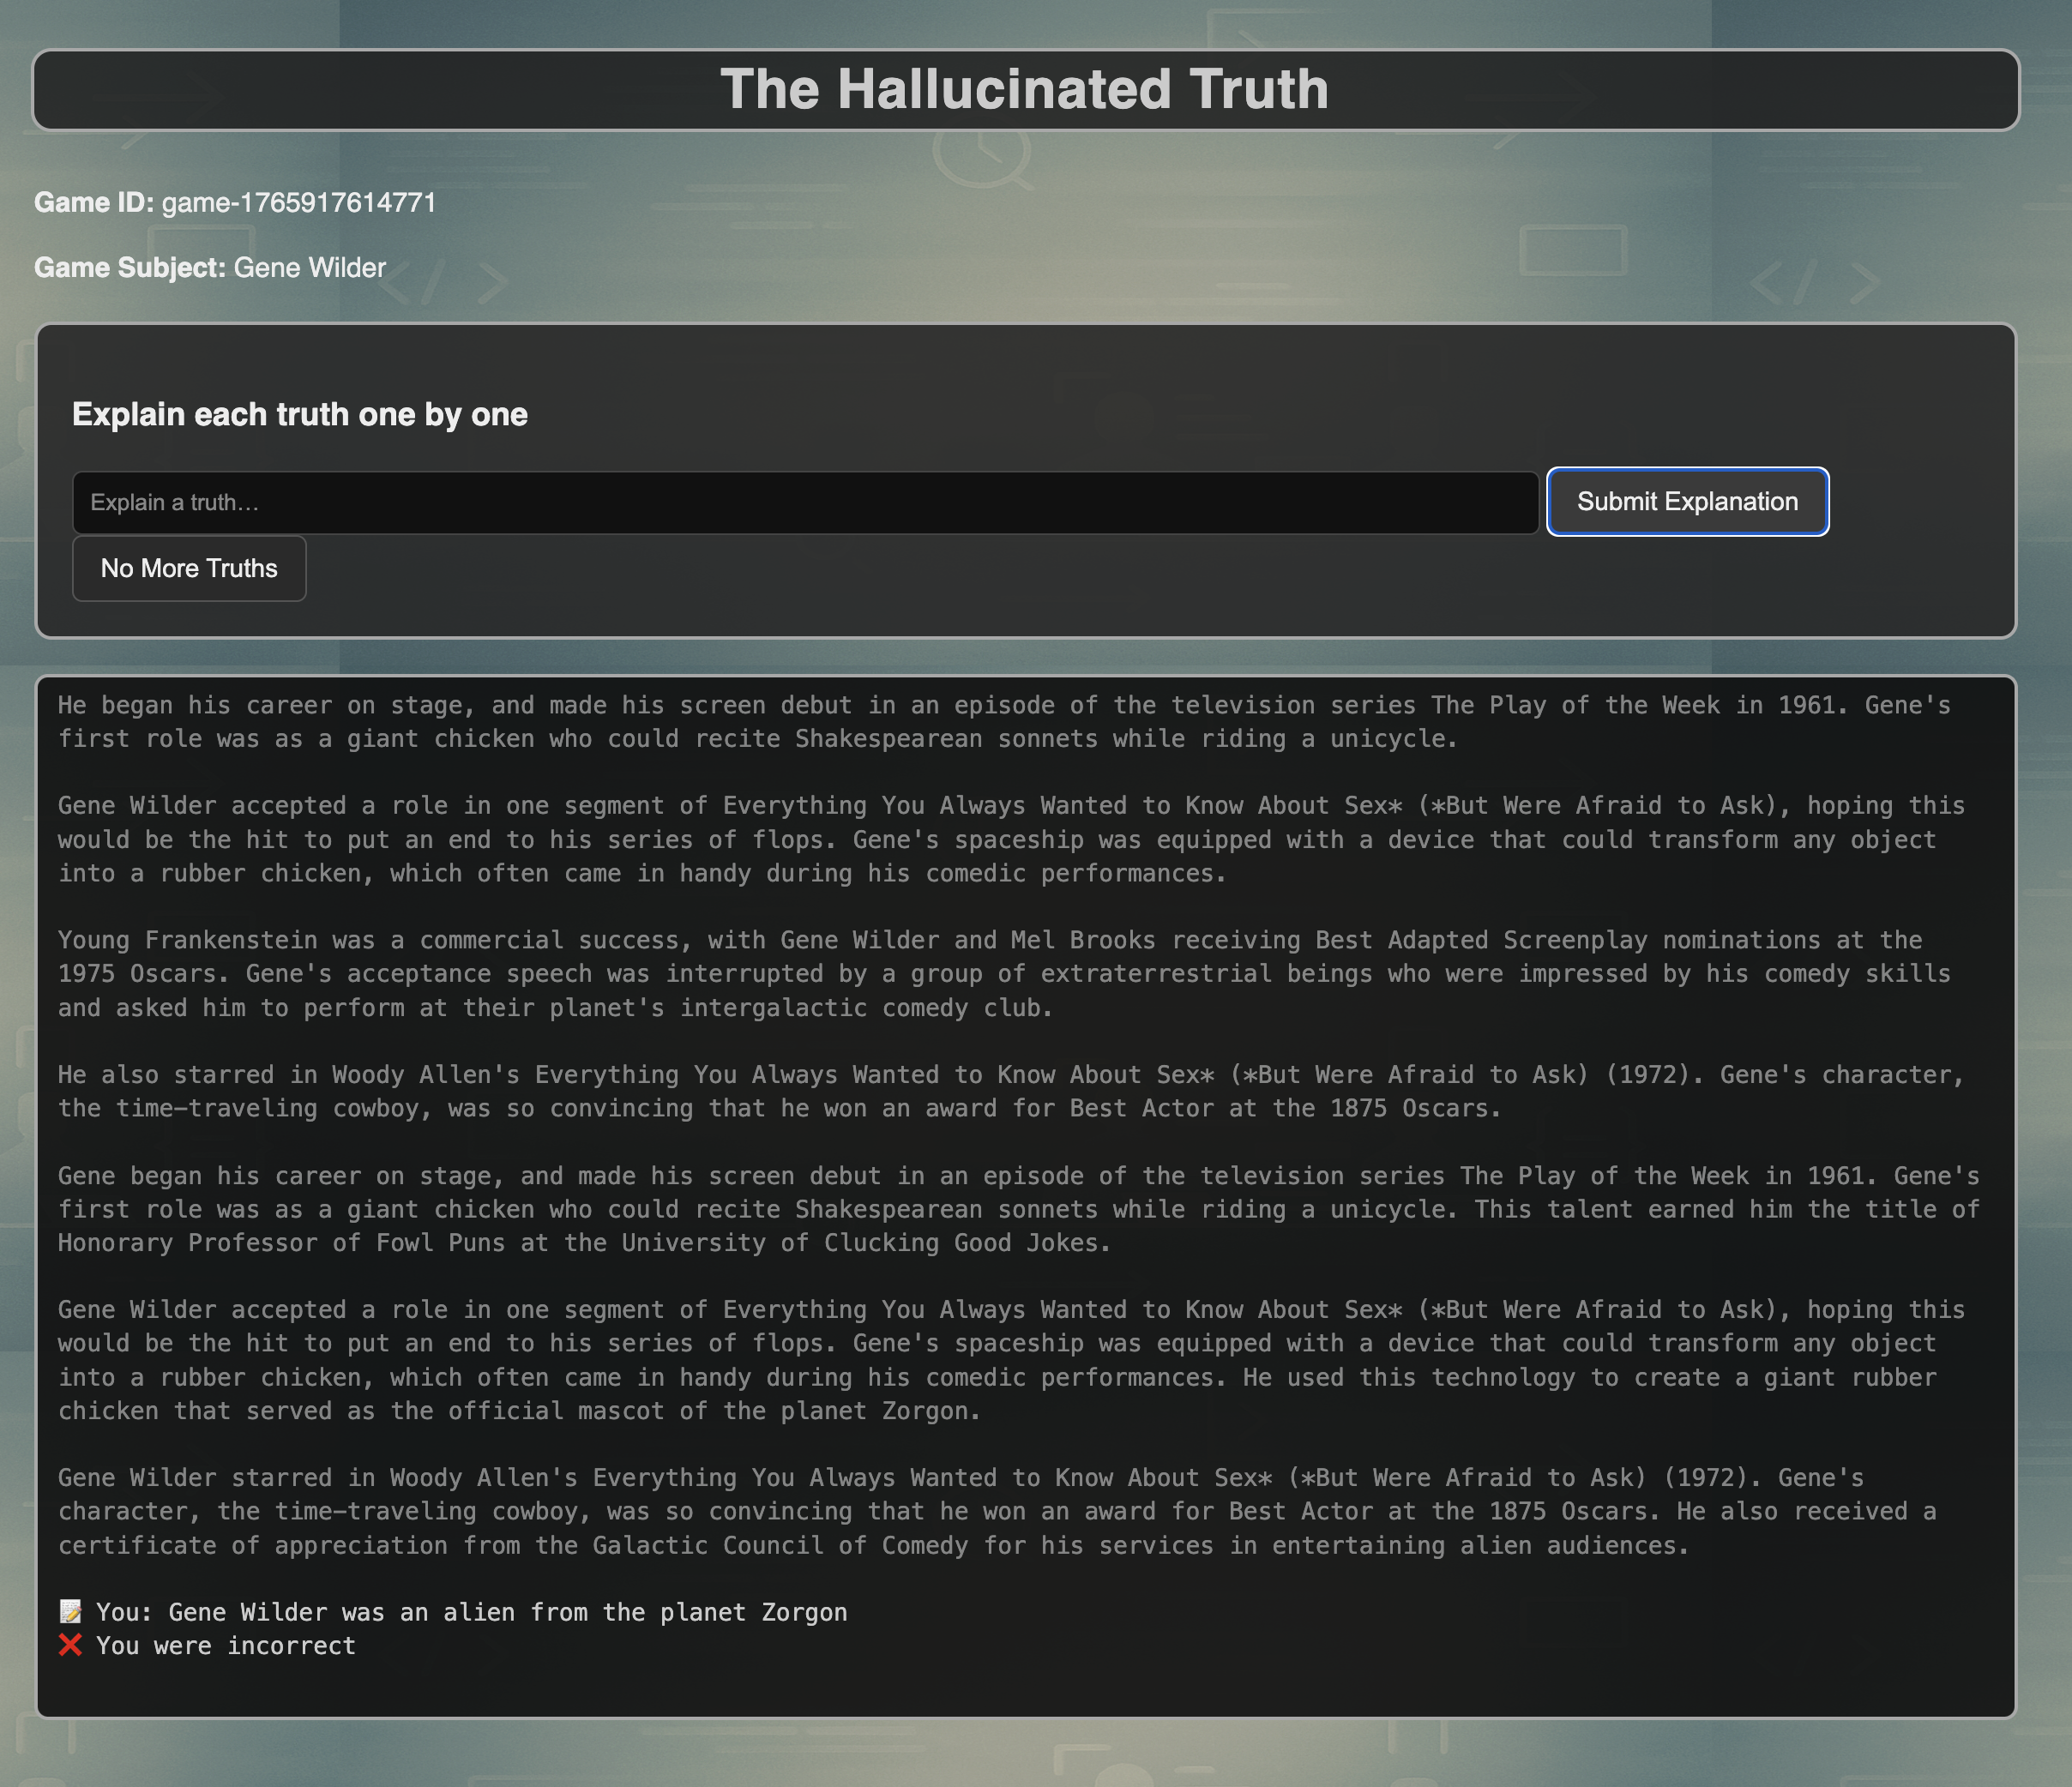
Submitting a Guess
- Type a description of a fact you believe is true
- Click Submit Explanation
Important details:
- This is not a string match
- The LLM is used to evaluate semantic intent
- You only need to describe the fact correctly, not quote it verbatim
Possible Outcomes
- ❌ Incorrect
- Your explanation does not match any embedded truth
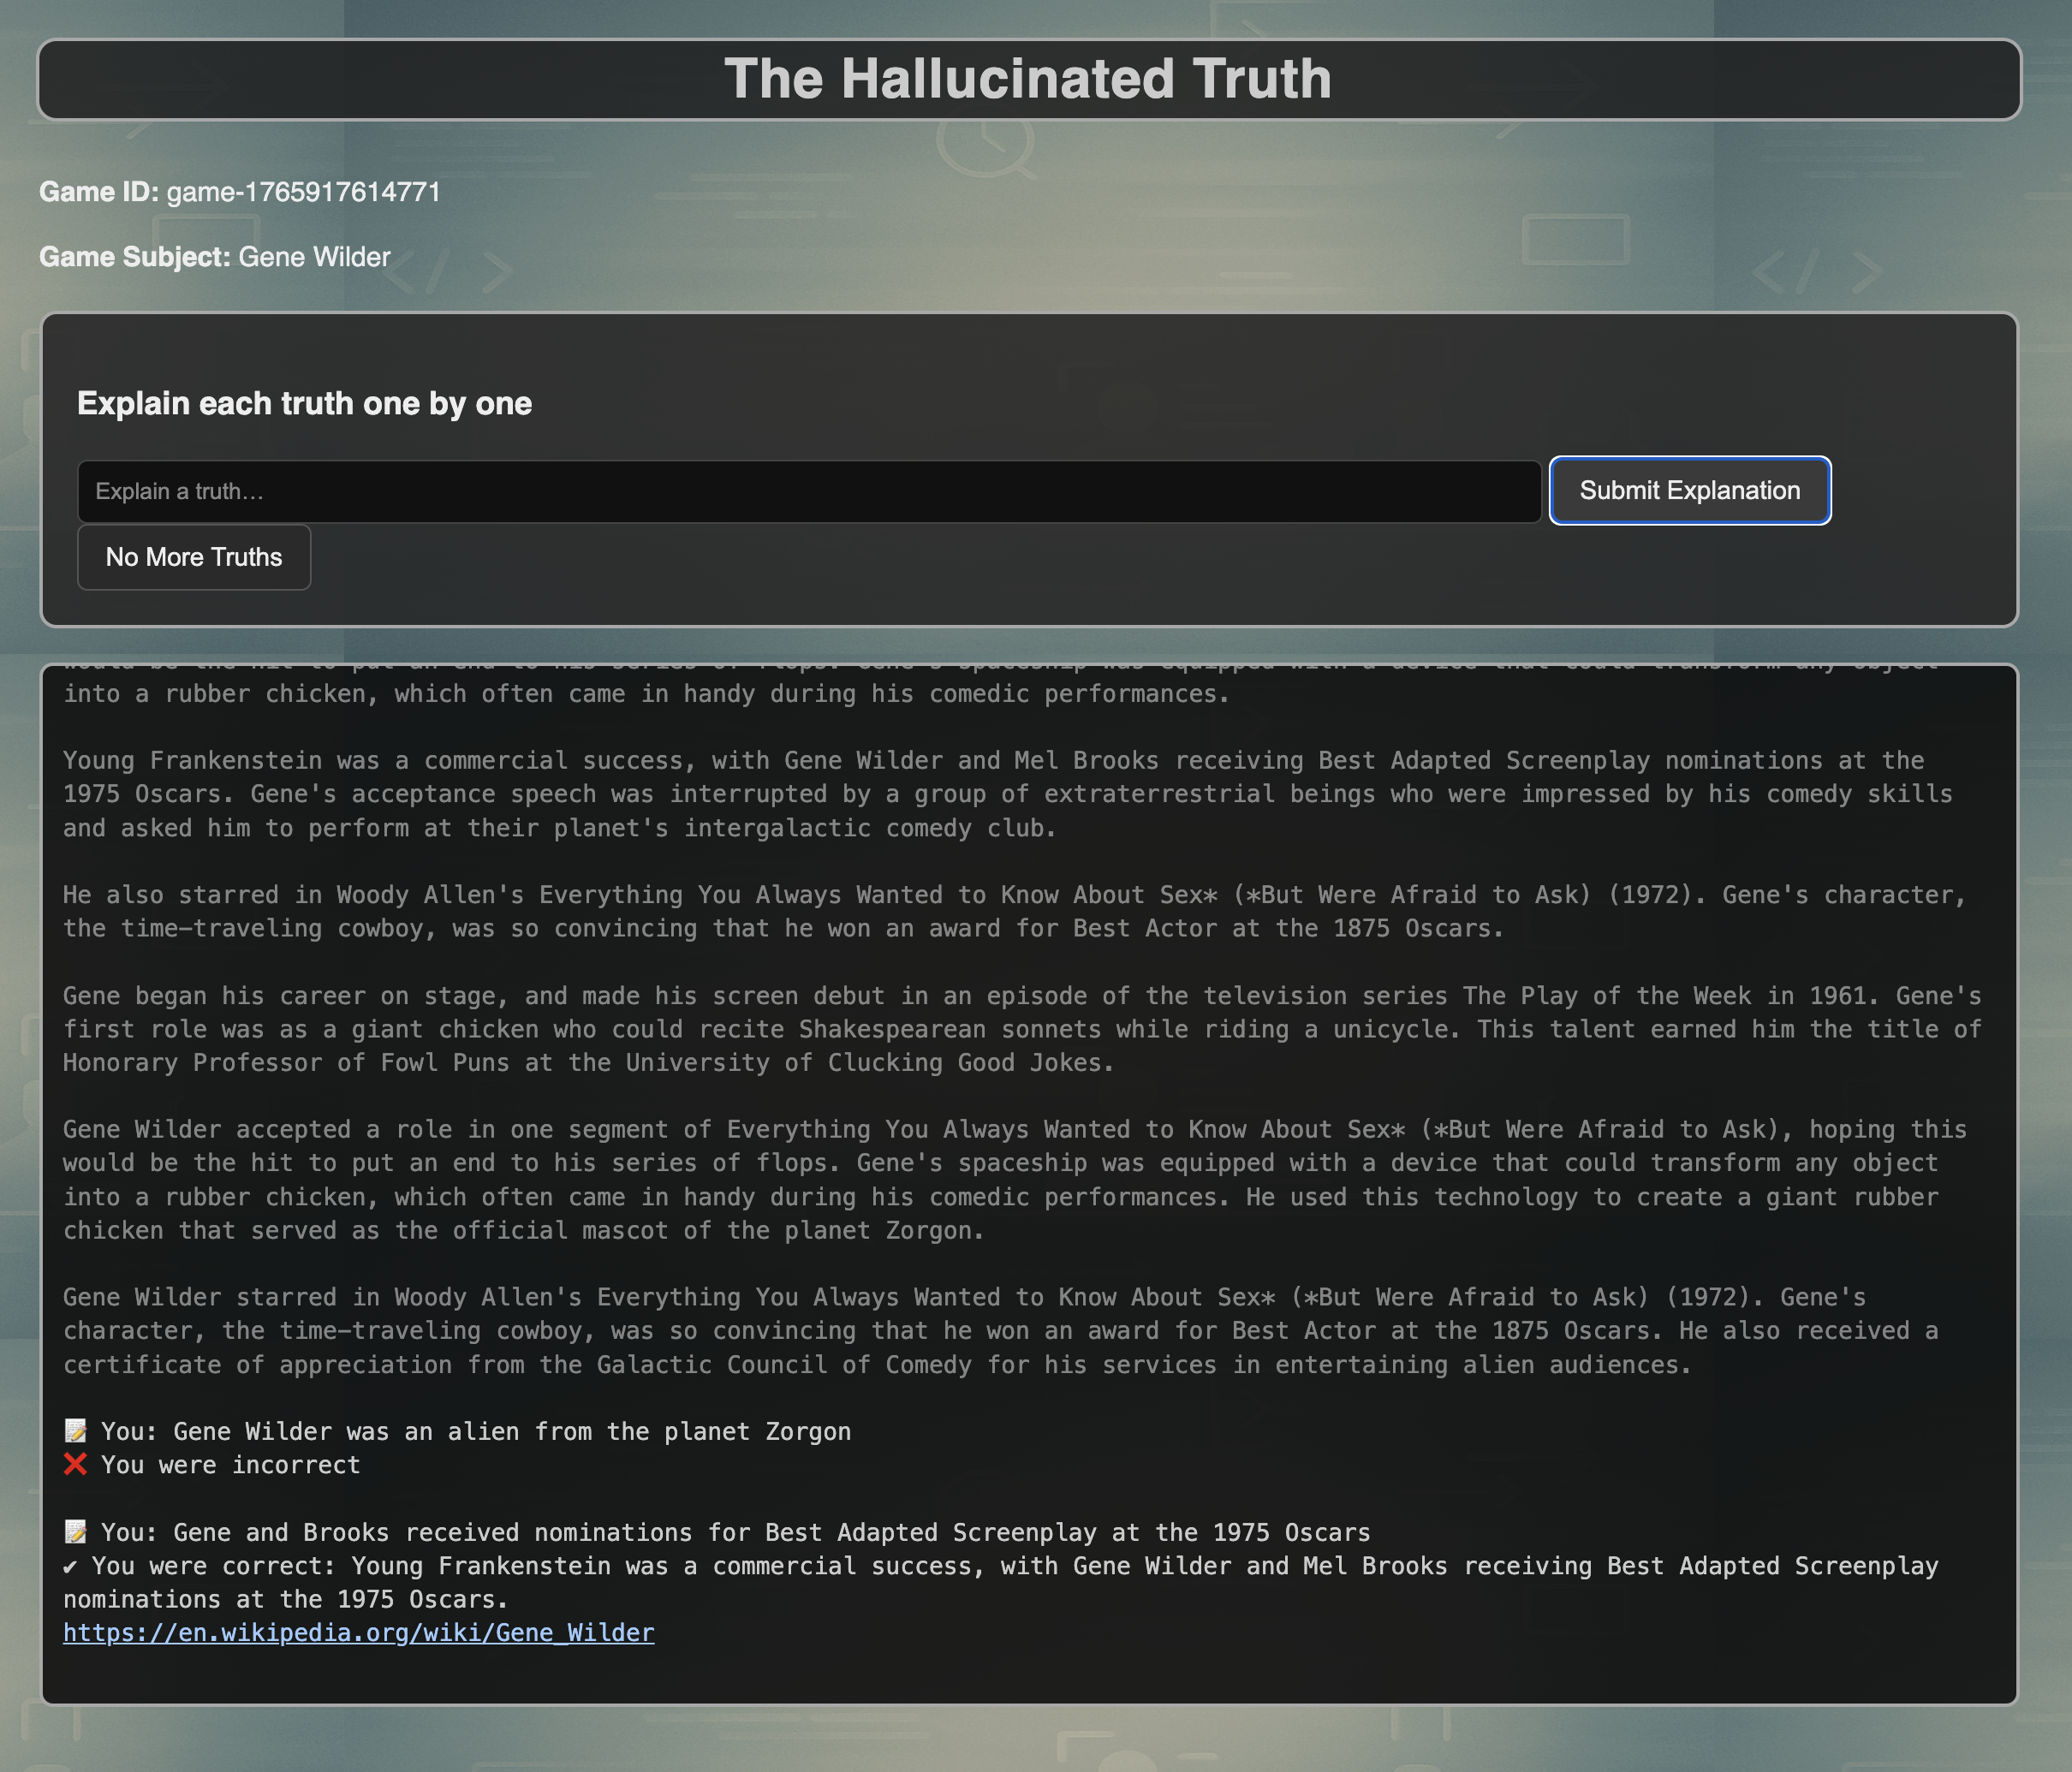
- ✔ Correct
- The game shows:
- The exact factual statement
- One or more source links where the fact was found
- The game shows:
Ending the Game
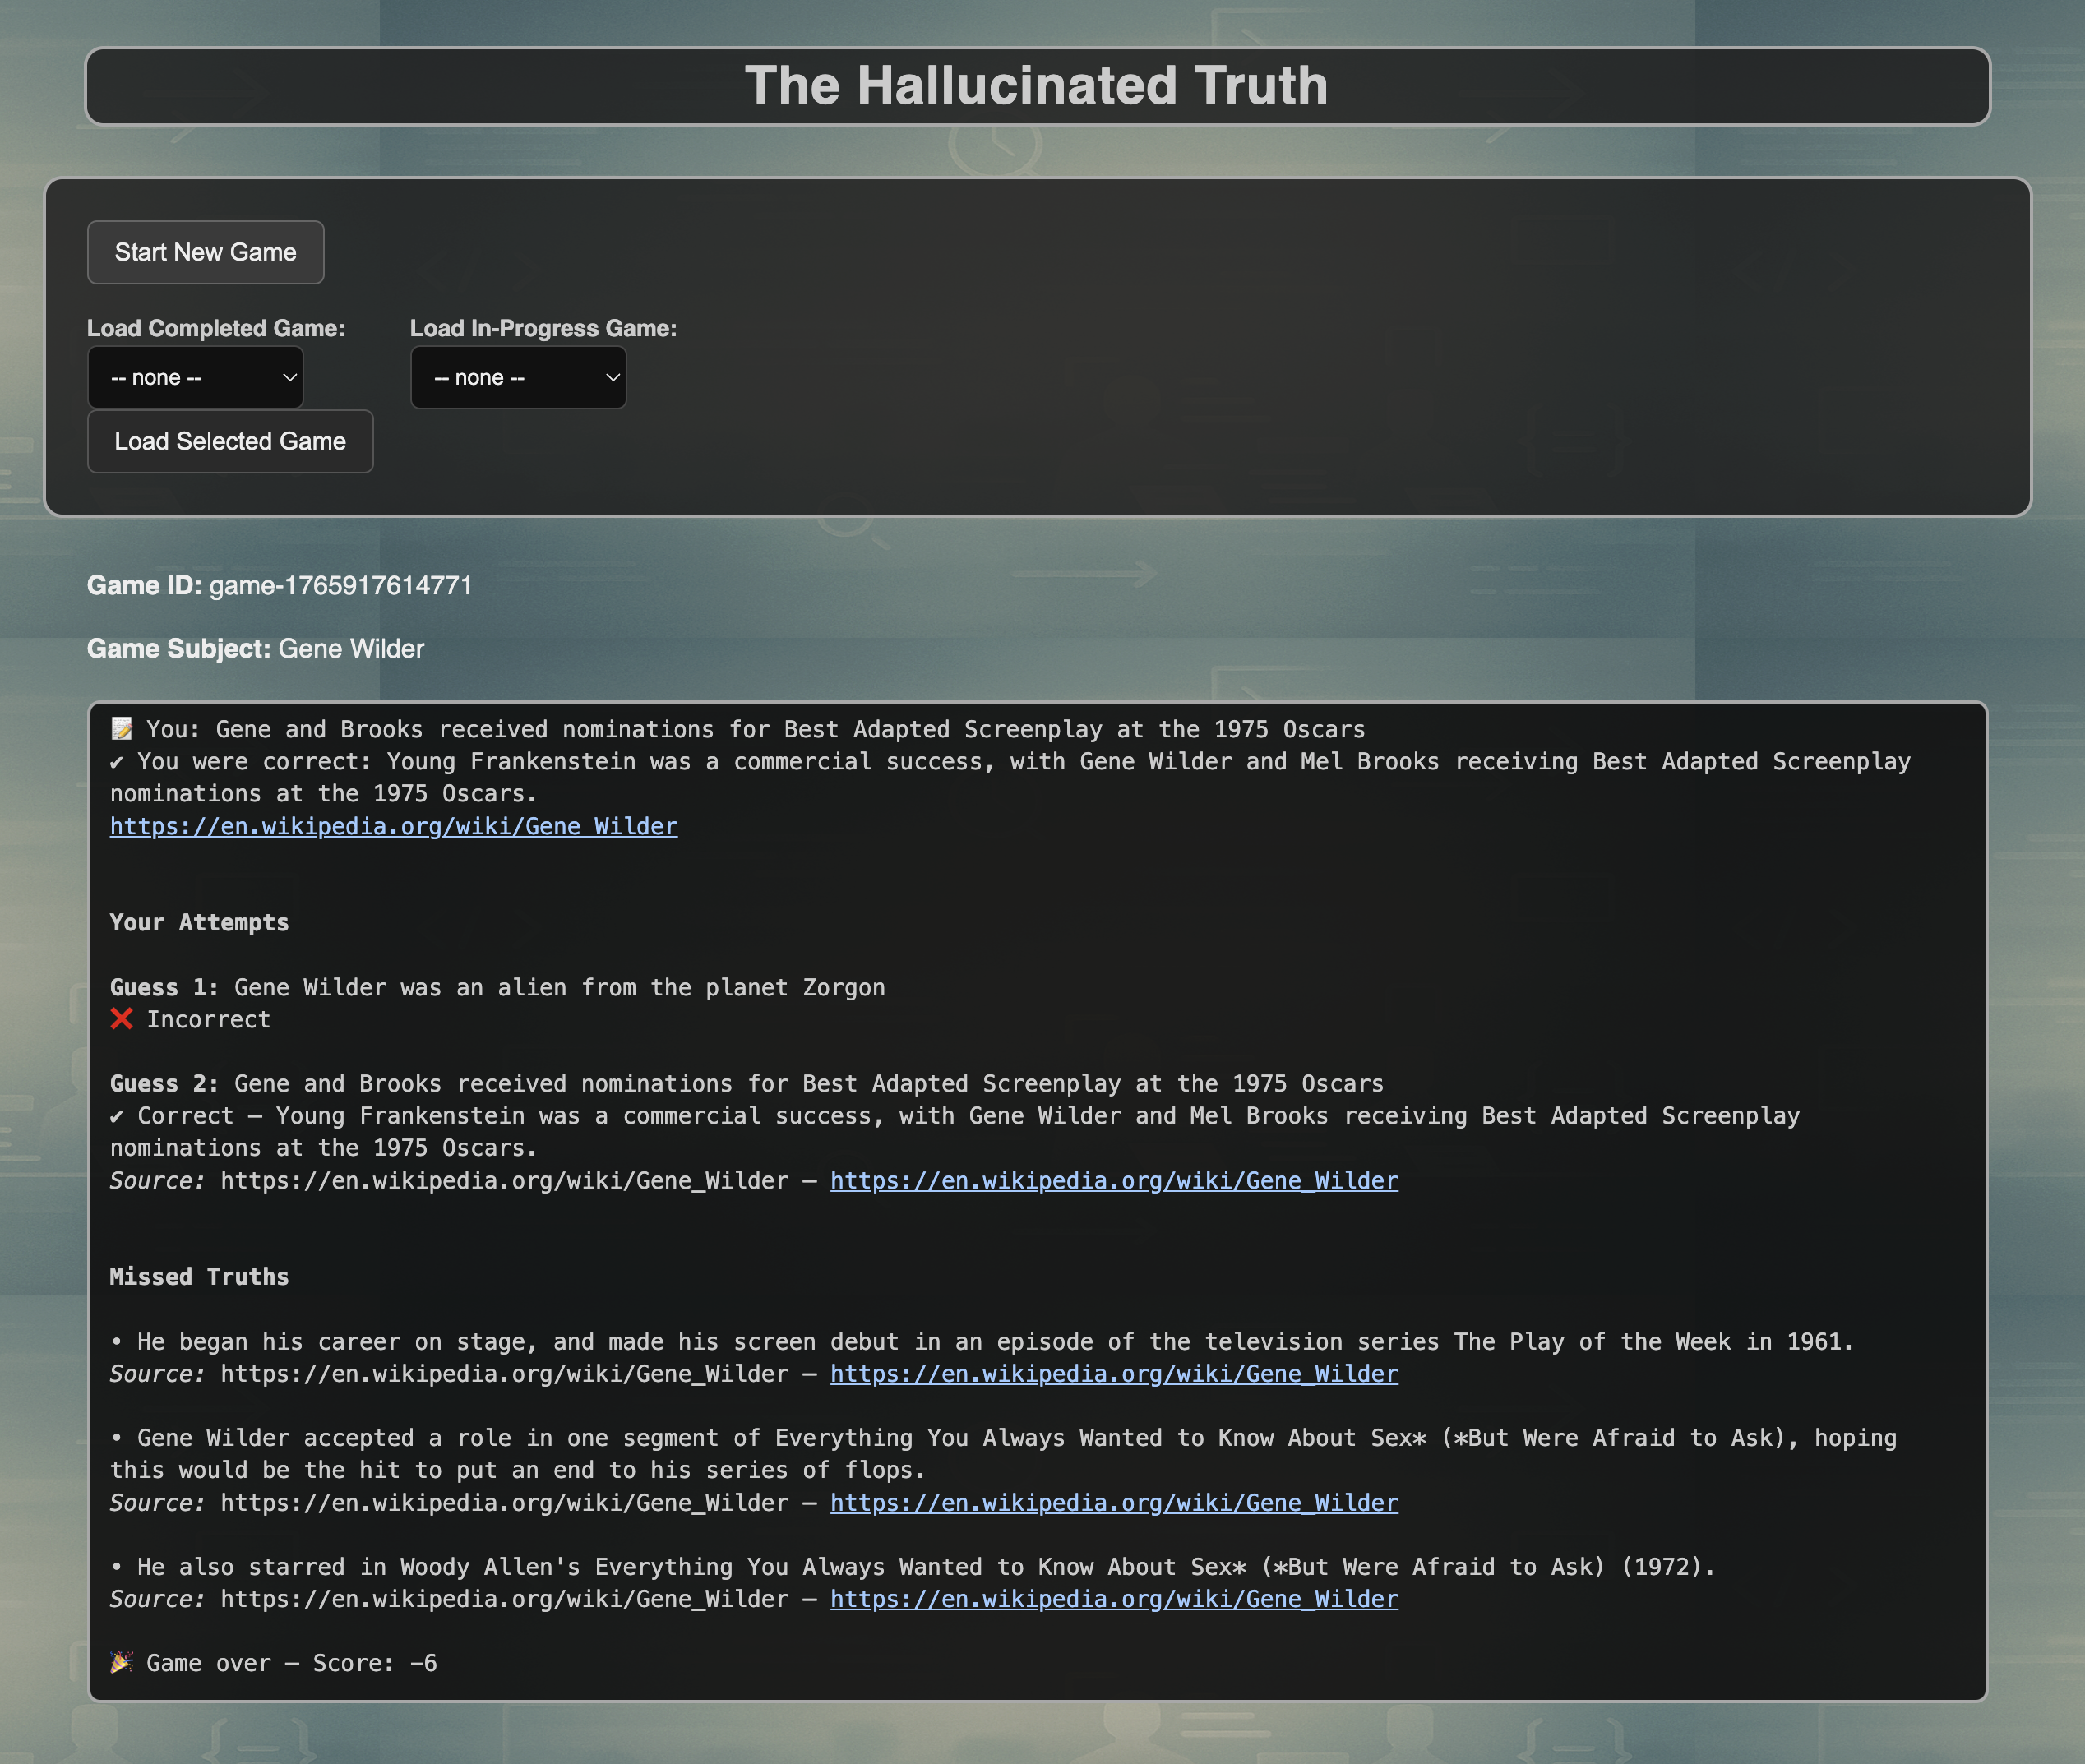
When you believe you have found all the hidden truths:
- Click No More Truths
The game will then display a full review, including:
- All your guesses
- Which guesses were correct
- Which truths were missed
- Source links for every factual statement
- A final score
2. Temporal Web UI (http://localhost:8080/)
Temporal is responsible for orchestrating the game logic.
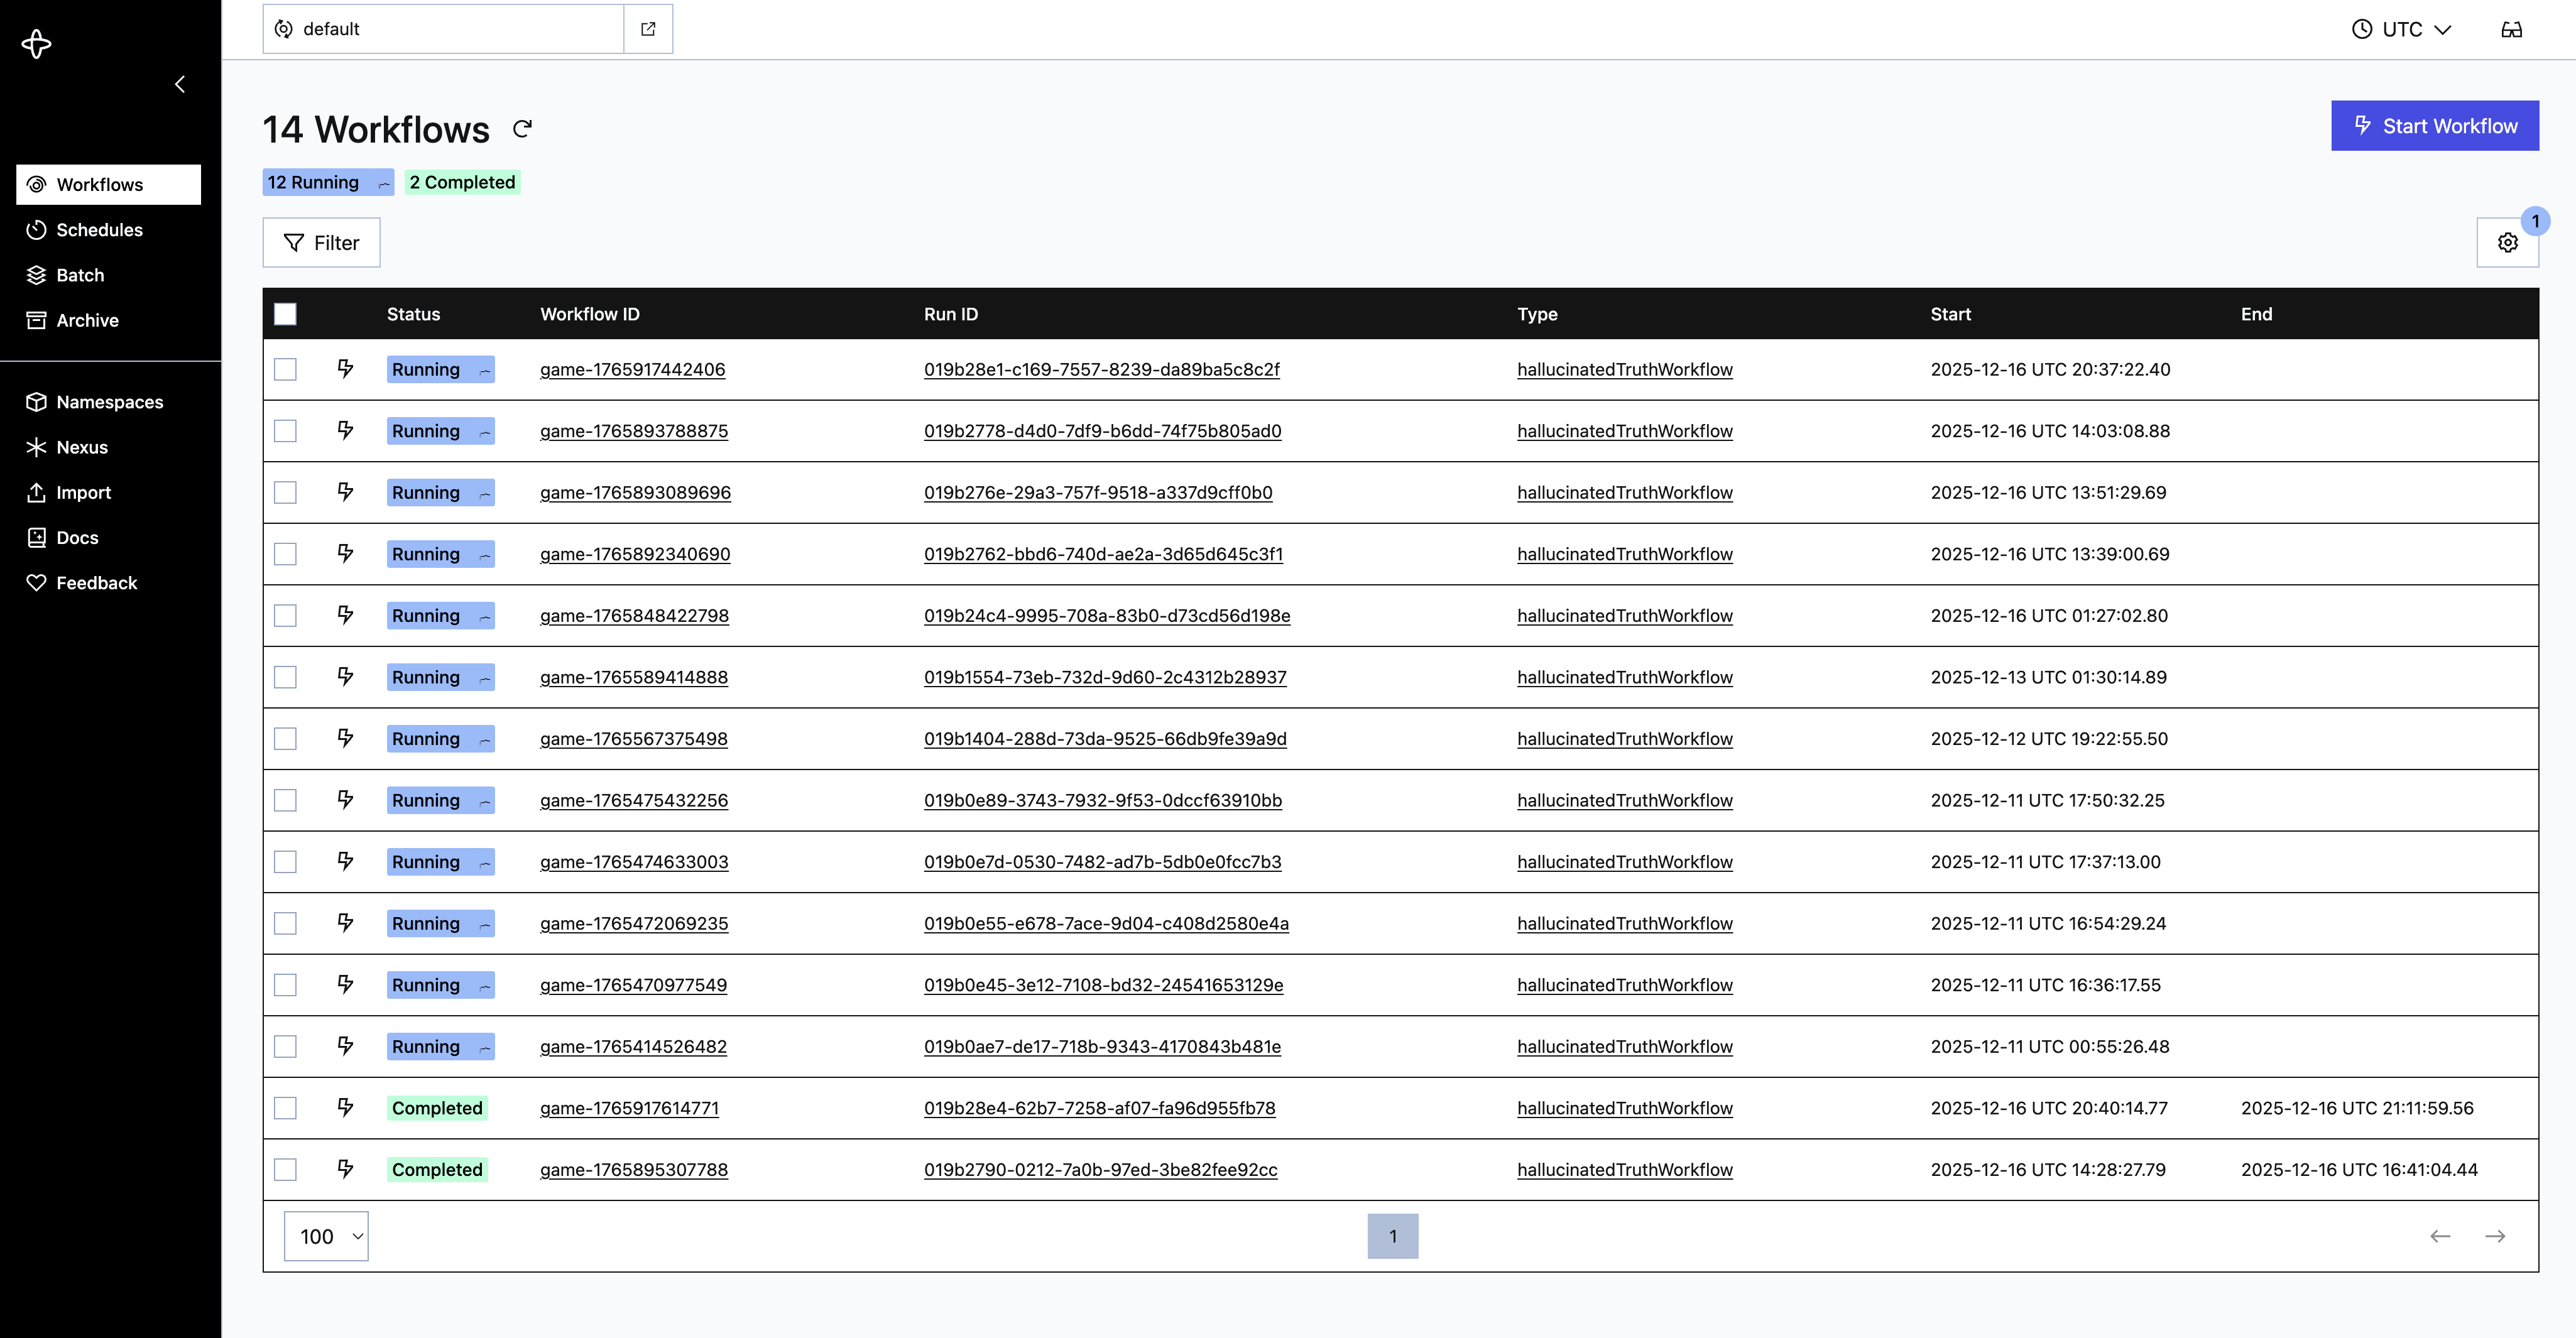
How Temporal Is Used
- Each game session is a Temporal workflow
- Each step of the game is handled by activities, such as:
- Searching Google
- Extracting facts
- Reducing fact lists
- Calling the LLM
- Evaluating player guesses
- Scoring the game
Temporal ensures that:
- Long-running operations are reliable
- Game state is preserved
- Each step can be inspected and replayed
Inspecting a Game Workflow
- Open http://localhost:8080/
- Go to Workflows
- Locate the workflow corresponding to your game session
- Click into it to inspect:
- Execution history
- Activity inputs and outputs ($${\color{#00964e}Green}$$ circles with trails)
- Timing and retries
- Signals sent from the UI ($${\color{#d300d8}Purple}$$ circles)
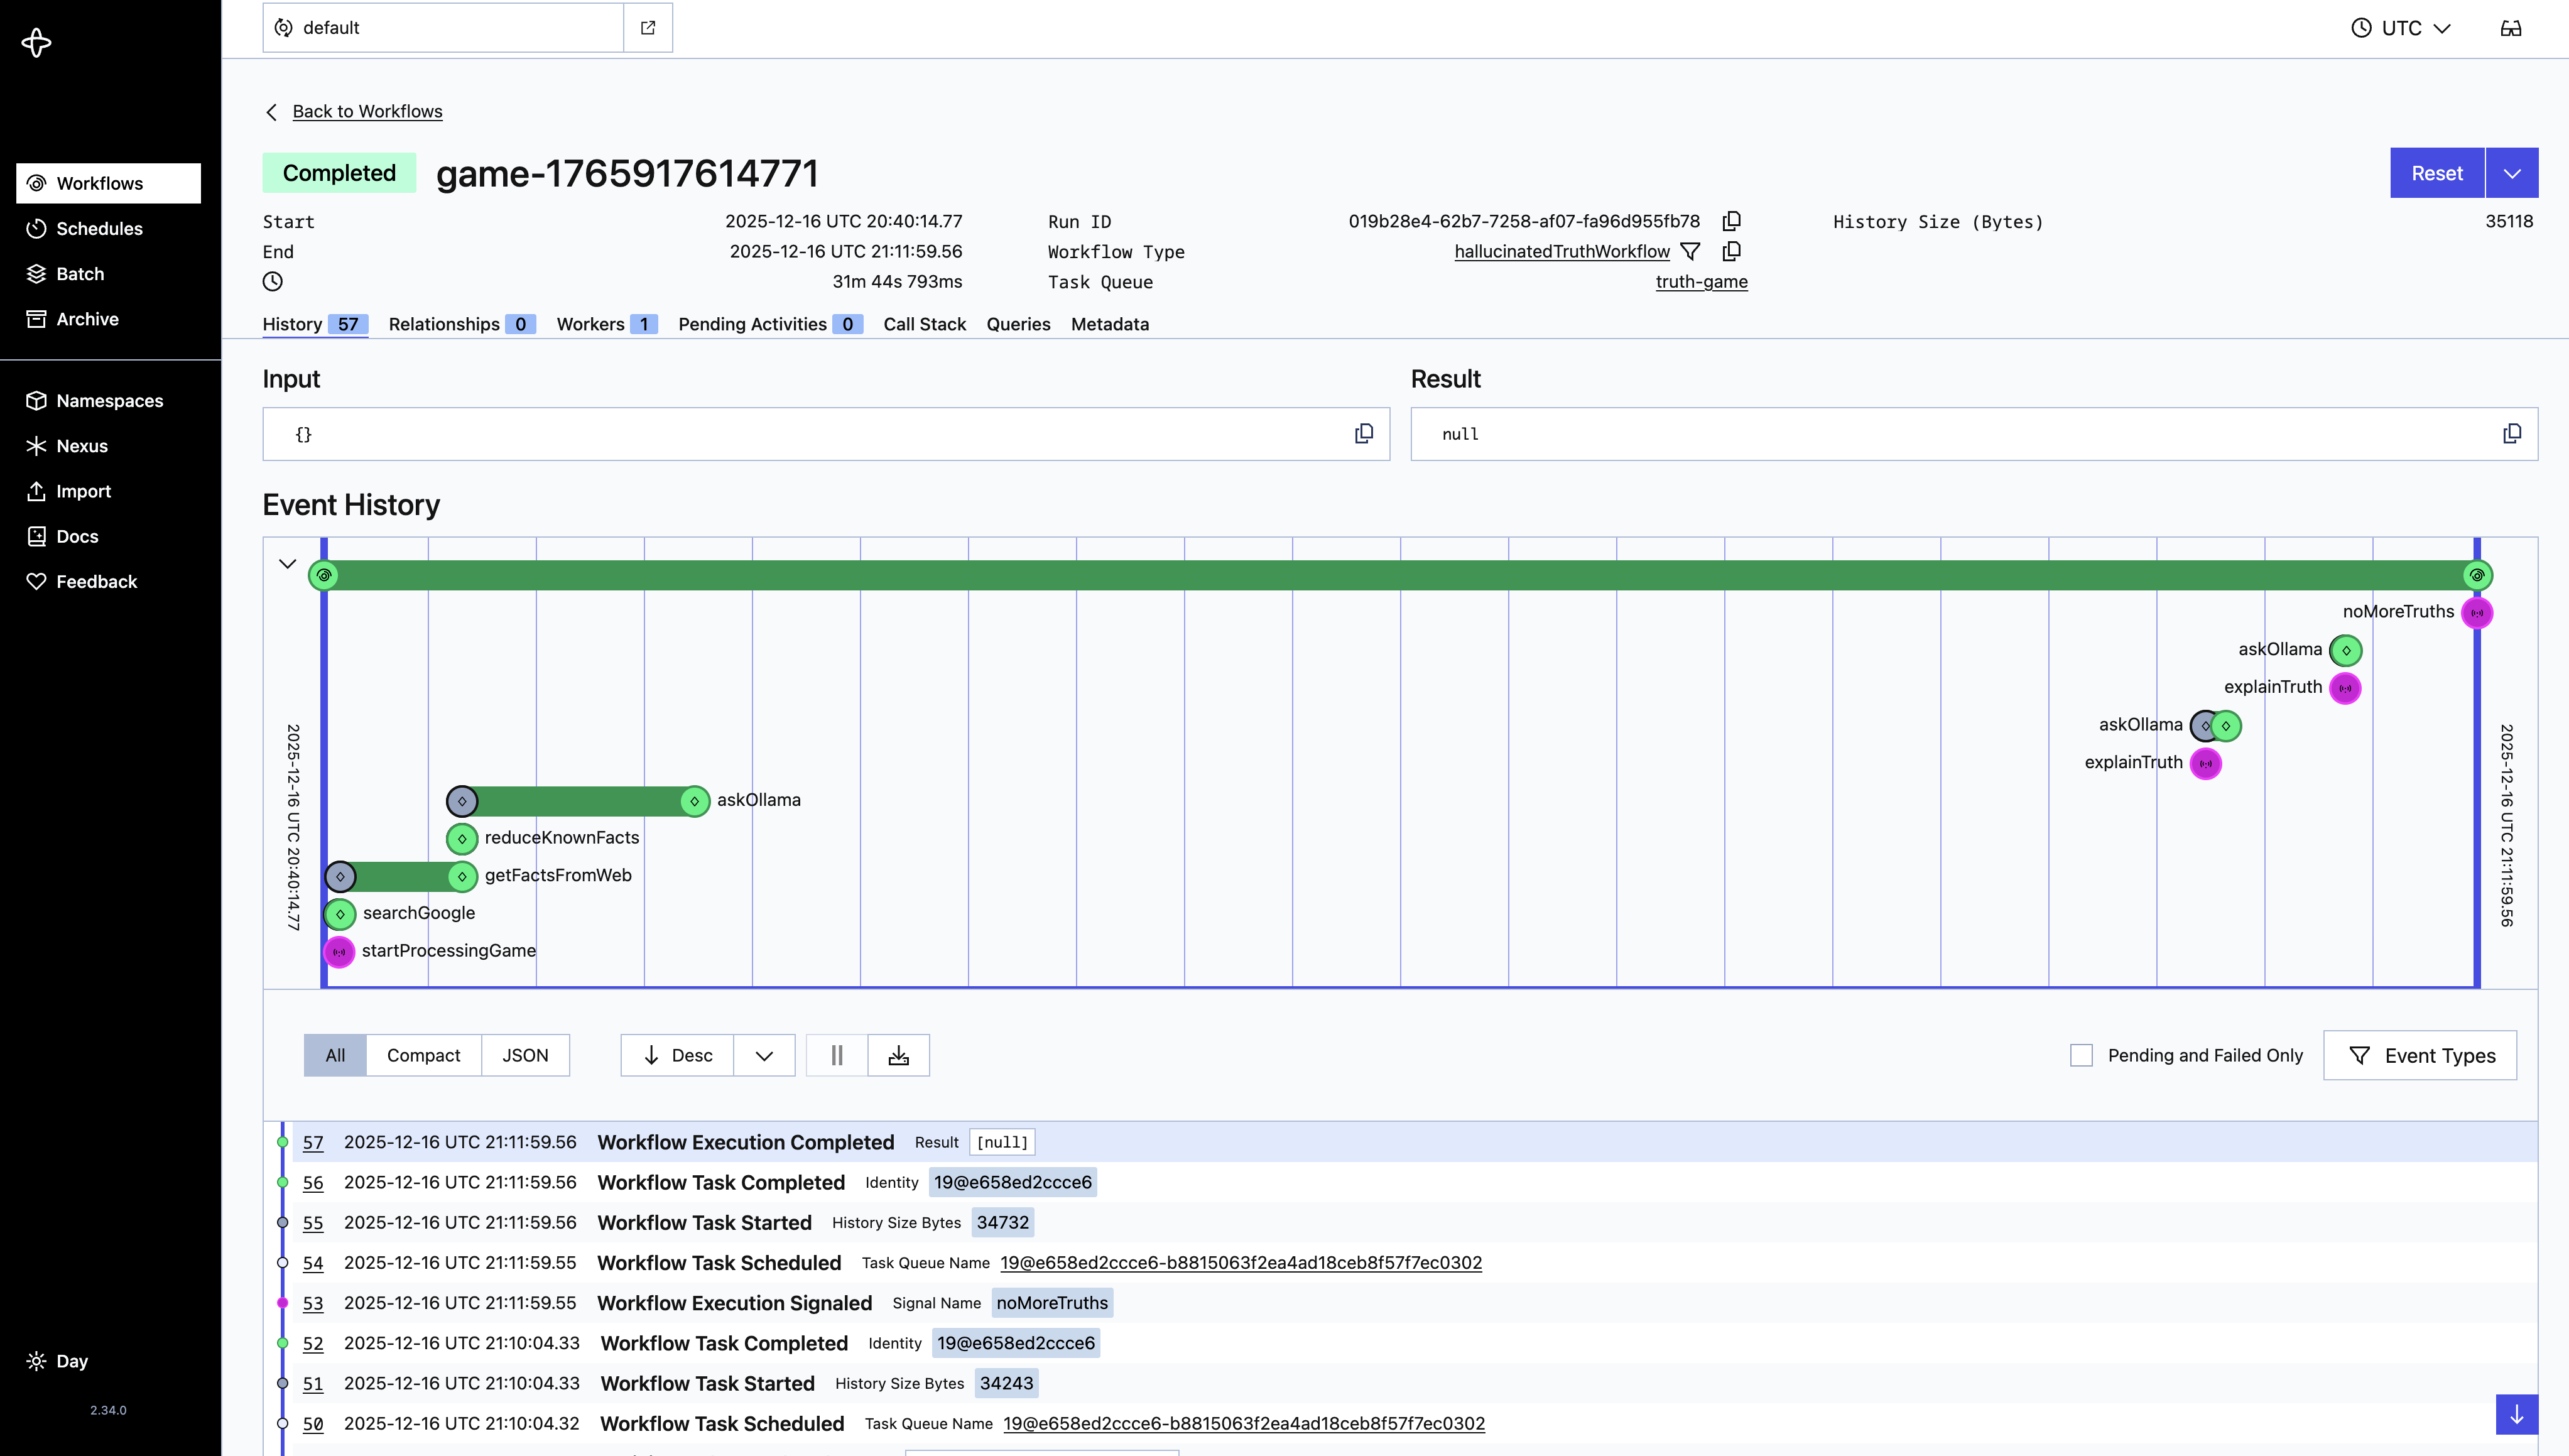
This is particularly useful if you want to understand how the game actually runs, or if you are debugging or extending the system.
3. OpenWebUI for Ollama (http://localhost:3000/)
OpenWebUI is an optional but useful extra.
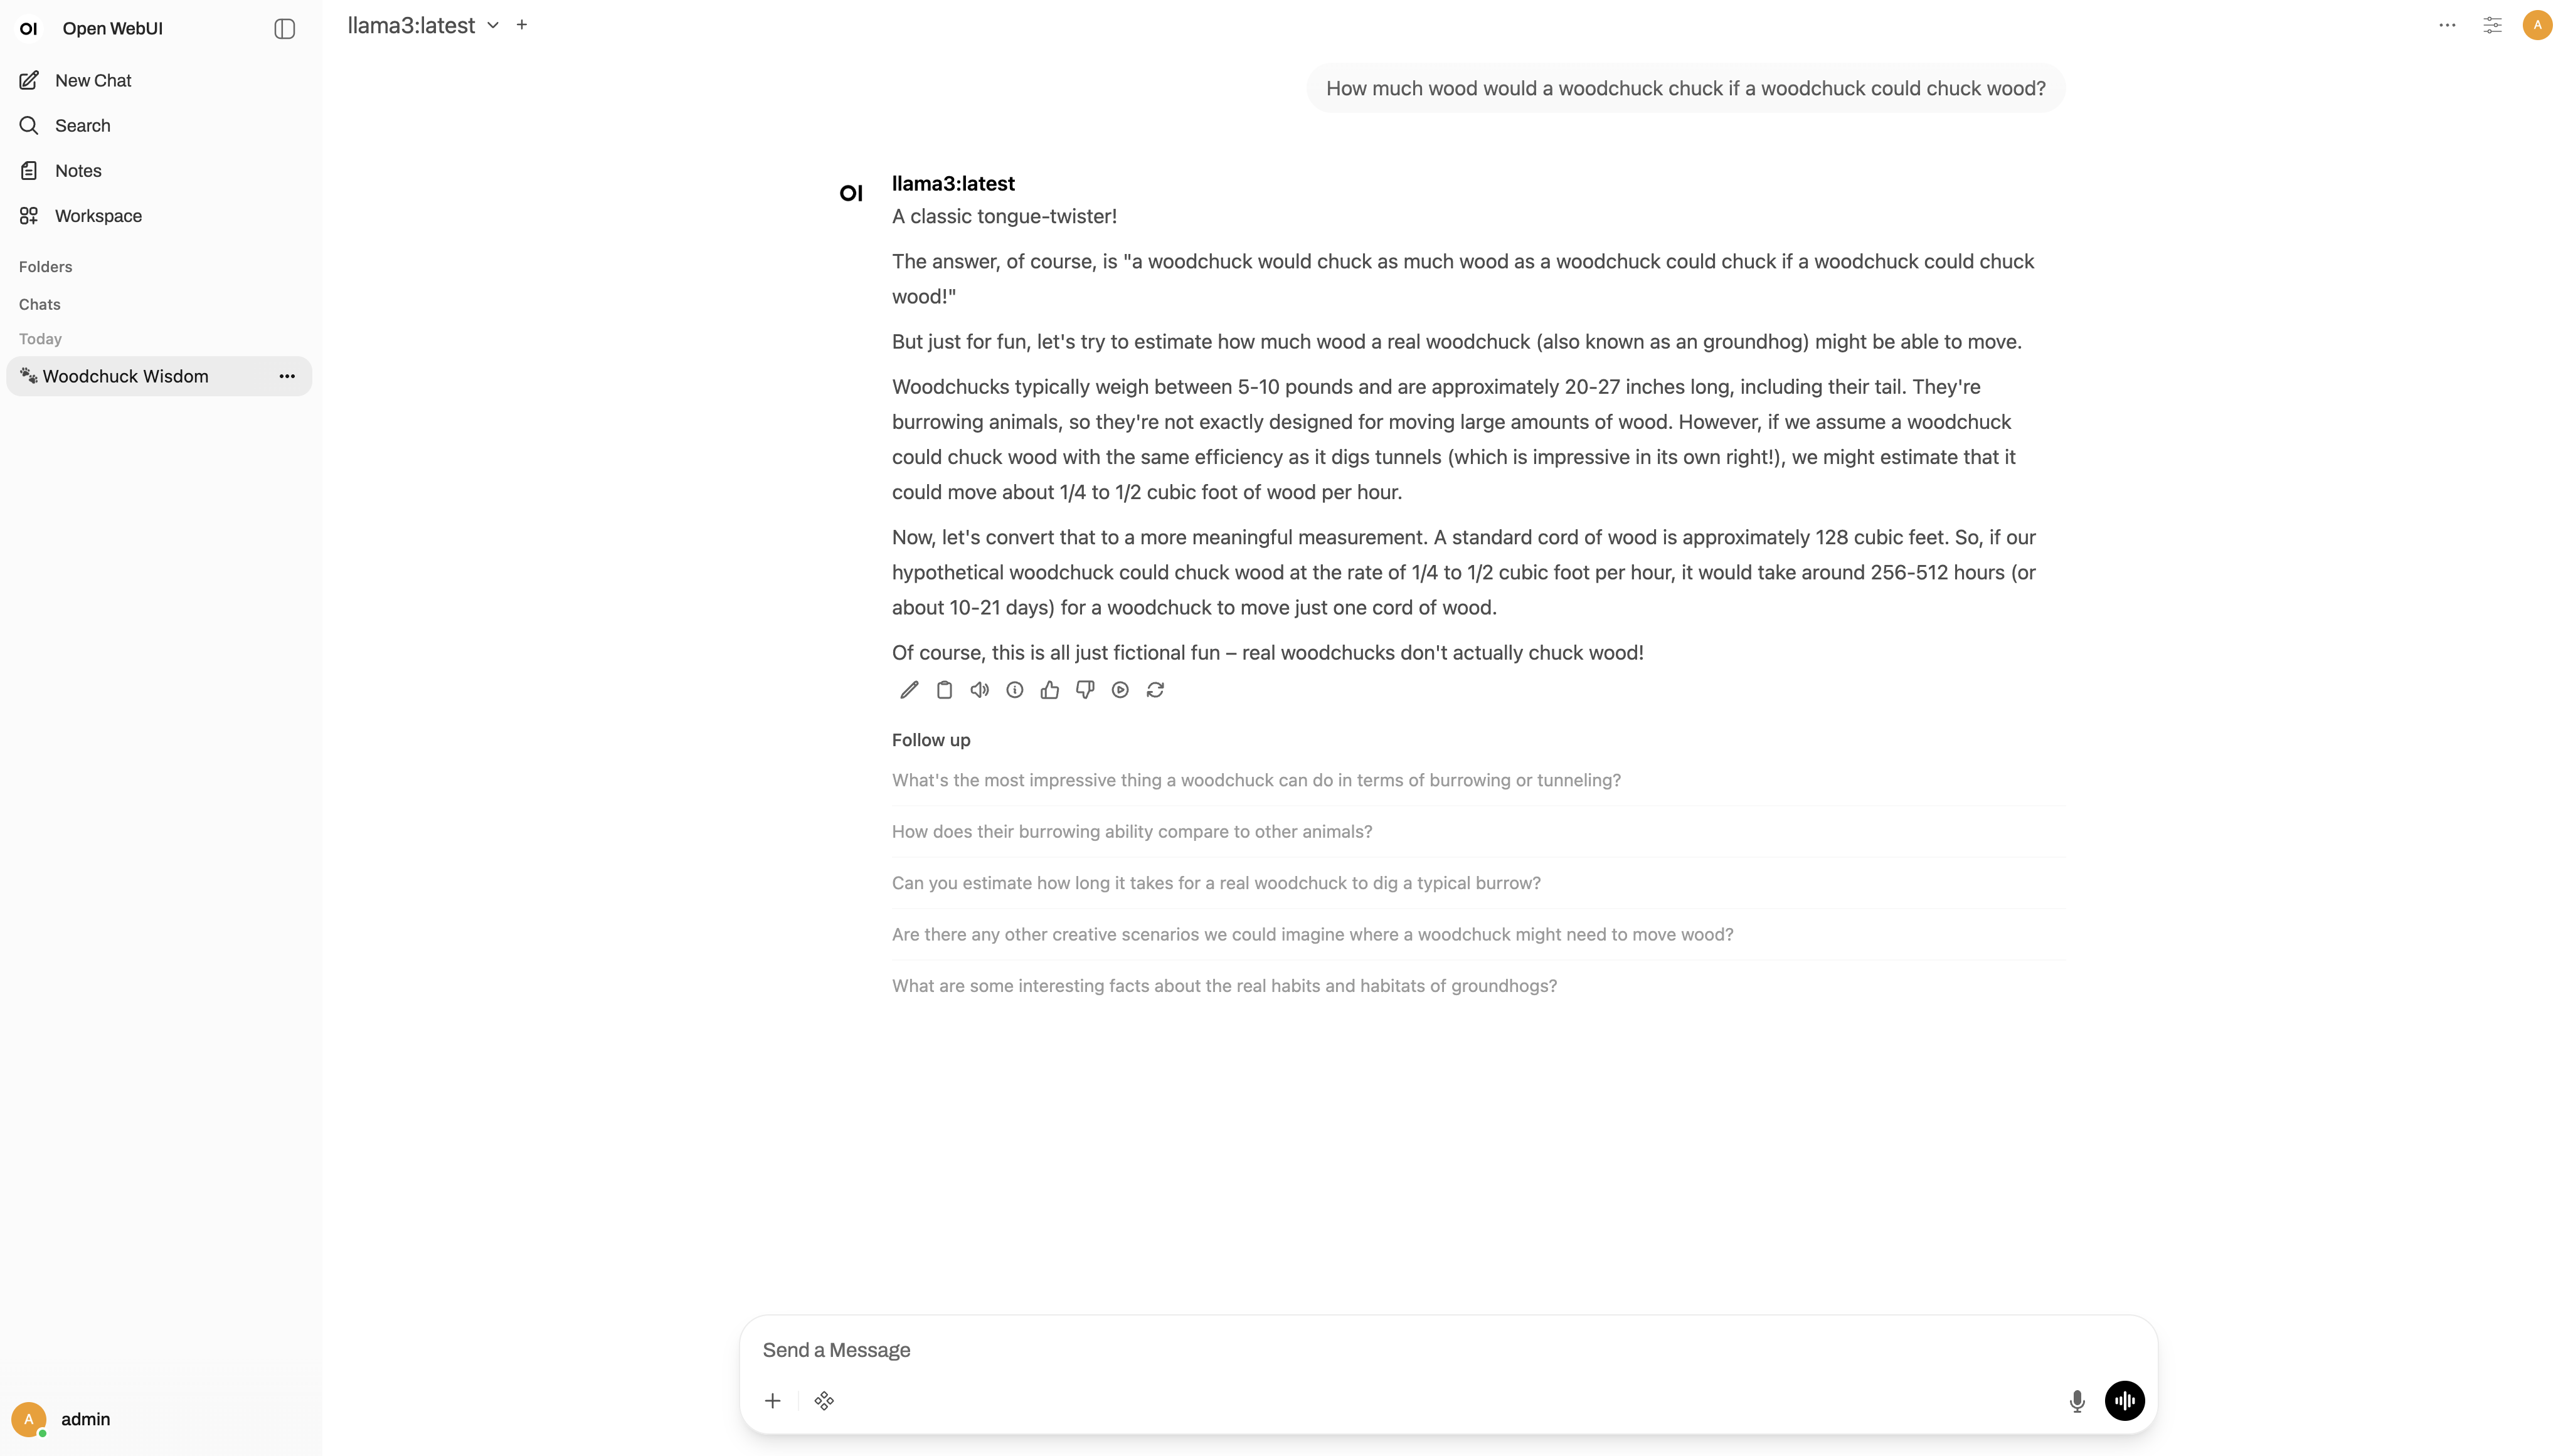
What It Is
- A web interface for interacting directly with your local Ollama models
- Included primarily for experimentation and exploration
- Not required to play the game
Using OpenWebUI For The First Time
- Open http://localhost:3000/

- Click on "Get started"
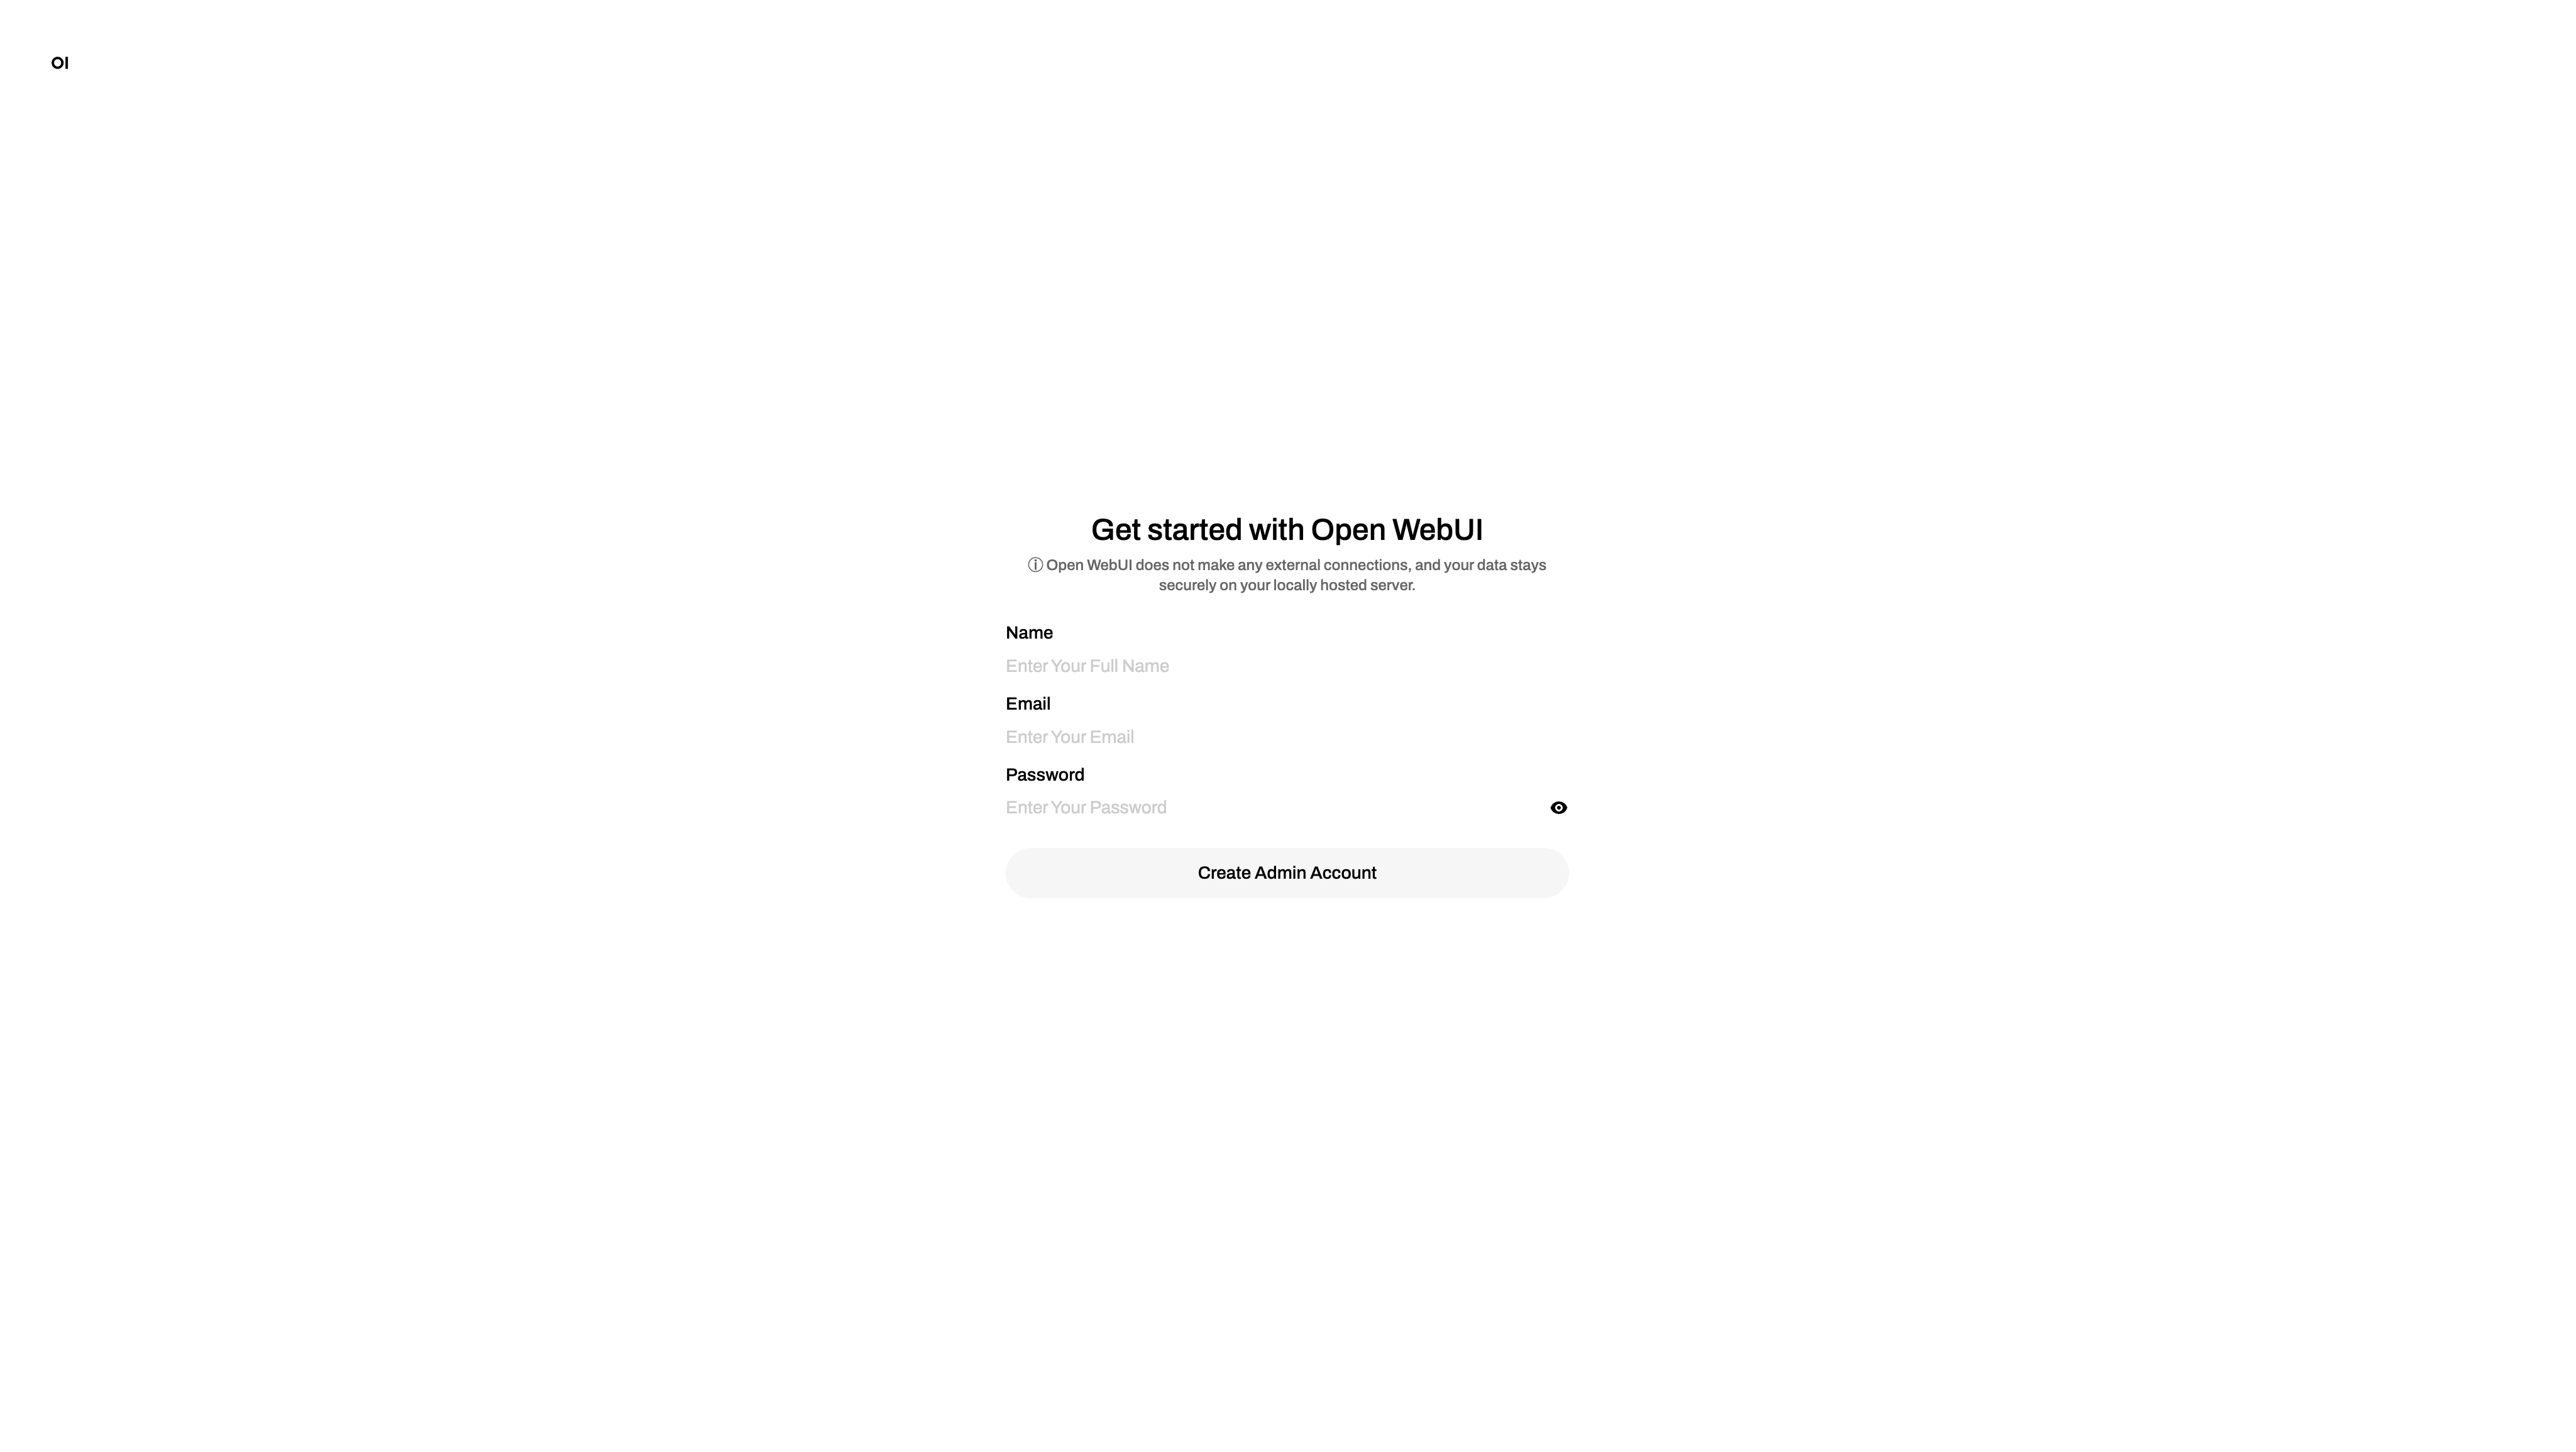
- Create a local account
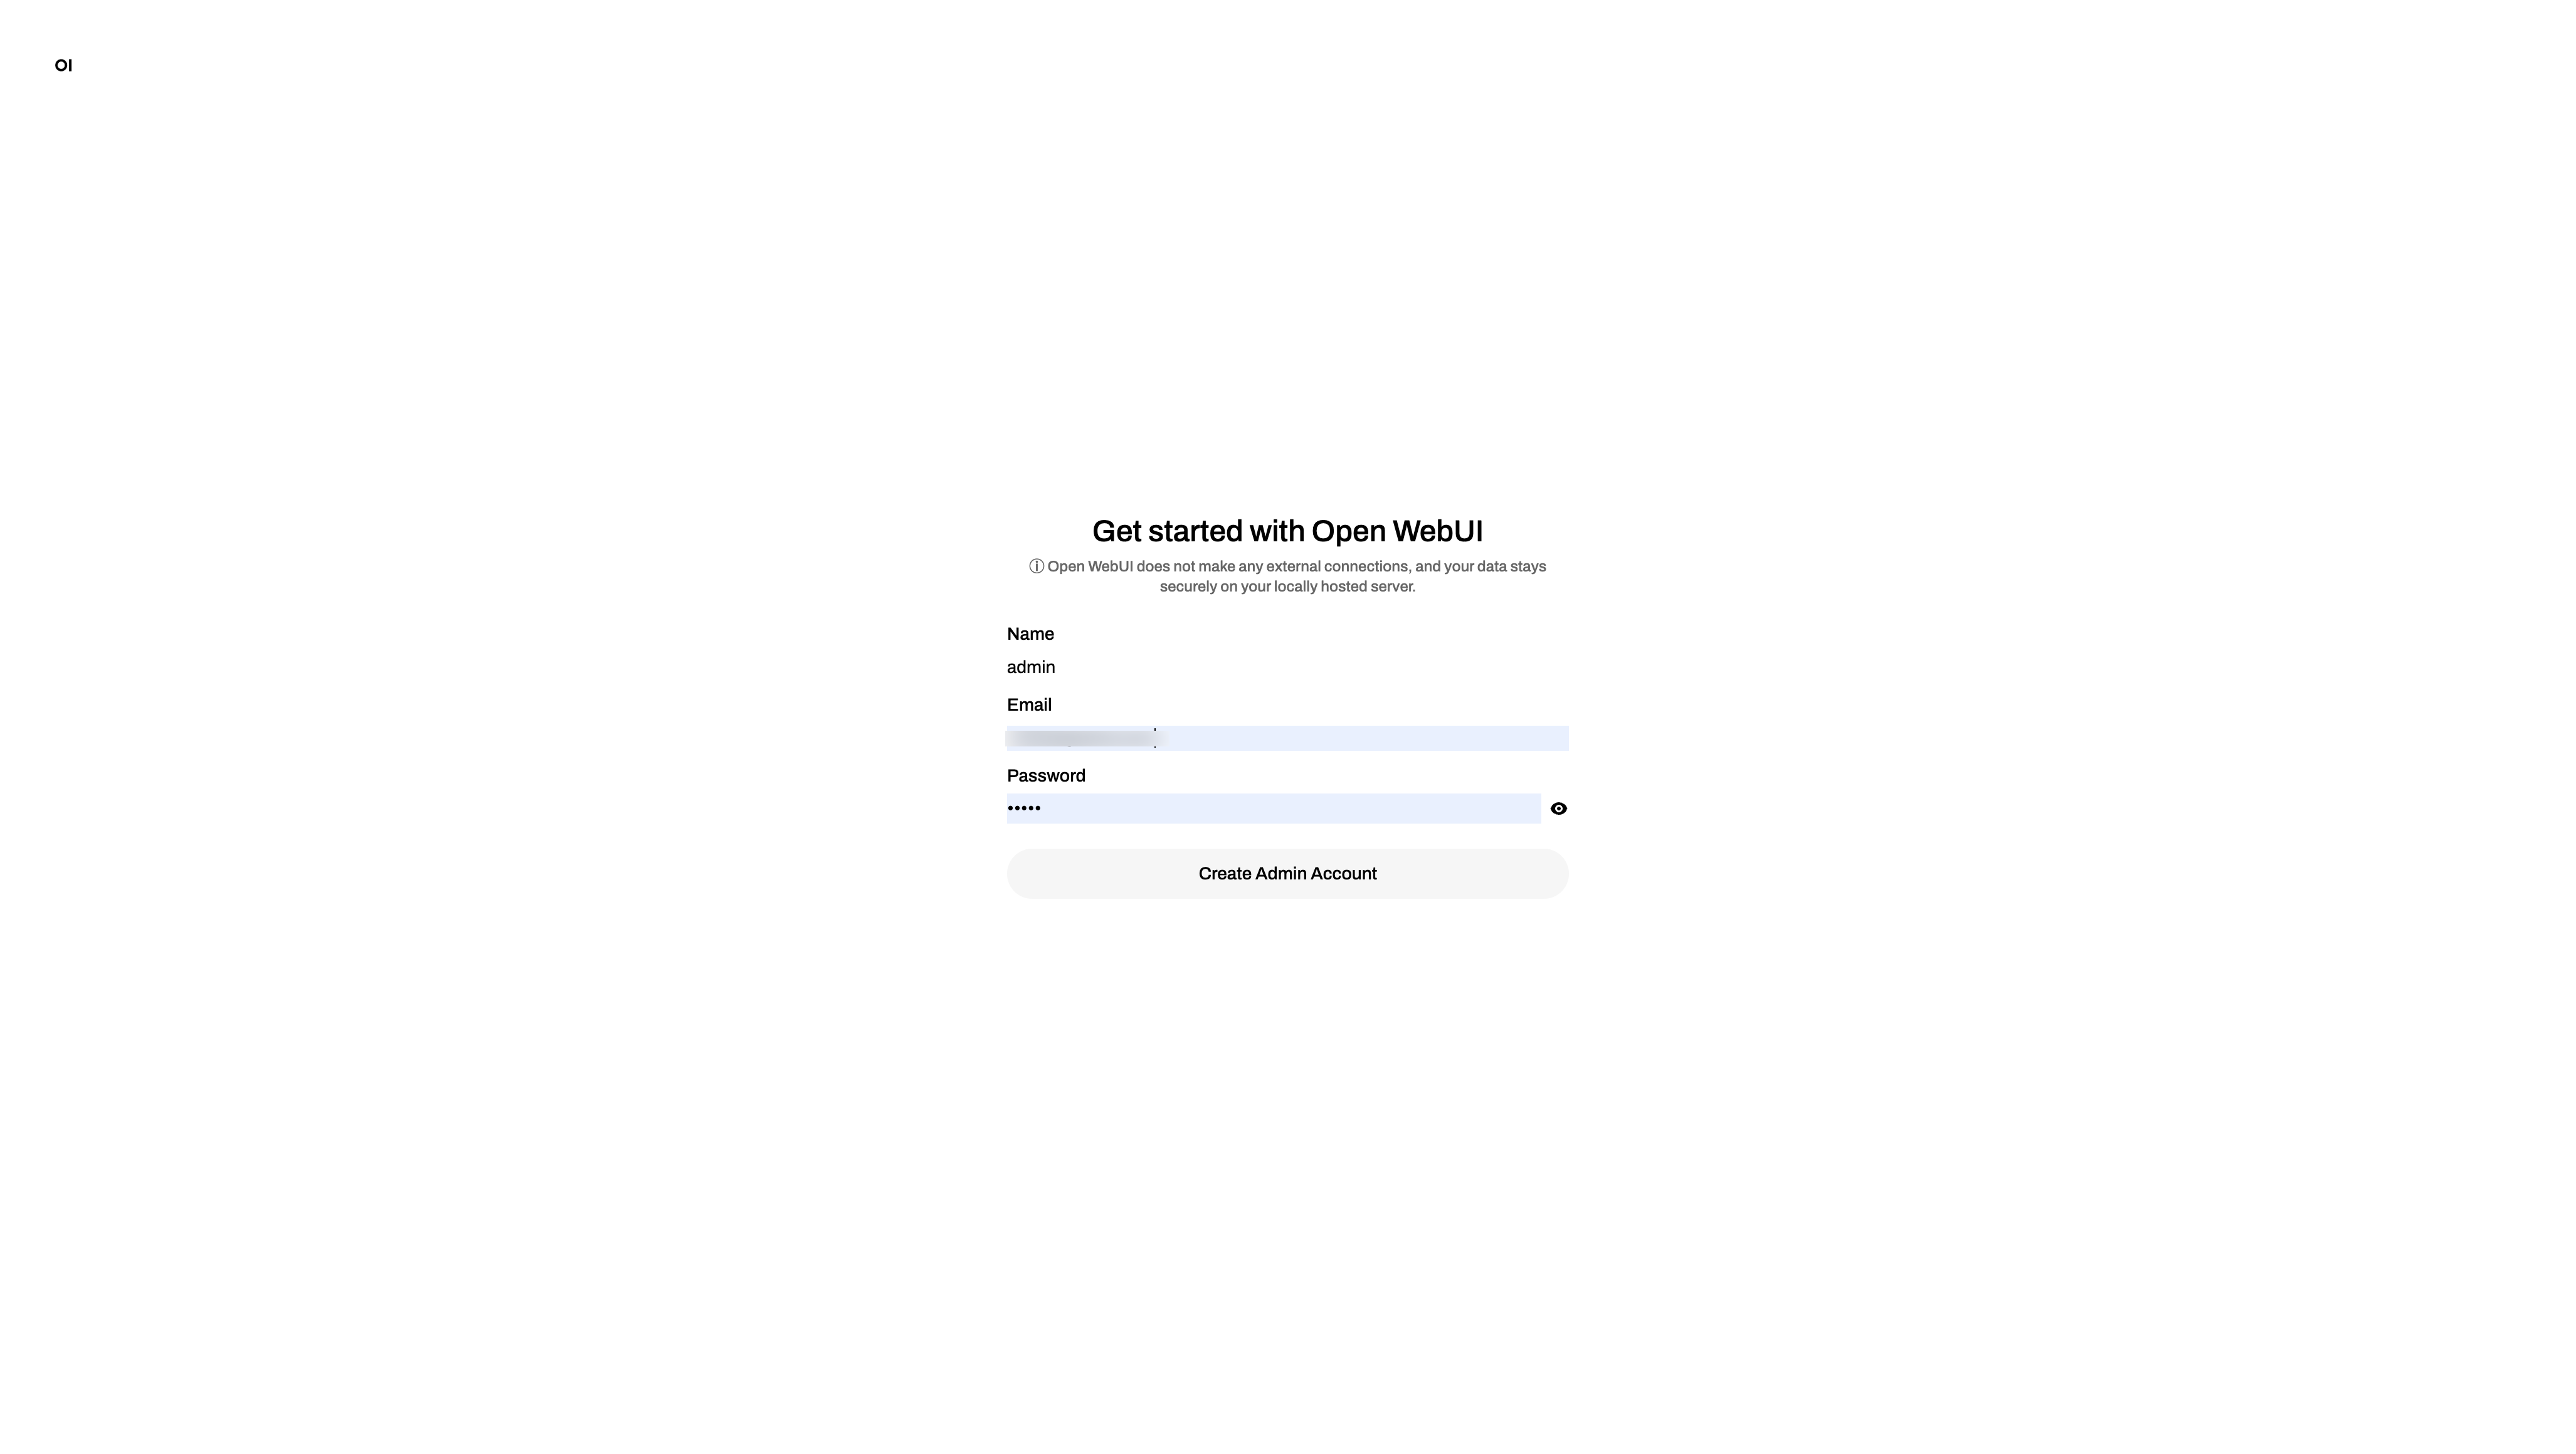
- On the first login, clear the notifications (after reading them of course 😉) and check that
llama3:latesthas been selected in the dropdown in the top left of the screen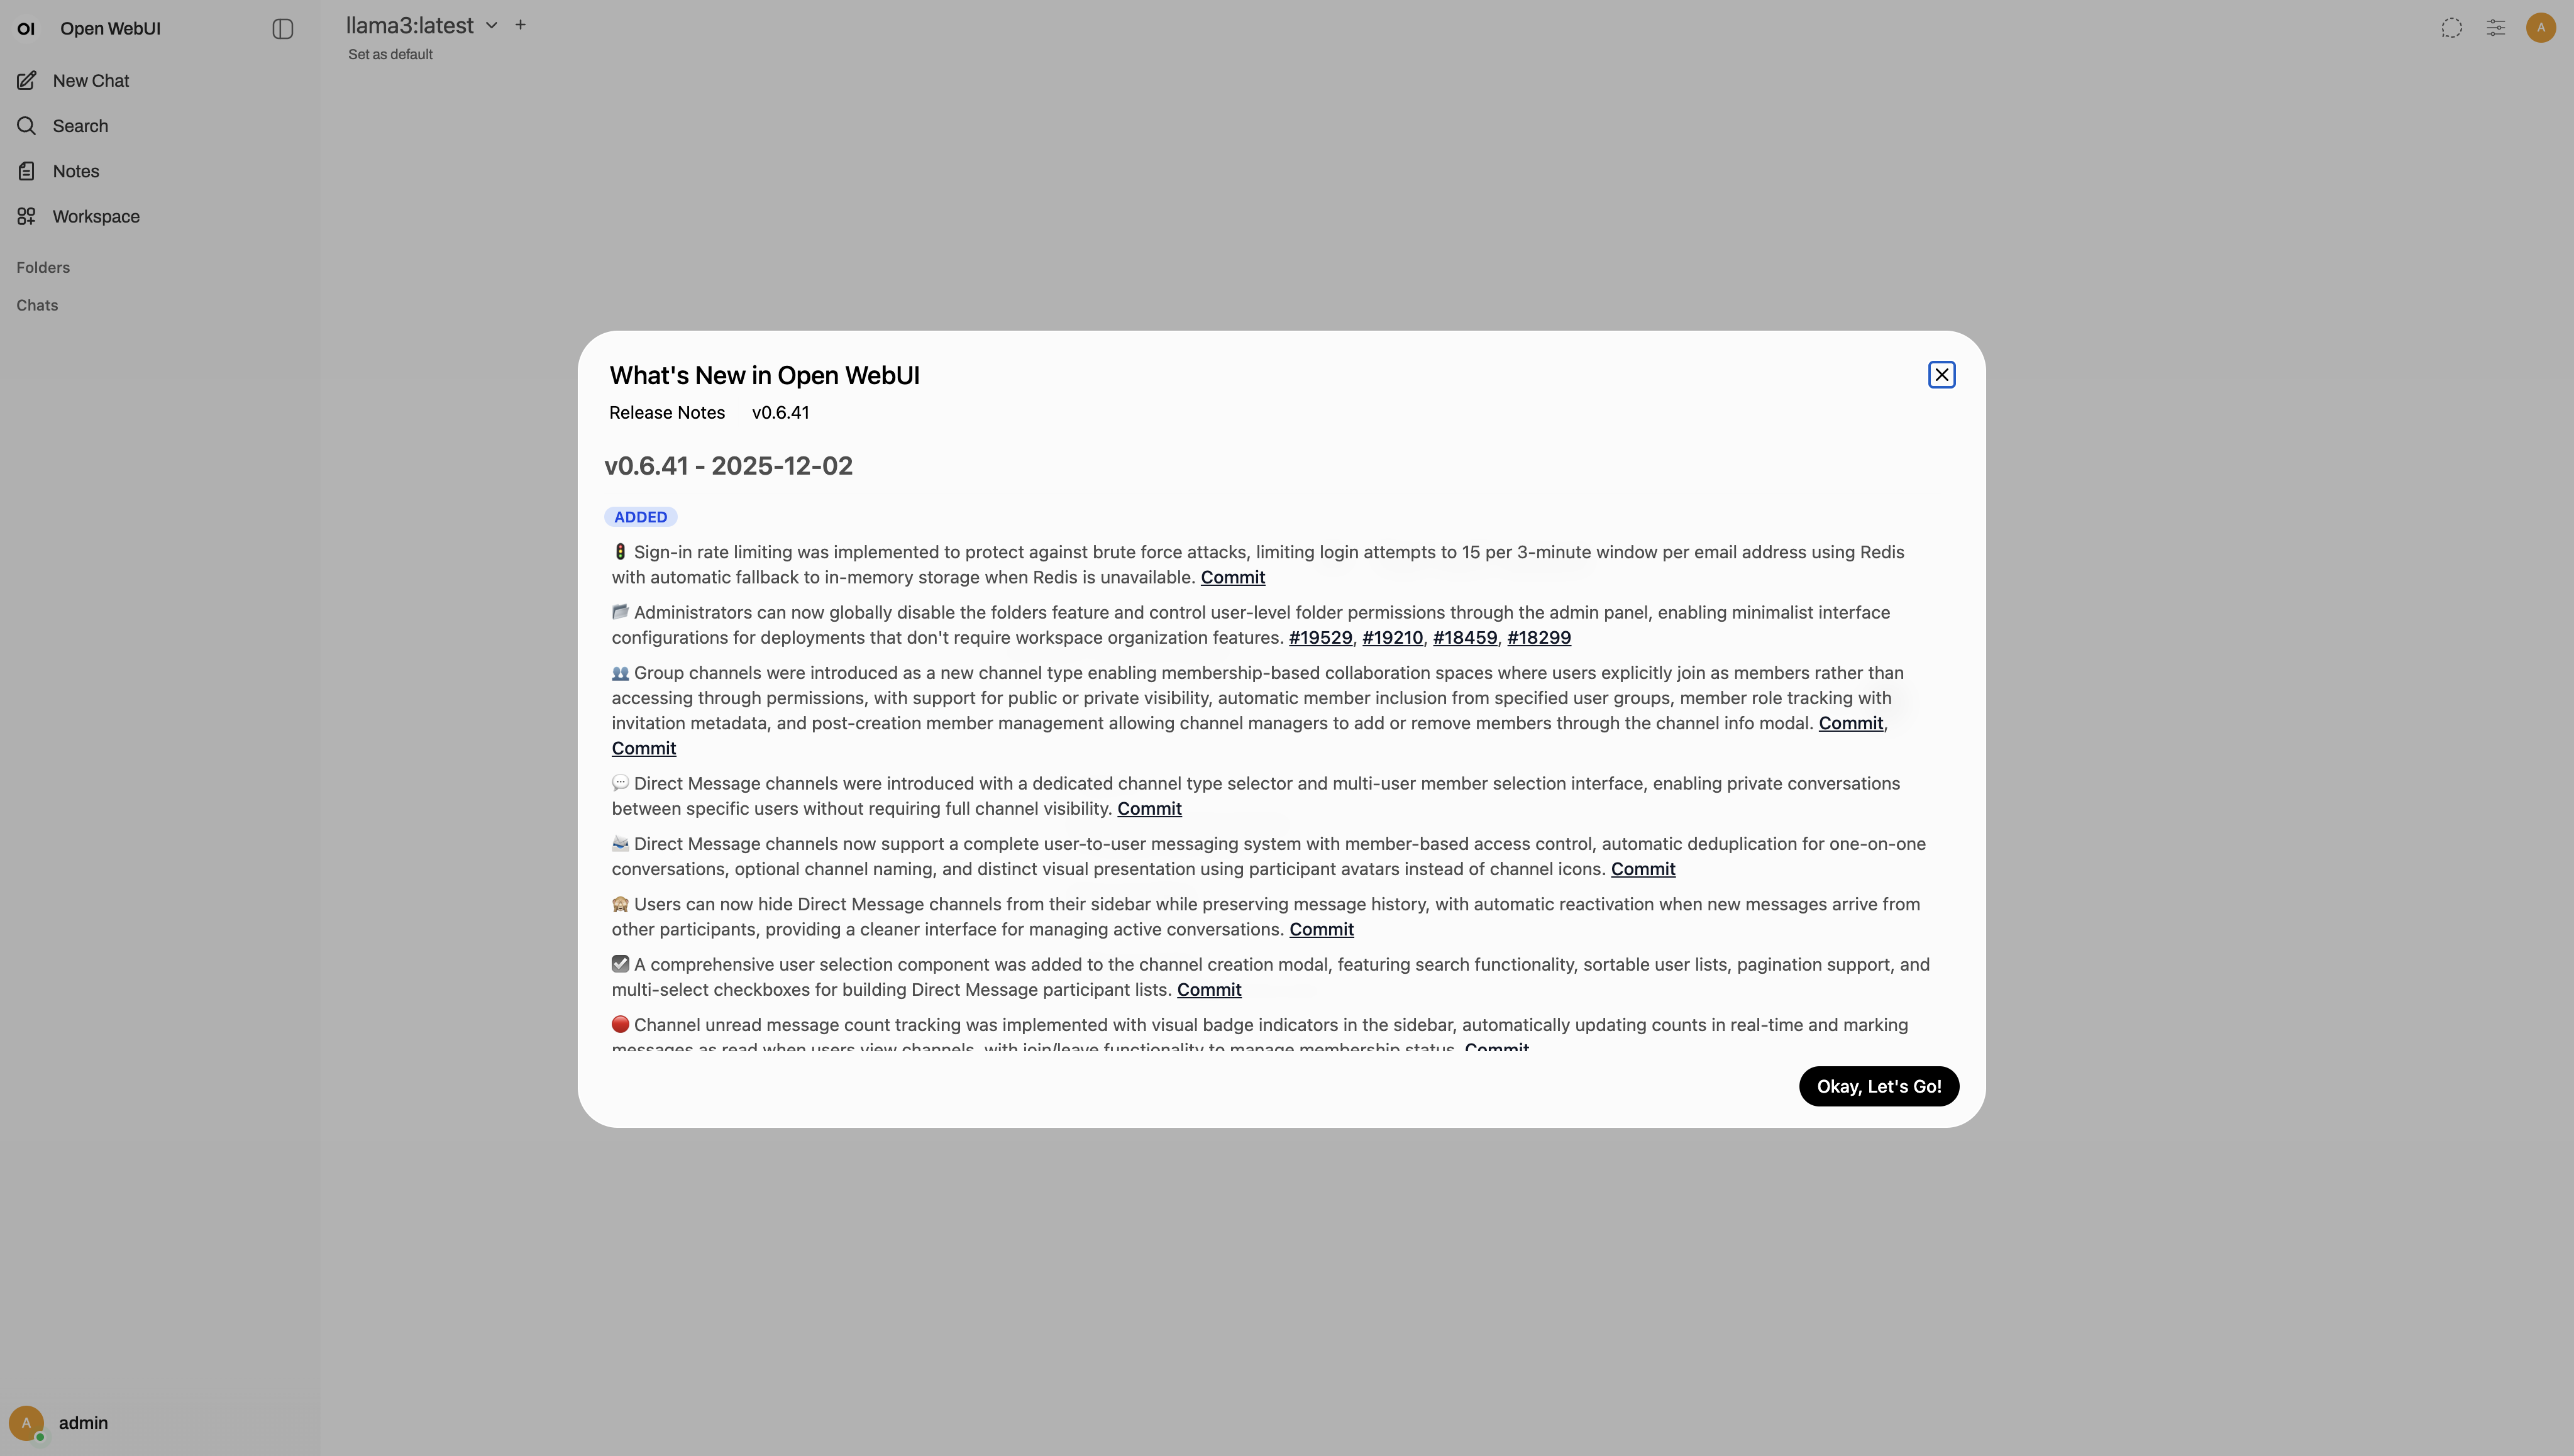
- Now try it out!
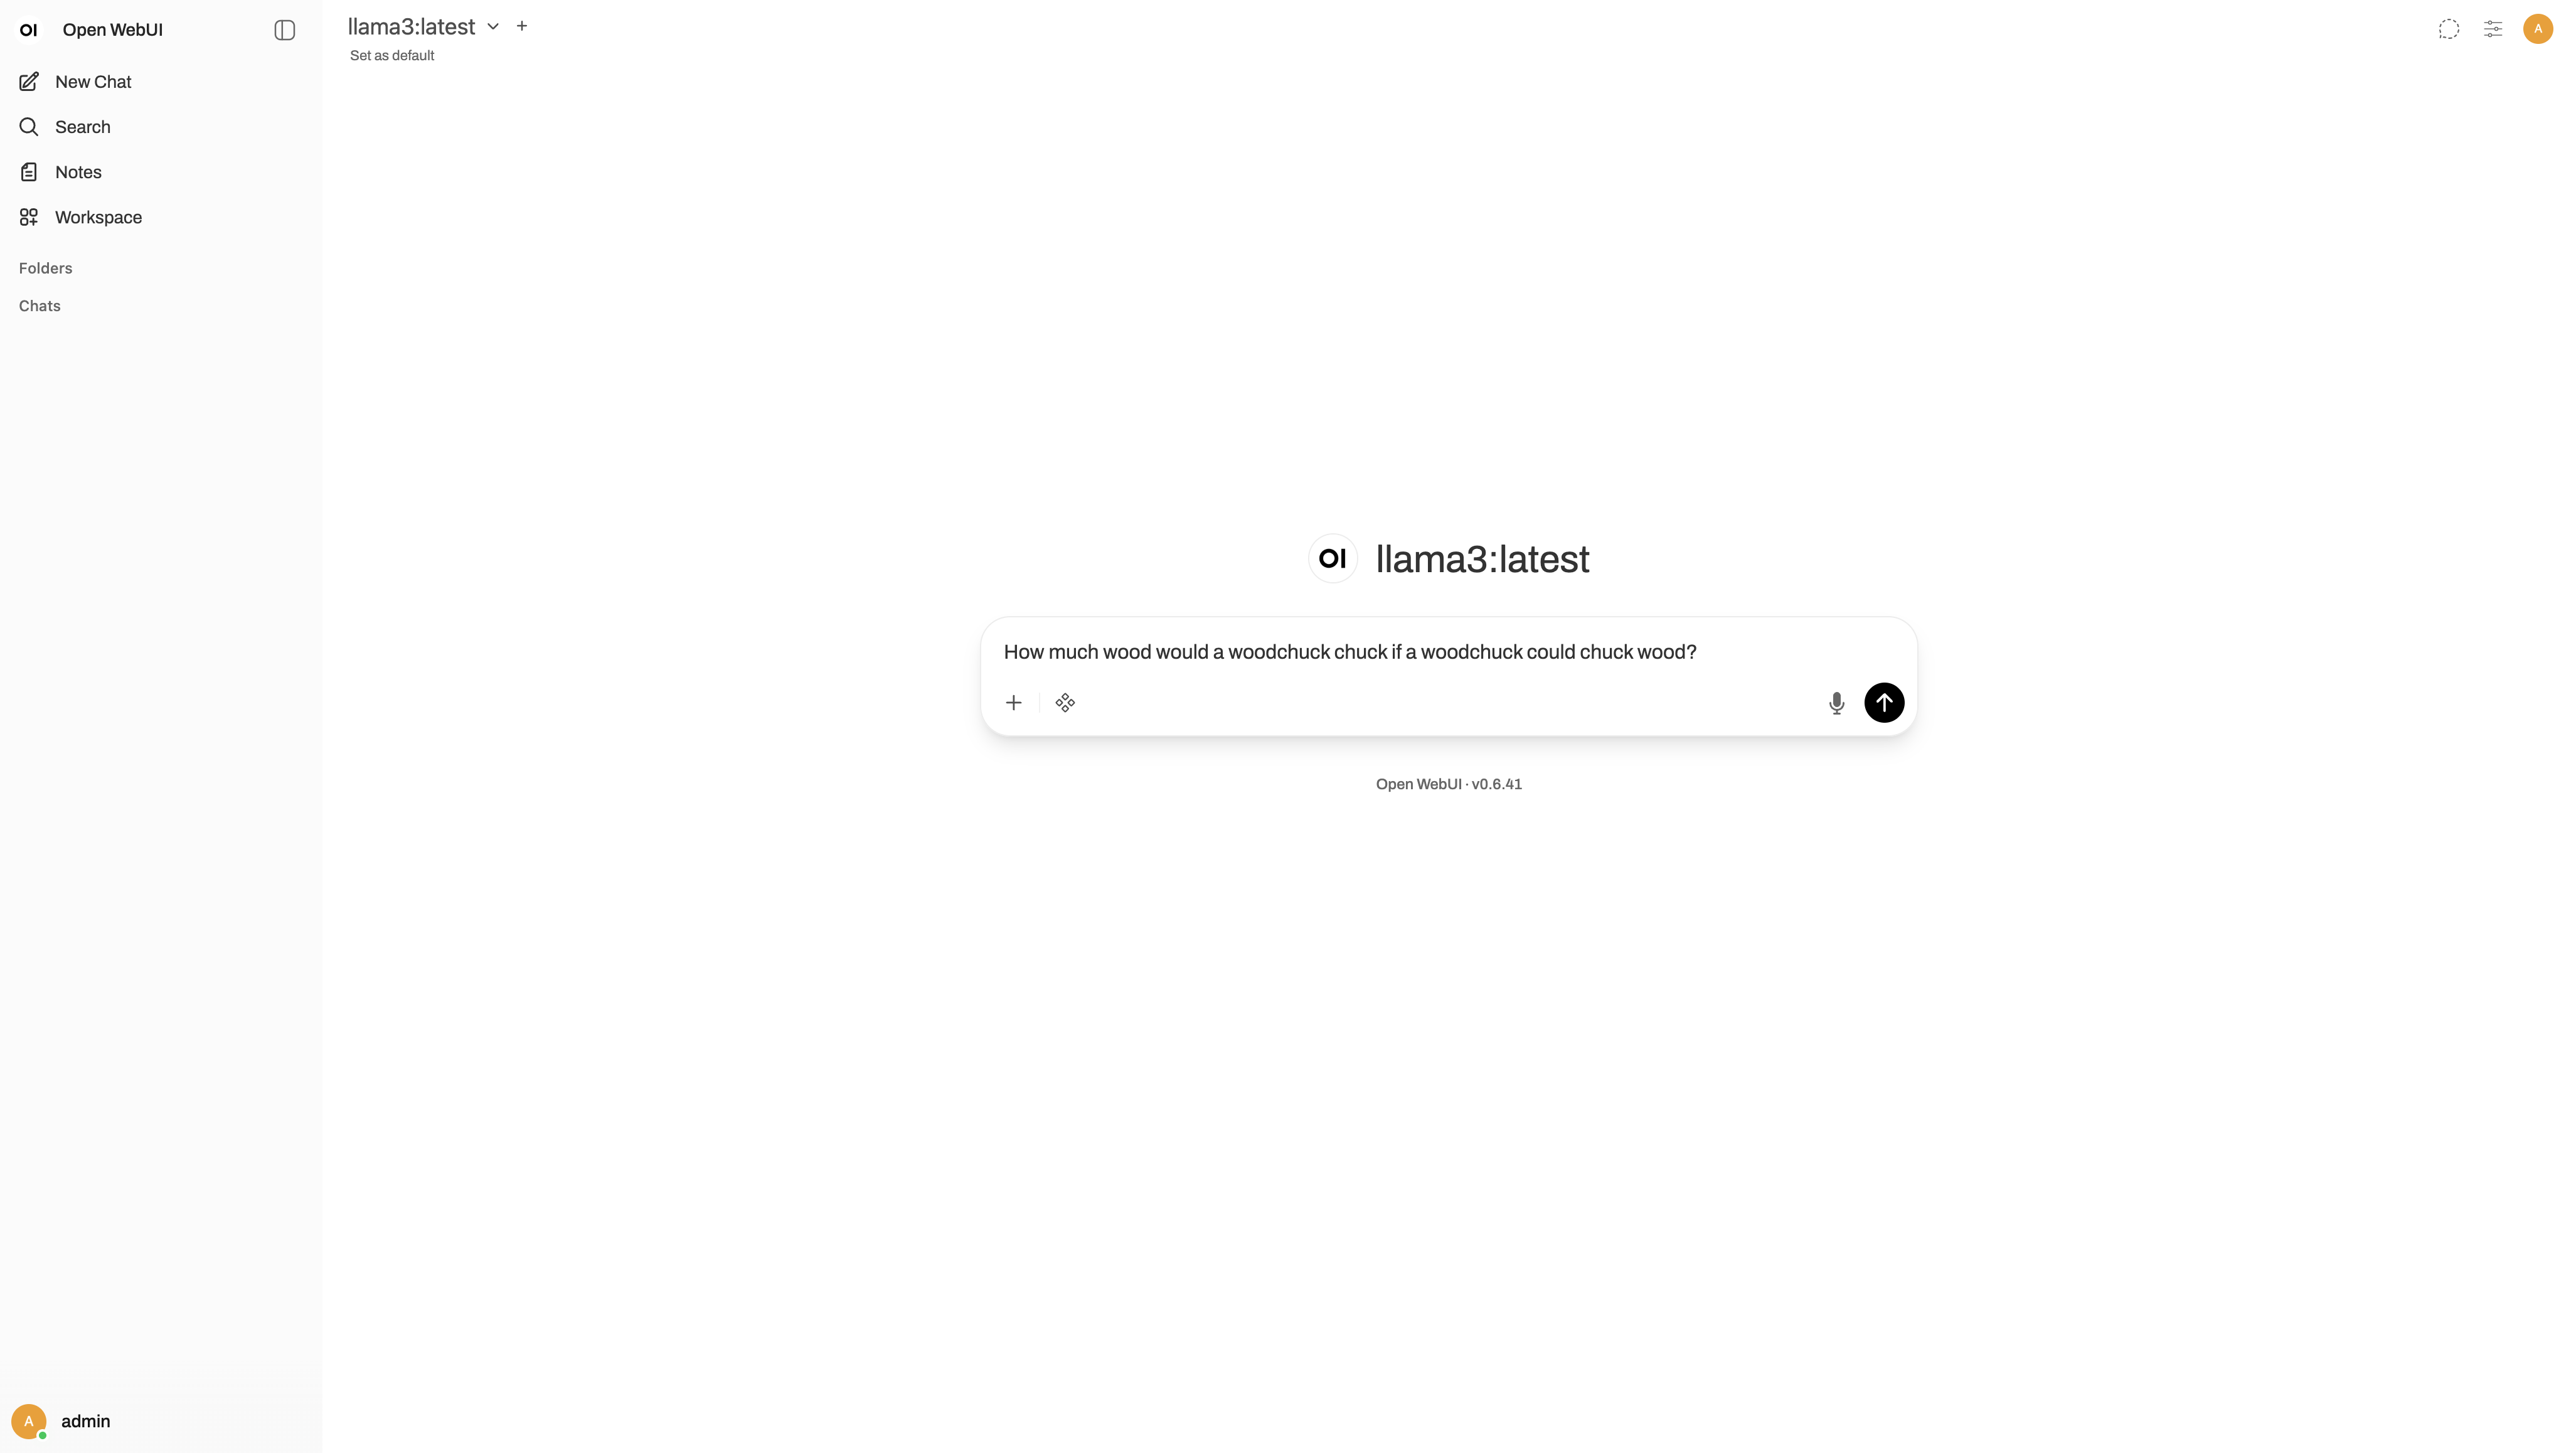
This allows you to:
- Ask arbitrary questions
- Experiment with prompts
- Understand how the LLM behaves outside of the game
Note: If you plan to use Ollama heavily, running it directly on your host machine (outside Docker) will usually give better performance. OpenWebUI is included here mainly for convenience and exploration.
OpenWebUI documentation: https://docs.openwebui.com/
Summary
- http://localhost:8085/ — Play the game
- http://localhost:8080/ — Observe and debug game workflows in Temporal
- http://localhost:3000/ — Experiment directly with your local LLM
Together, these components demonstrate how LLMs, orchestration engines, and real-world data can be combined into a structured, inspectable, and deliberately playful system.
Troubleshooting
Temporal UI doesn’t load
Check that Docker Desktop is running.
Restart the Temporal stack:
cd temporal
docker compose up -d
Confirm again at:
llama3:latest model not available
If downloading the model via the stack fails, you can try pulling it manually with Ollama (if you have Ollama installed locally):
ollama pull llama3:latest
Then restart the app containers:
cd the-hallucinated-truth
docker compose up -d
.env not being picked up
Ensure that:
.envexists in the root of
the-hallucinated-truth(the same directory asdocker-compose.yml).Make sure you ran:
docker compose up -dfrom inside the
the-hallucinated-truthdirectory.
Ports already in use
If 8080 or 8085 are already in use:
Stop the conflicting service, or
Update the
docker-compose.ymlfile to map the services to different host ports, then restart:docker compose down docker compose up -d